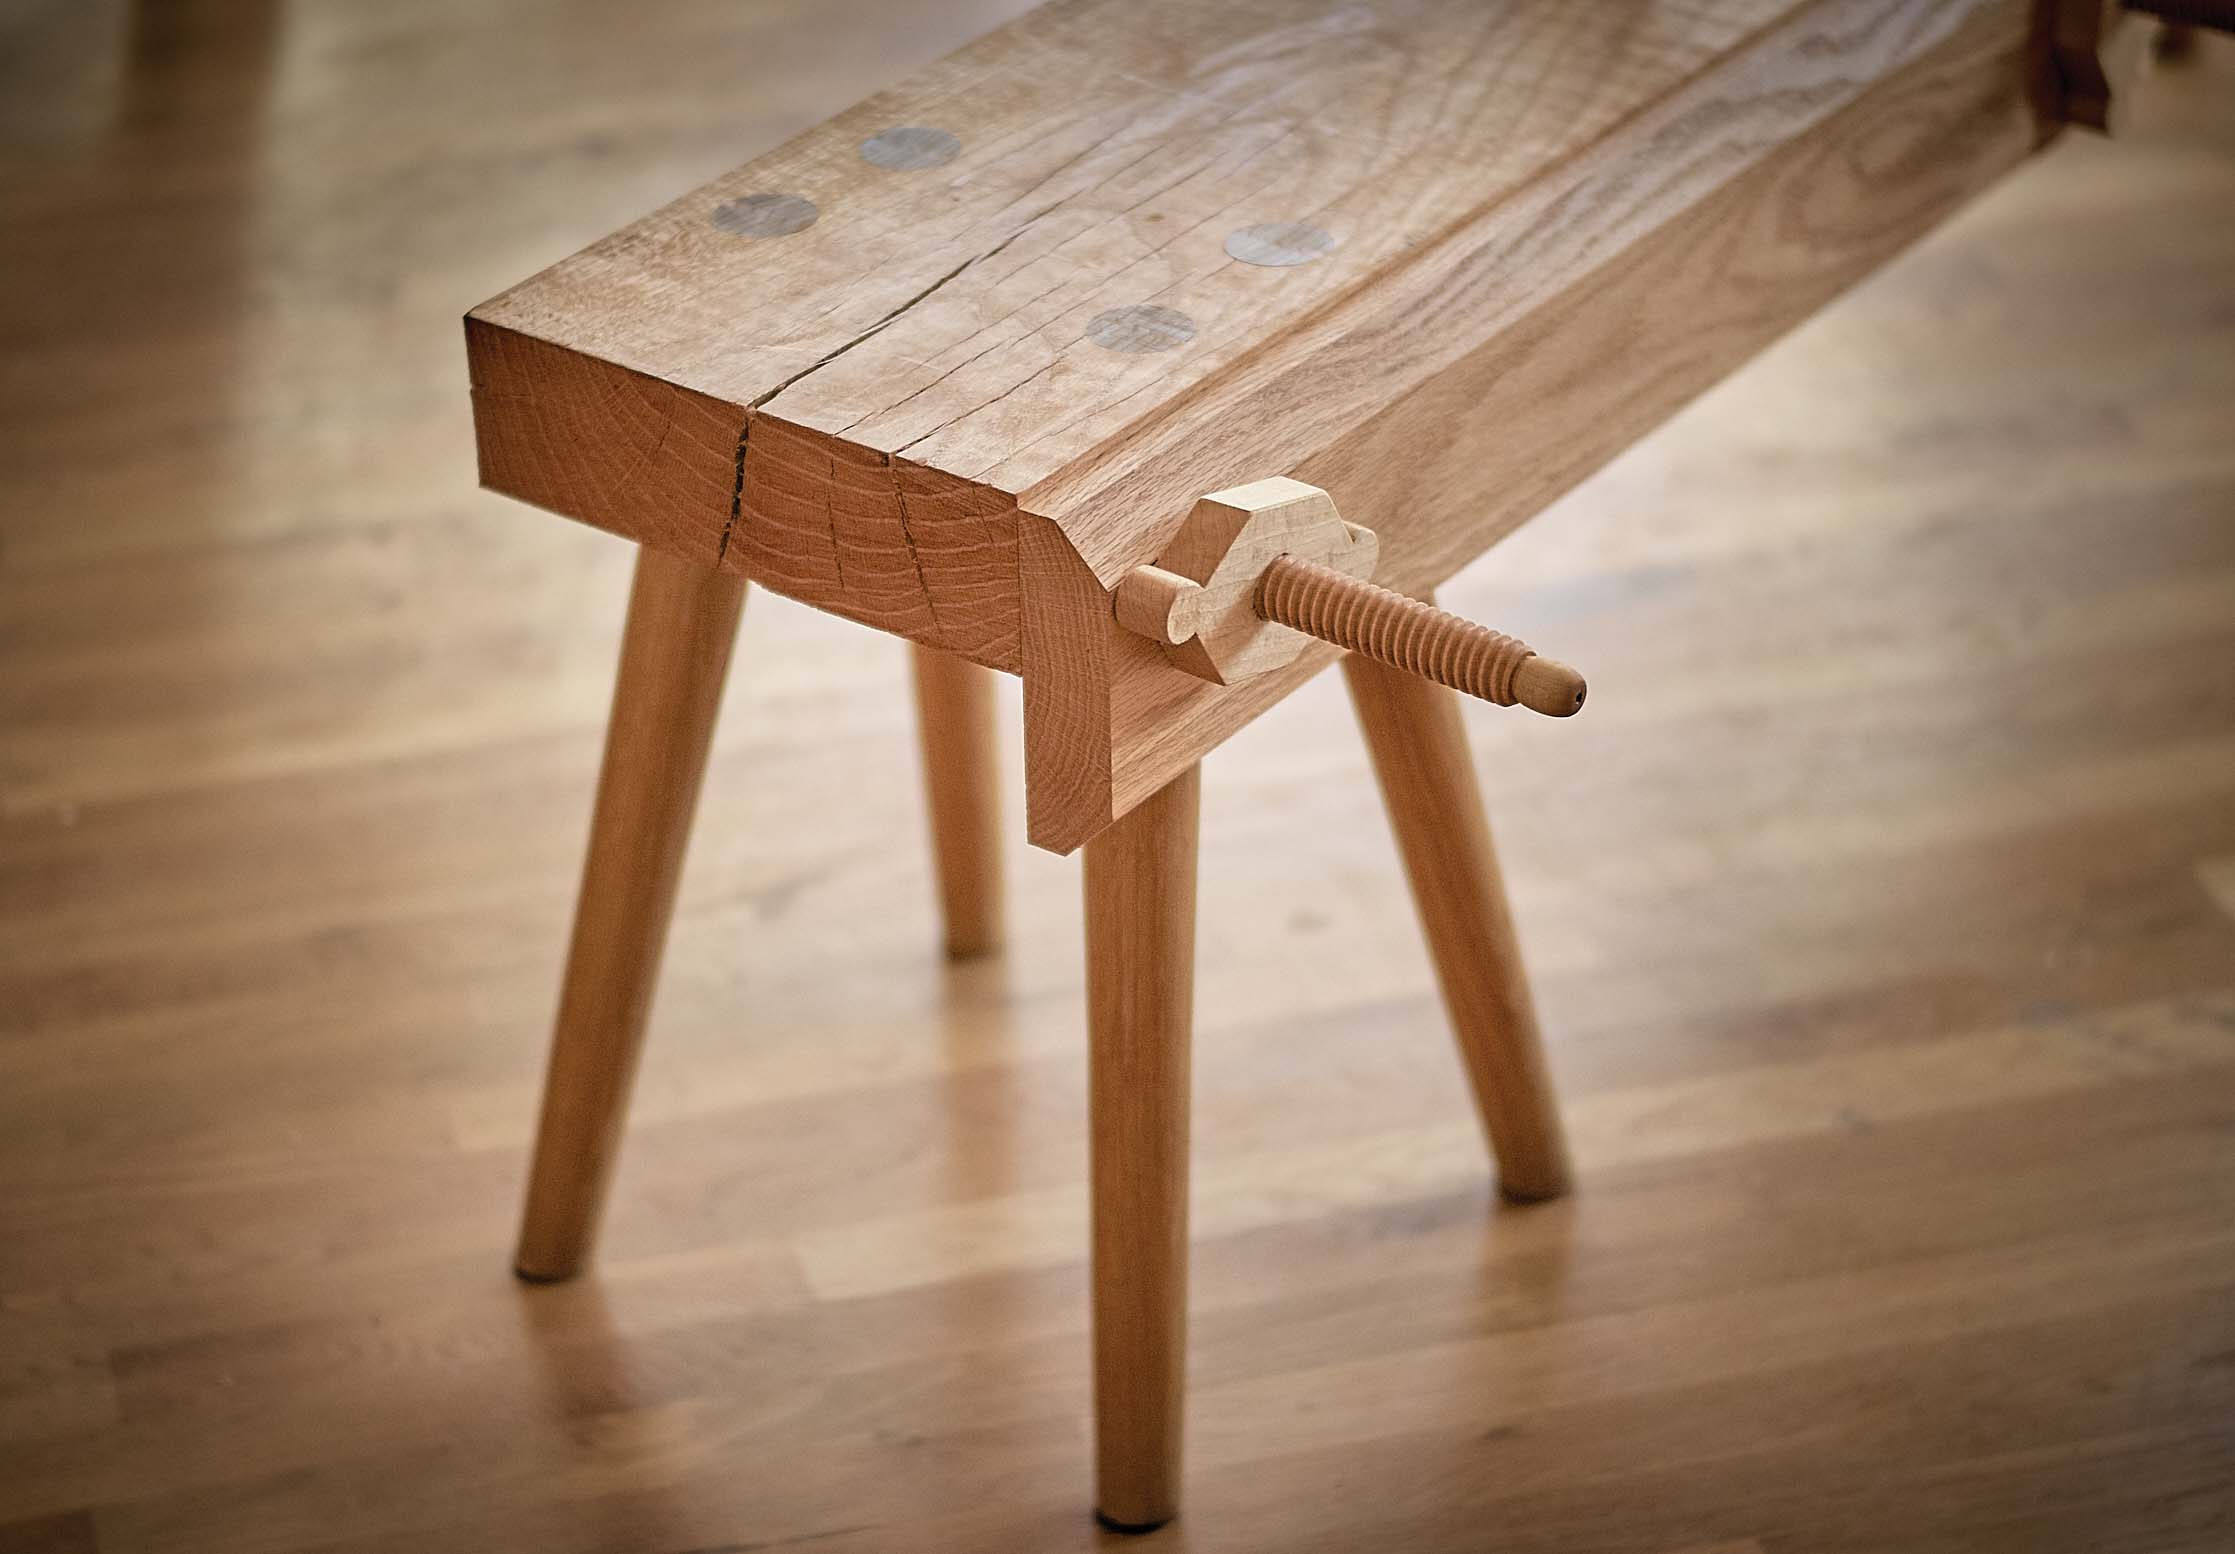
Roll your own. Simple screw vises such as this one are quick and easy to make with a threadbox and scraps. You can make as many as you like and as large as you like – even the entire length of the workbench. Photo by Narayan Nayar.
While screw vises were known in Roman times (there is an extant example of one used for jewelry making at Augusta Raurica), they don’t start showing up on woodworking benches until much later. The earliest image I know of is from northern Italy in the early 14th century and shows workers constructing Noah’s ark.
While these vises appear similar to modern vises, there are significant differences. On these early vises, the screw does not move. Instead, there is a movable nut that presses the chop against the work.
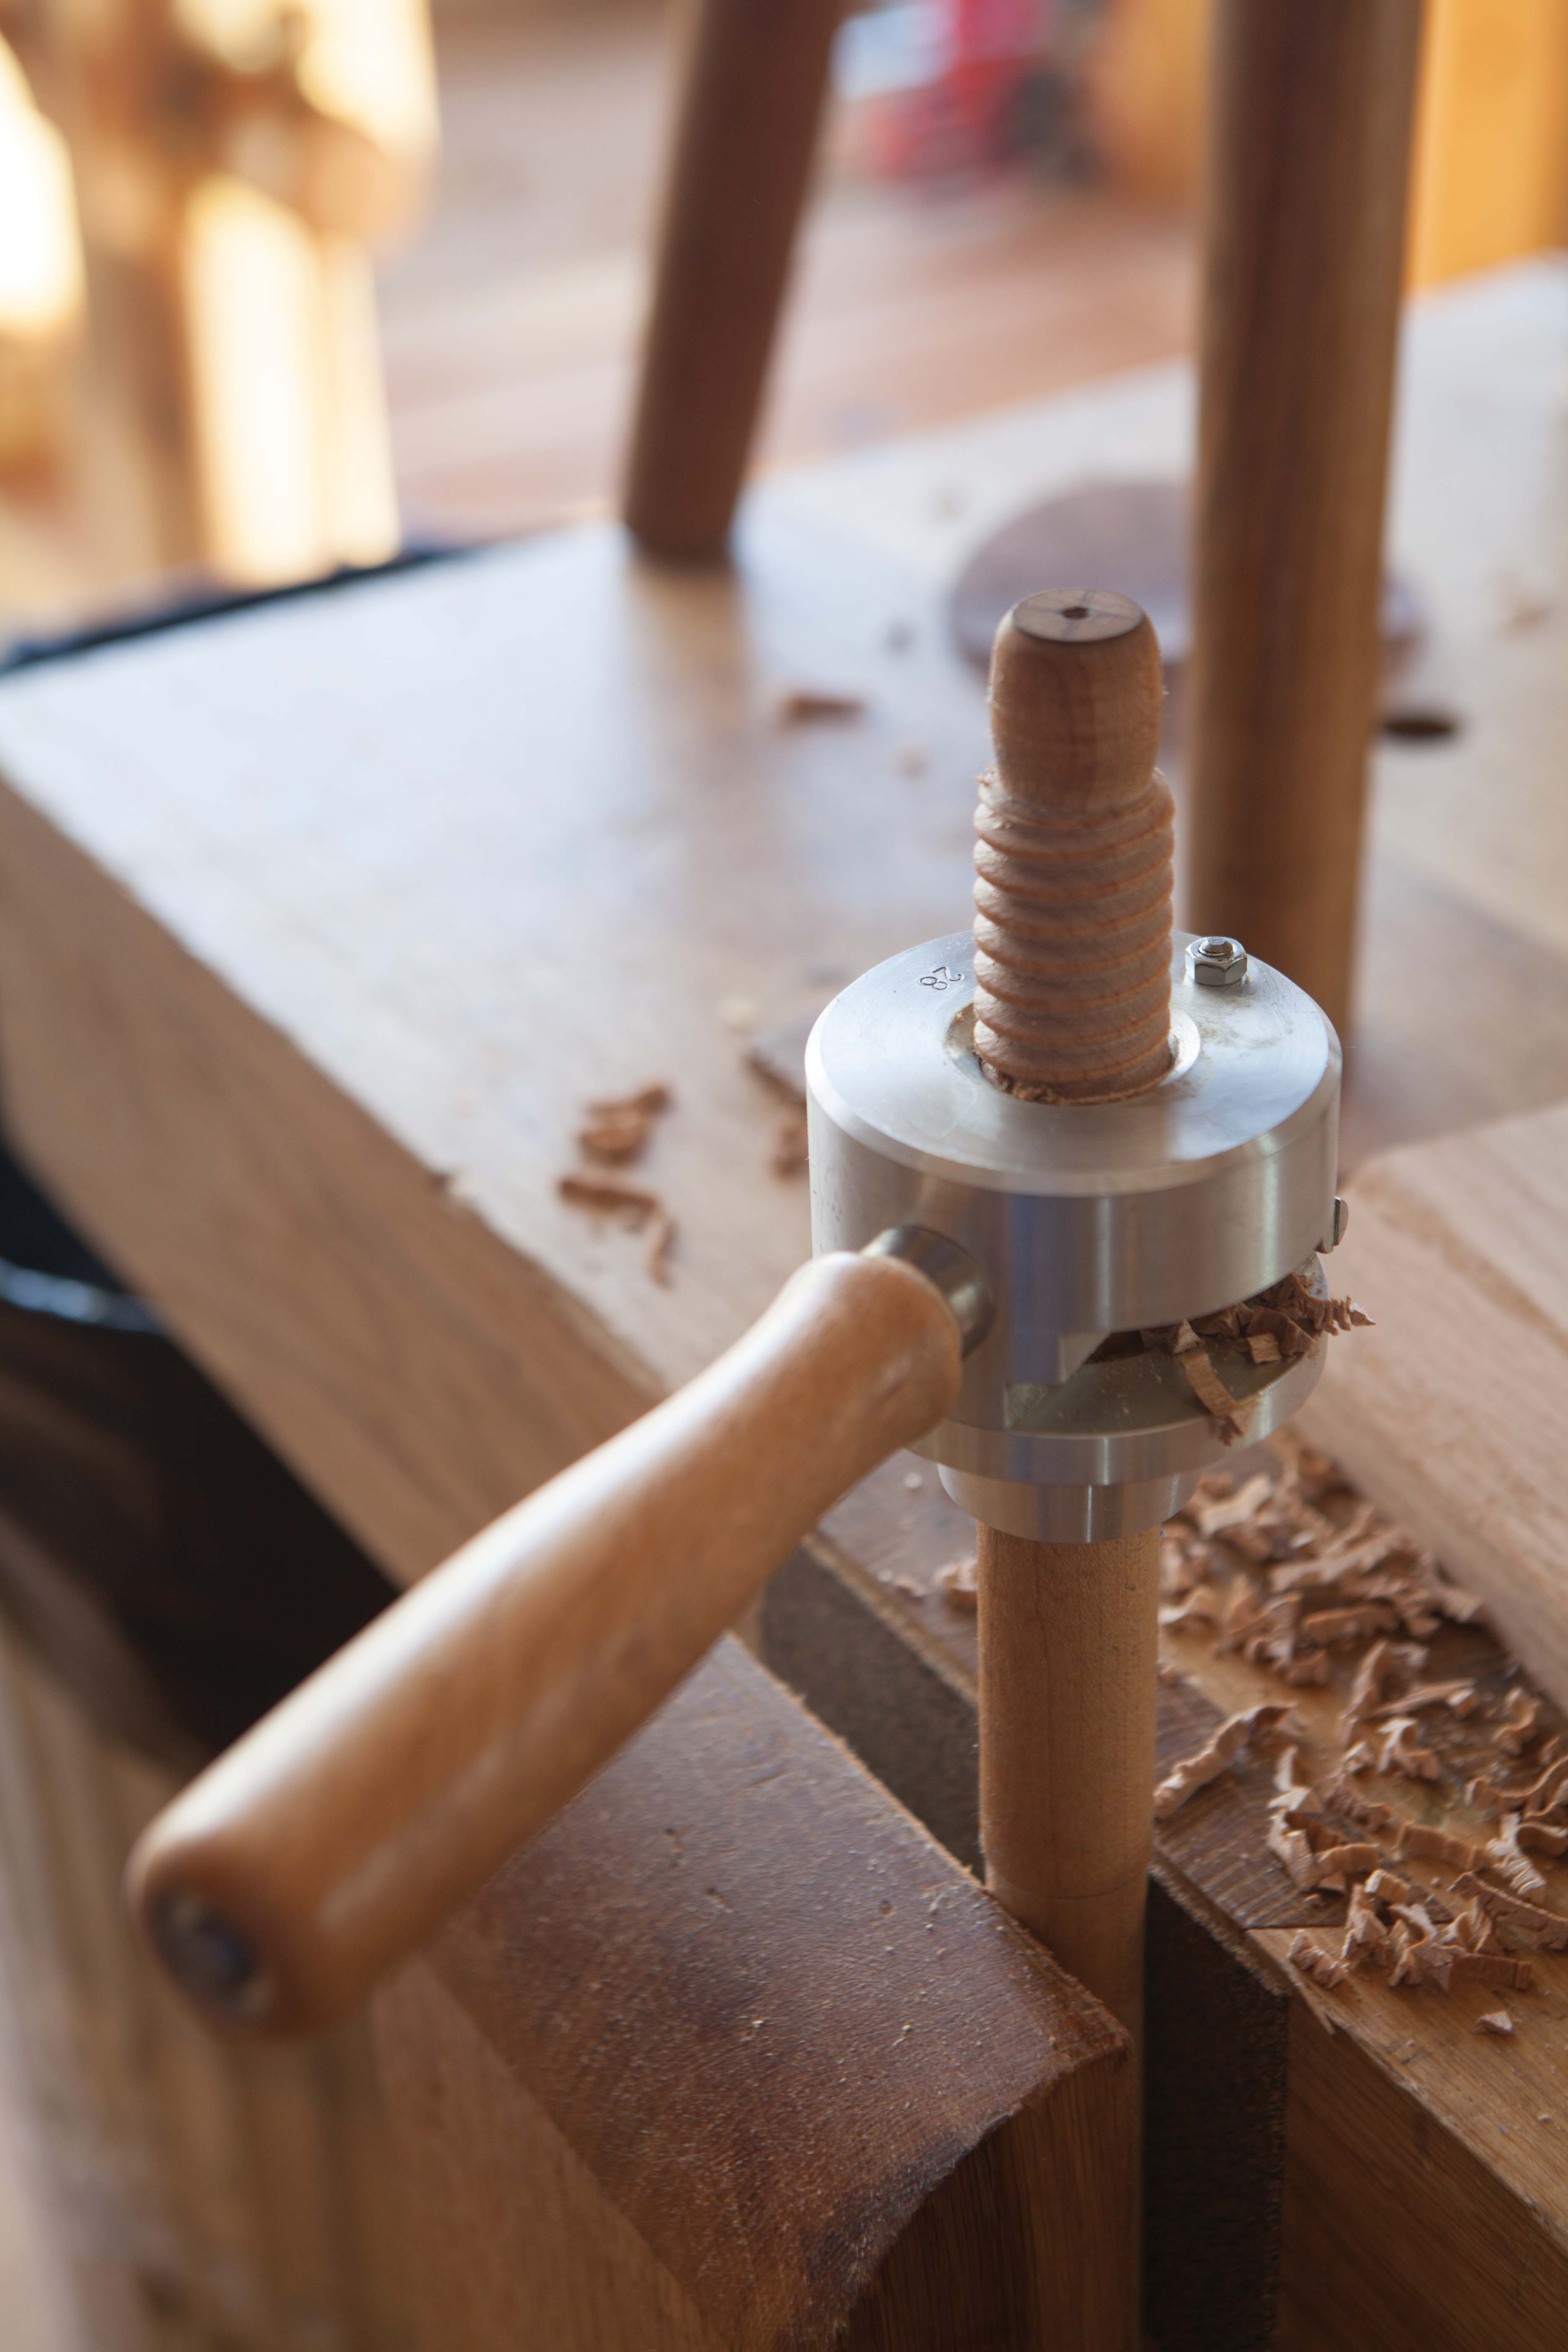
One slick tool. Lubricate the cutter with a little tallow or wax with each use. Some people soak the screws overnight in linseed oil. This is supposed to result in crisper threads. It’s not entirely necessary with a sharp cutter and a little lubricant.
These older screw vises are easier to make than a modern vise and can be installed directly into the benchtop without much effort. To make these vises, you’ll need a threadbox and a matching tap. These once-common tools are available used, and it’s worth searching out a functioning set because with them you can make all manner of vises and clamps. I also use these tools to make threaded parts for furniture pieces to allow them to be knocked down flat.
Note that the German threading kit shown in the photos cuts a 1-1/8″-diameter (28mm) thread, which is a good size for general workshop use. The 1″ version would also work fine and allow you to use a store-bought 1″-diameter dowel to make the screws. You can make the vise’s jaw any size you desire, including the entire length of the benchtop. Because I don’t build boats or fear the Great Flood, I made the jaw of my vise (sometimes called a “chop”) 1-3/4″ x 6″ x 36″.
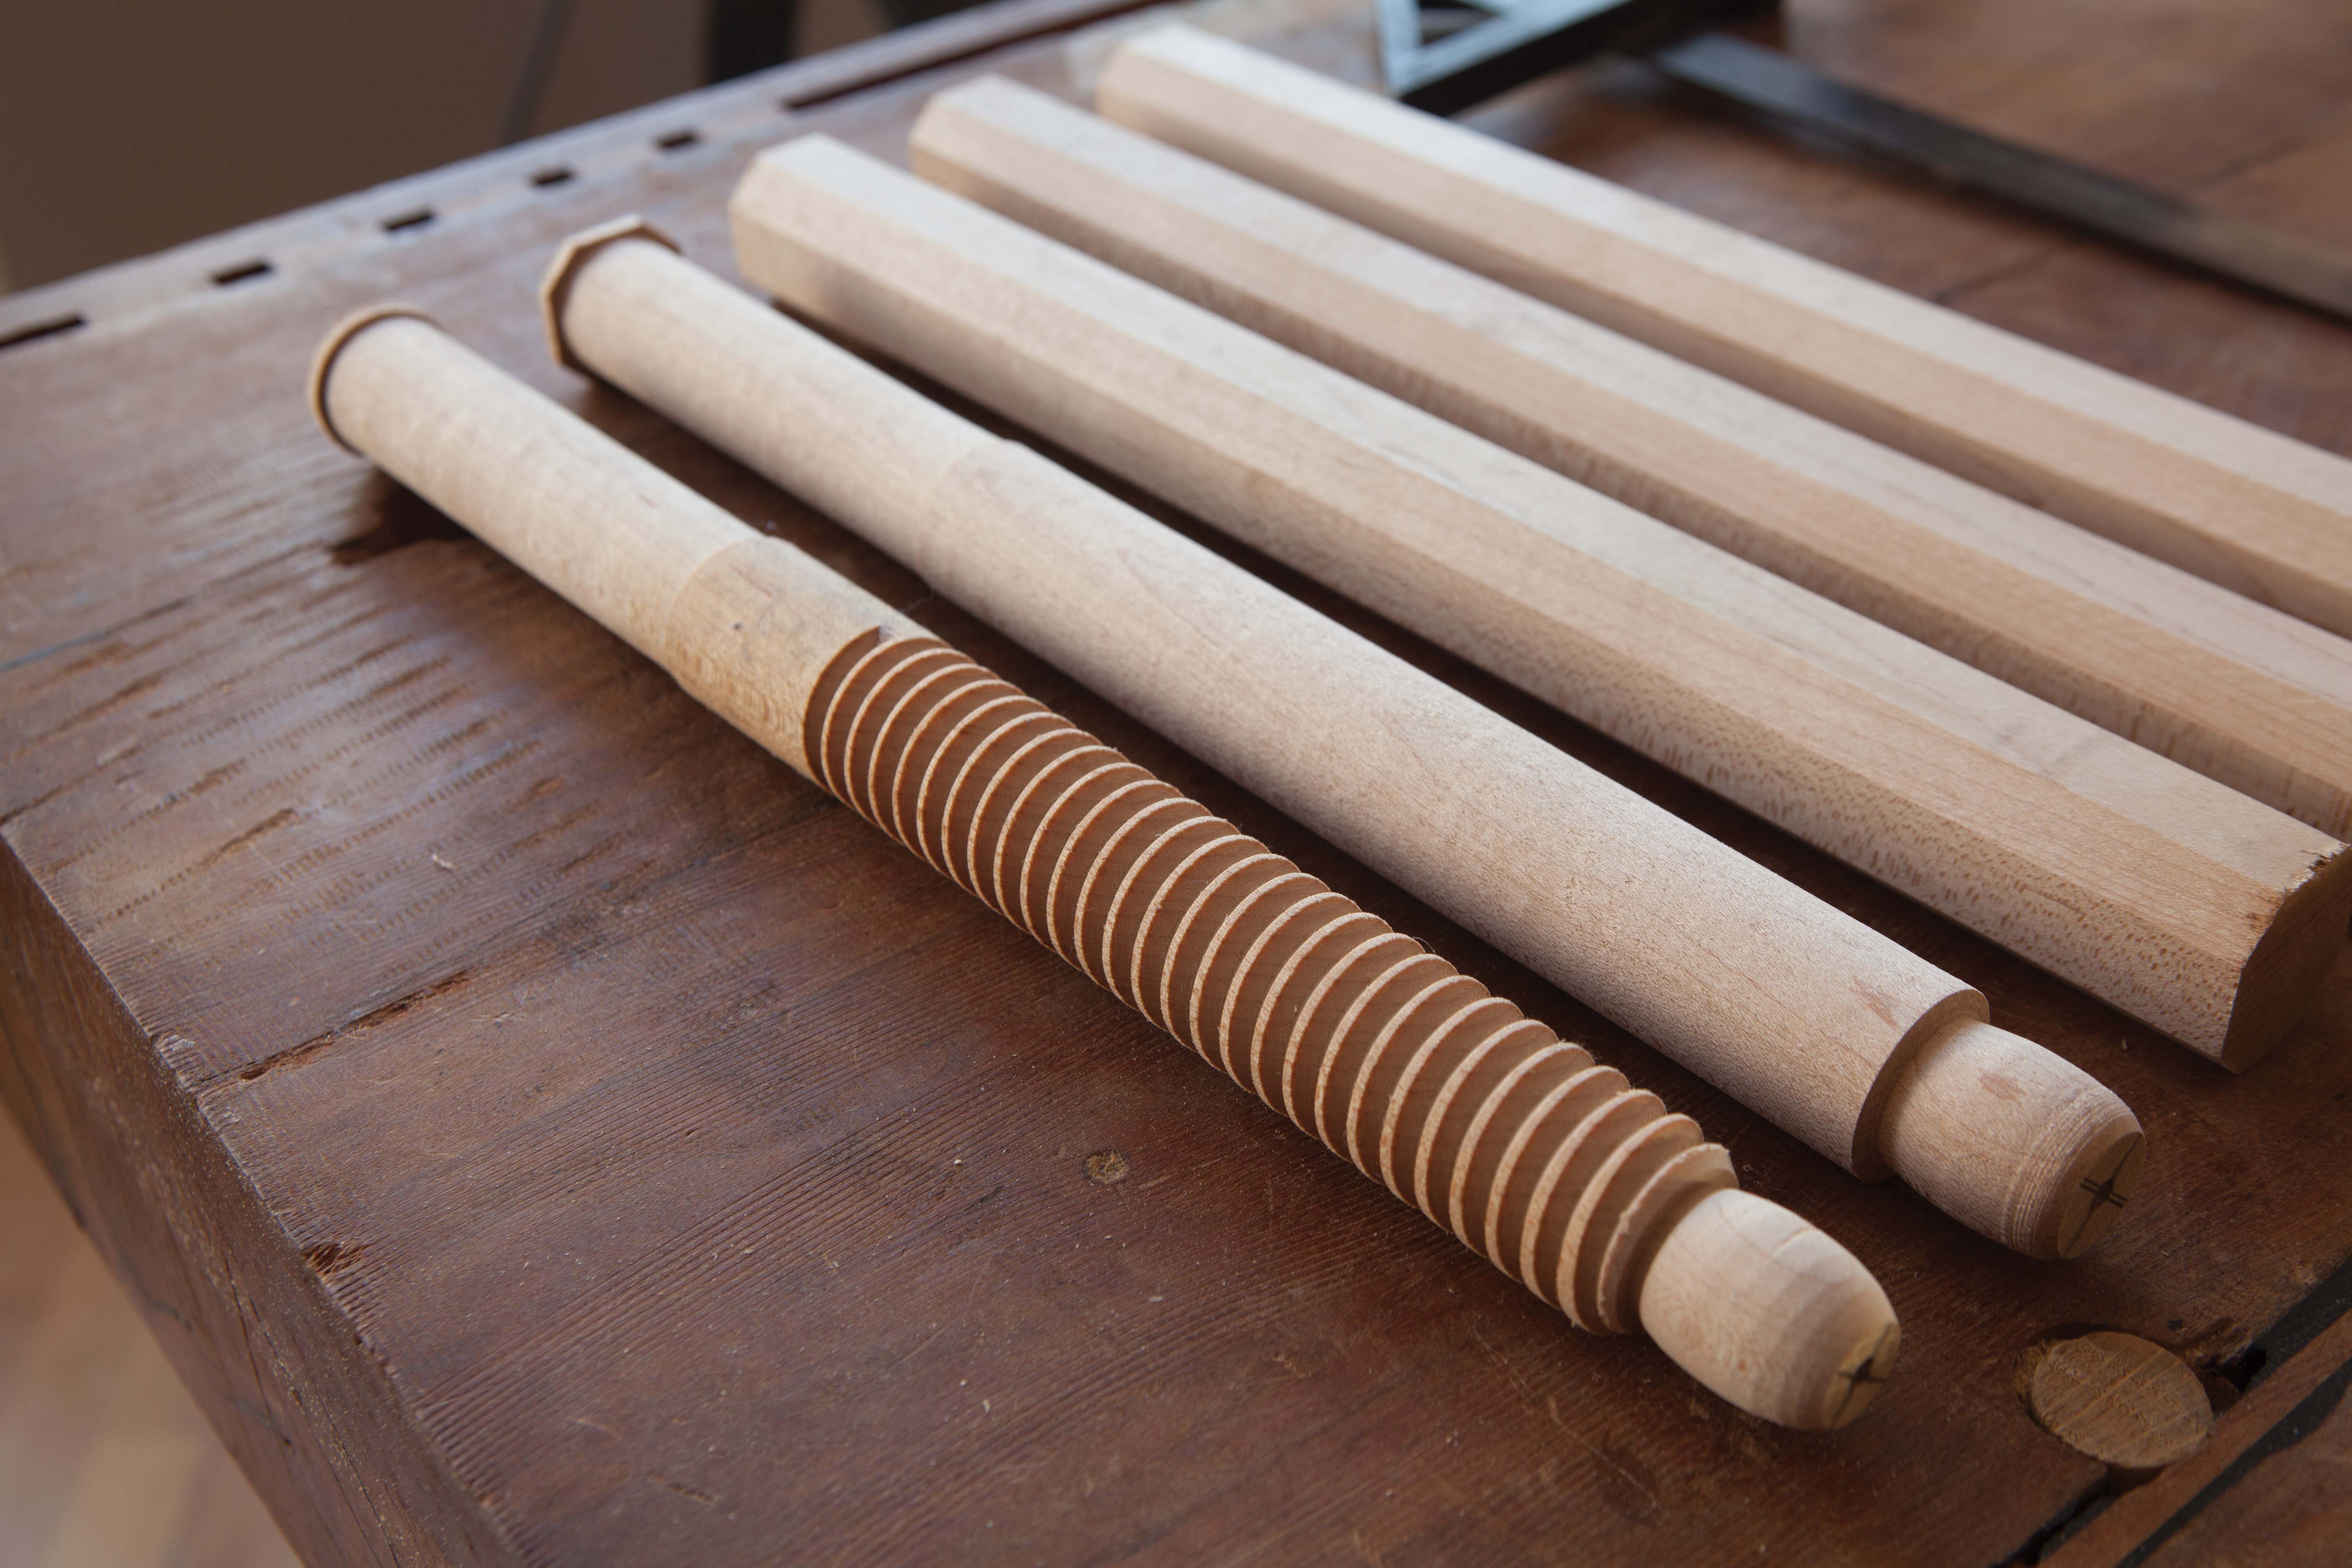
The finished screw. The last 4″ of the stick is 1″ in diameter. The remainder is 1.10″ in diameter and threaded.
Begin by making the screws. Mine are hard maple, 1.10″ in diameter (which works with the 28mm threading tool) and 12″ long. Turn down 4″ of the length to 1″. This 1″-diameter section will be glued into the benchtop. Thread the remainder of the stick.
Now lay out the location of the through-holes for the screws on the chop. My holes are 30″ apart on centers and located 2″ down from the top edge of the chop. Bore 1-3/8″ holes through the chop at both locations. The oversized holes will allow your chop to pivot and clamp tapered workpieces.
Go for tight. Ideally, the screws should have to be driven into the bench with mallet taps. Go for a tight fit. The glue should be superfluous.
Show the chop to the front edge of the benchtop and use your 1-3/8″ bit to punch centerpoints on the front edge. Drill 1″ holes that are 4-1/4″ deep into the benchtop. Glue the screws into their holes.
Full-size nuts. I tried drawing the nuts and explaining them with geometry. The original, quickly sketched nuts looked better. So here is one of them, shown at full-size.
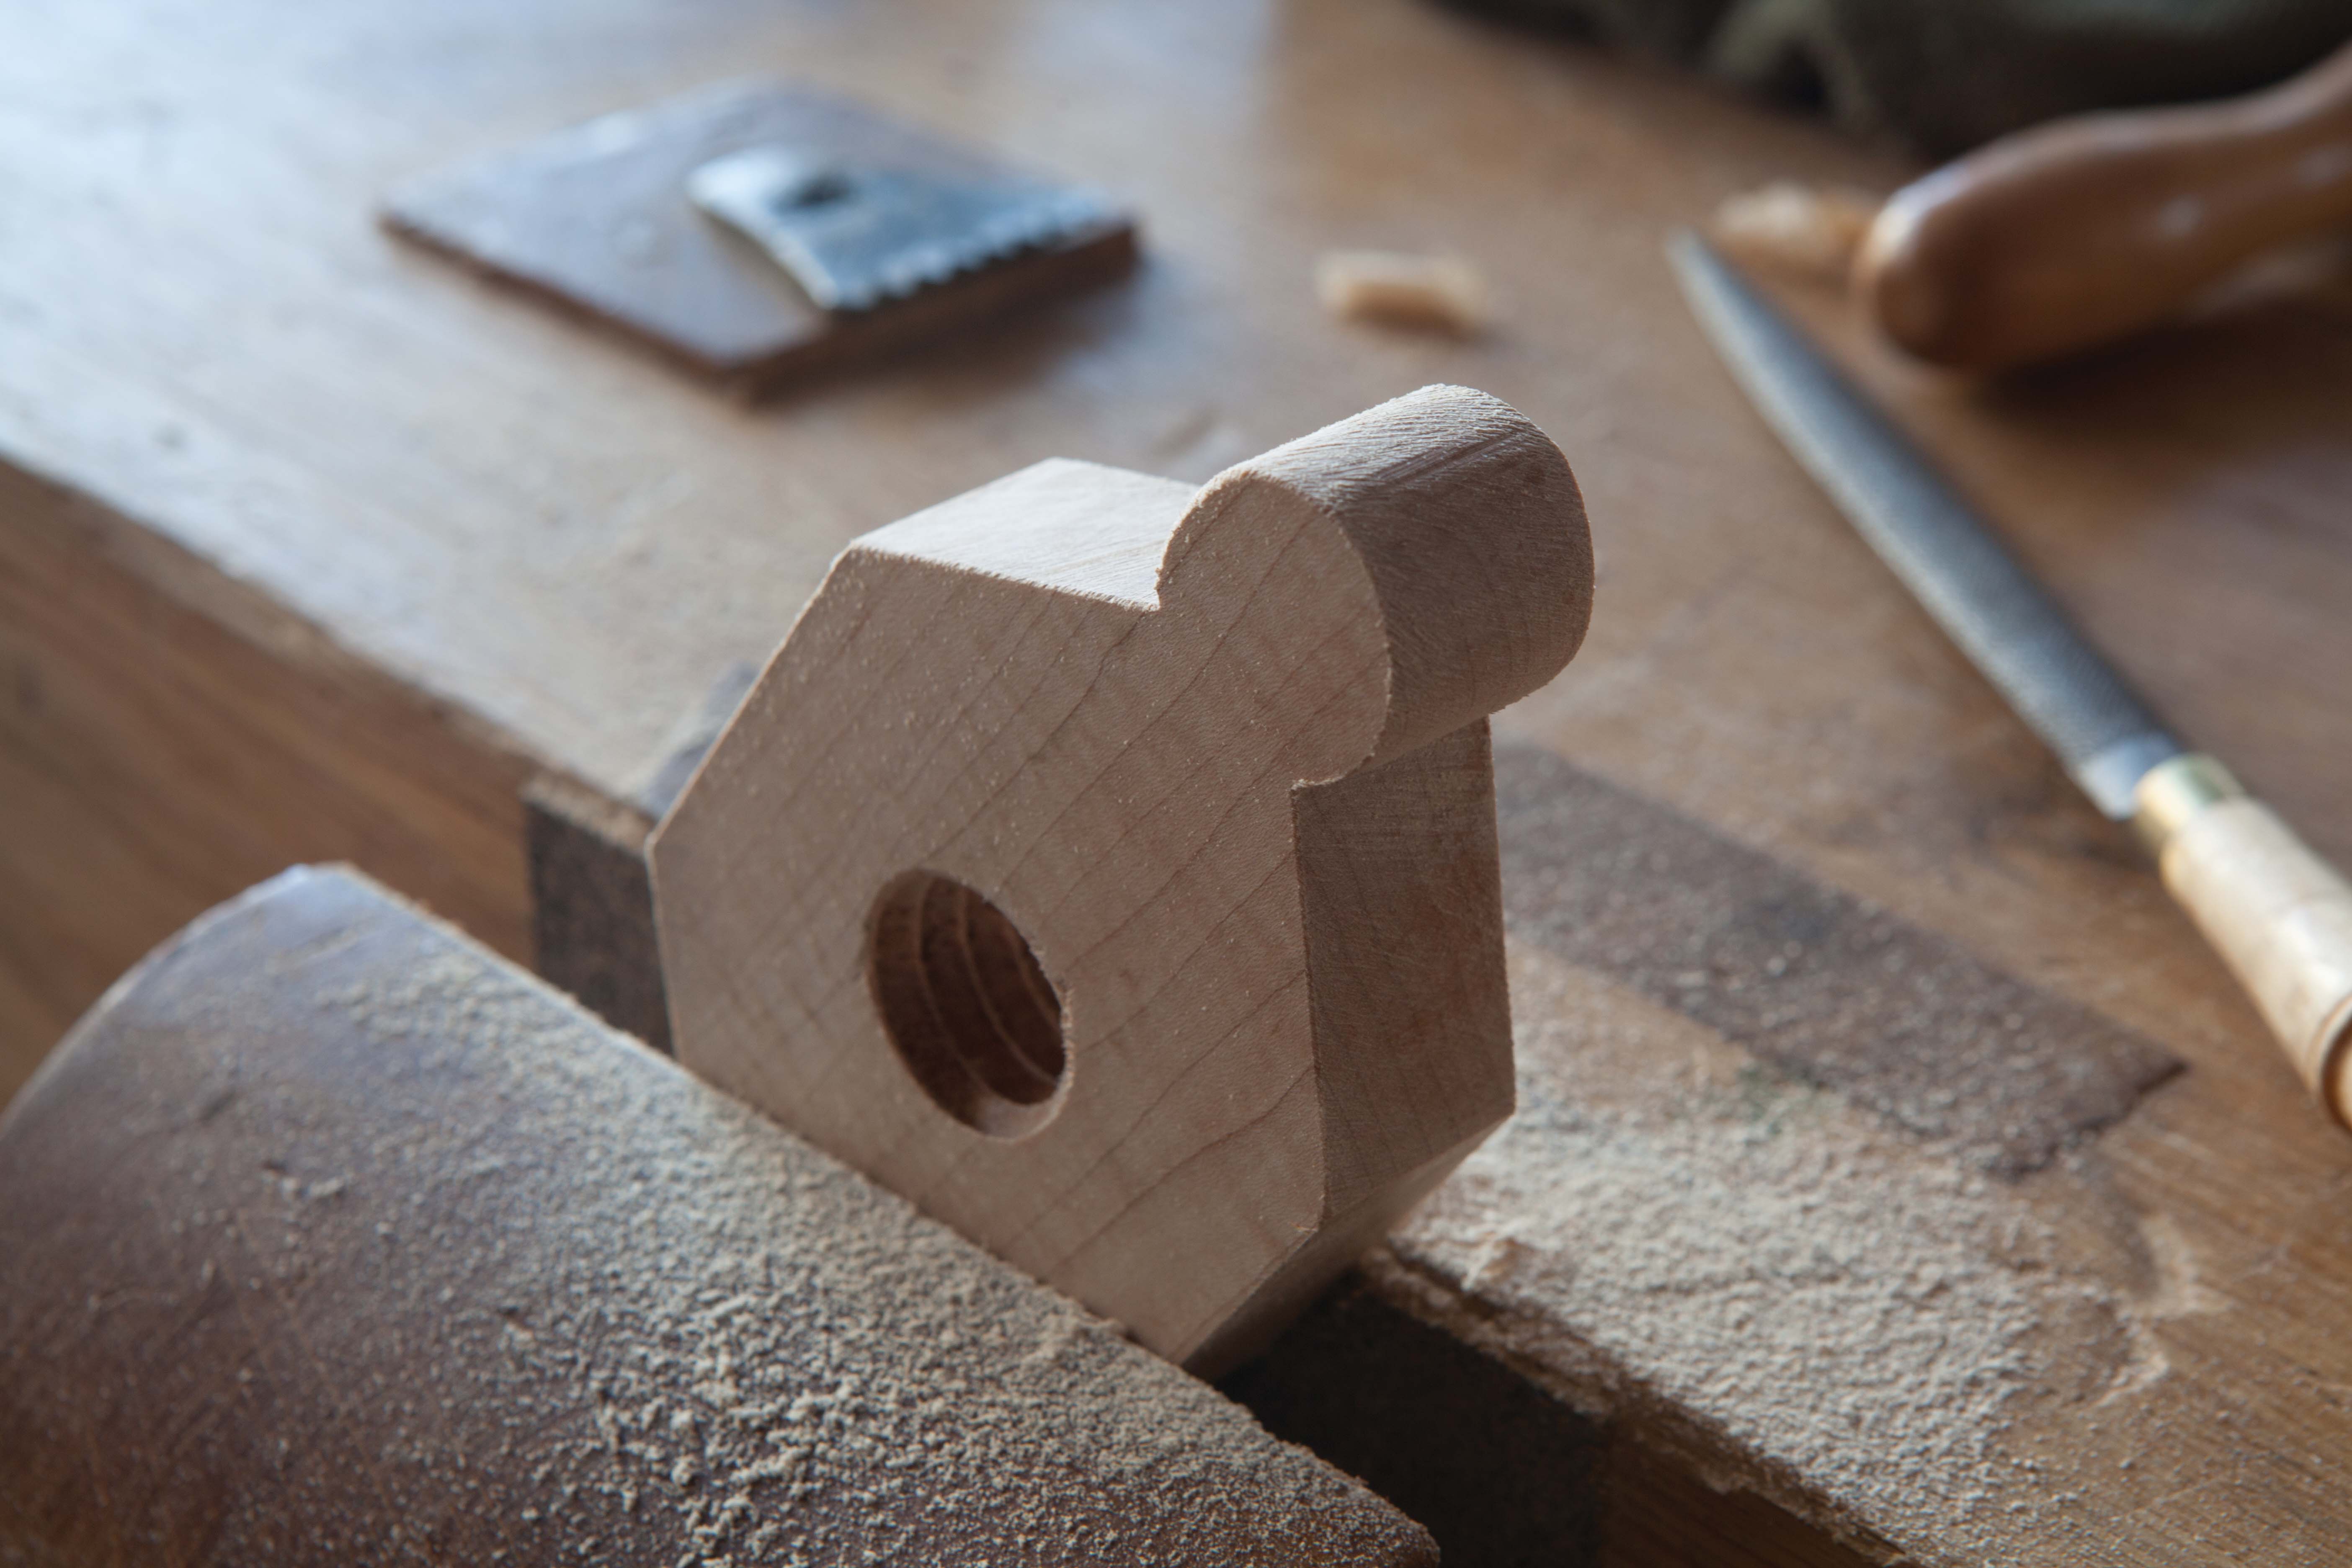
Make the nuts from maple. Before wasting time on shaping the nuts, bore and tap several holes in a board and use the two tapped holes that came out the straightest and cleanest. Cut the nuts to shape using [the figure above] as a guide. Then rasp the corners. Simple screw vises such as this are nice for working on the edges of chair seats, planing the edges of boards or working on anything that needs to be held securely. I have installed them on low benches and tall ones.
Rasp for comfort. After you drill and tap the holes in the nuts, cut them to shape and ease the corners with a rasp. Shown is an alternative shape to the nut above.
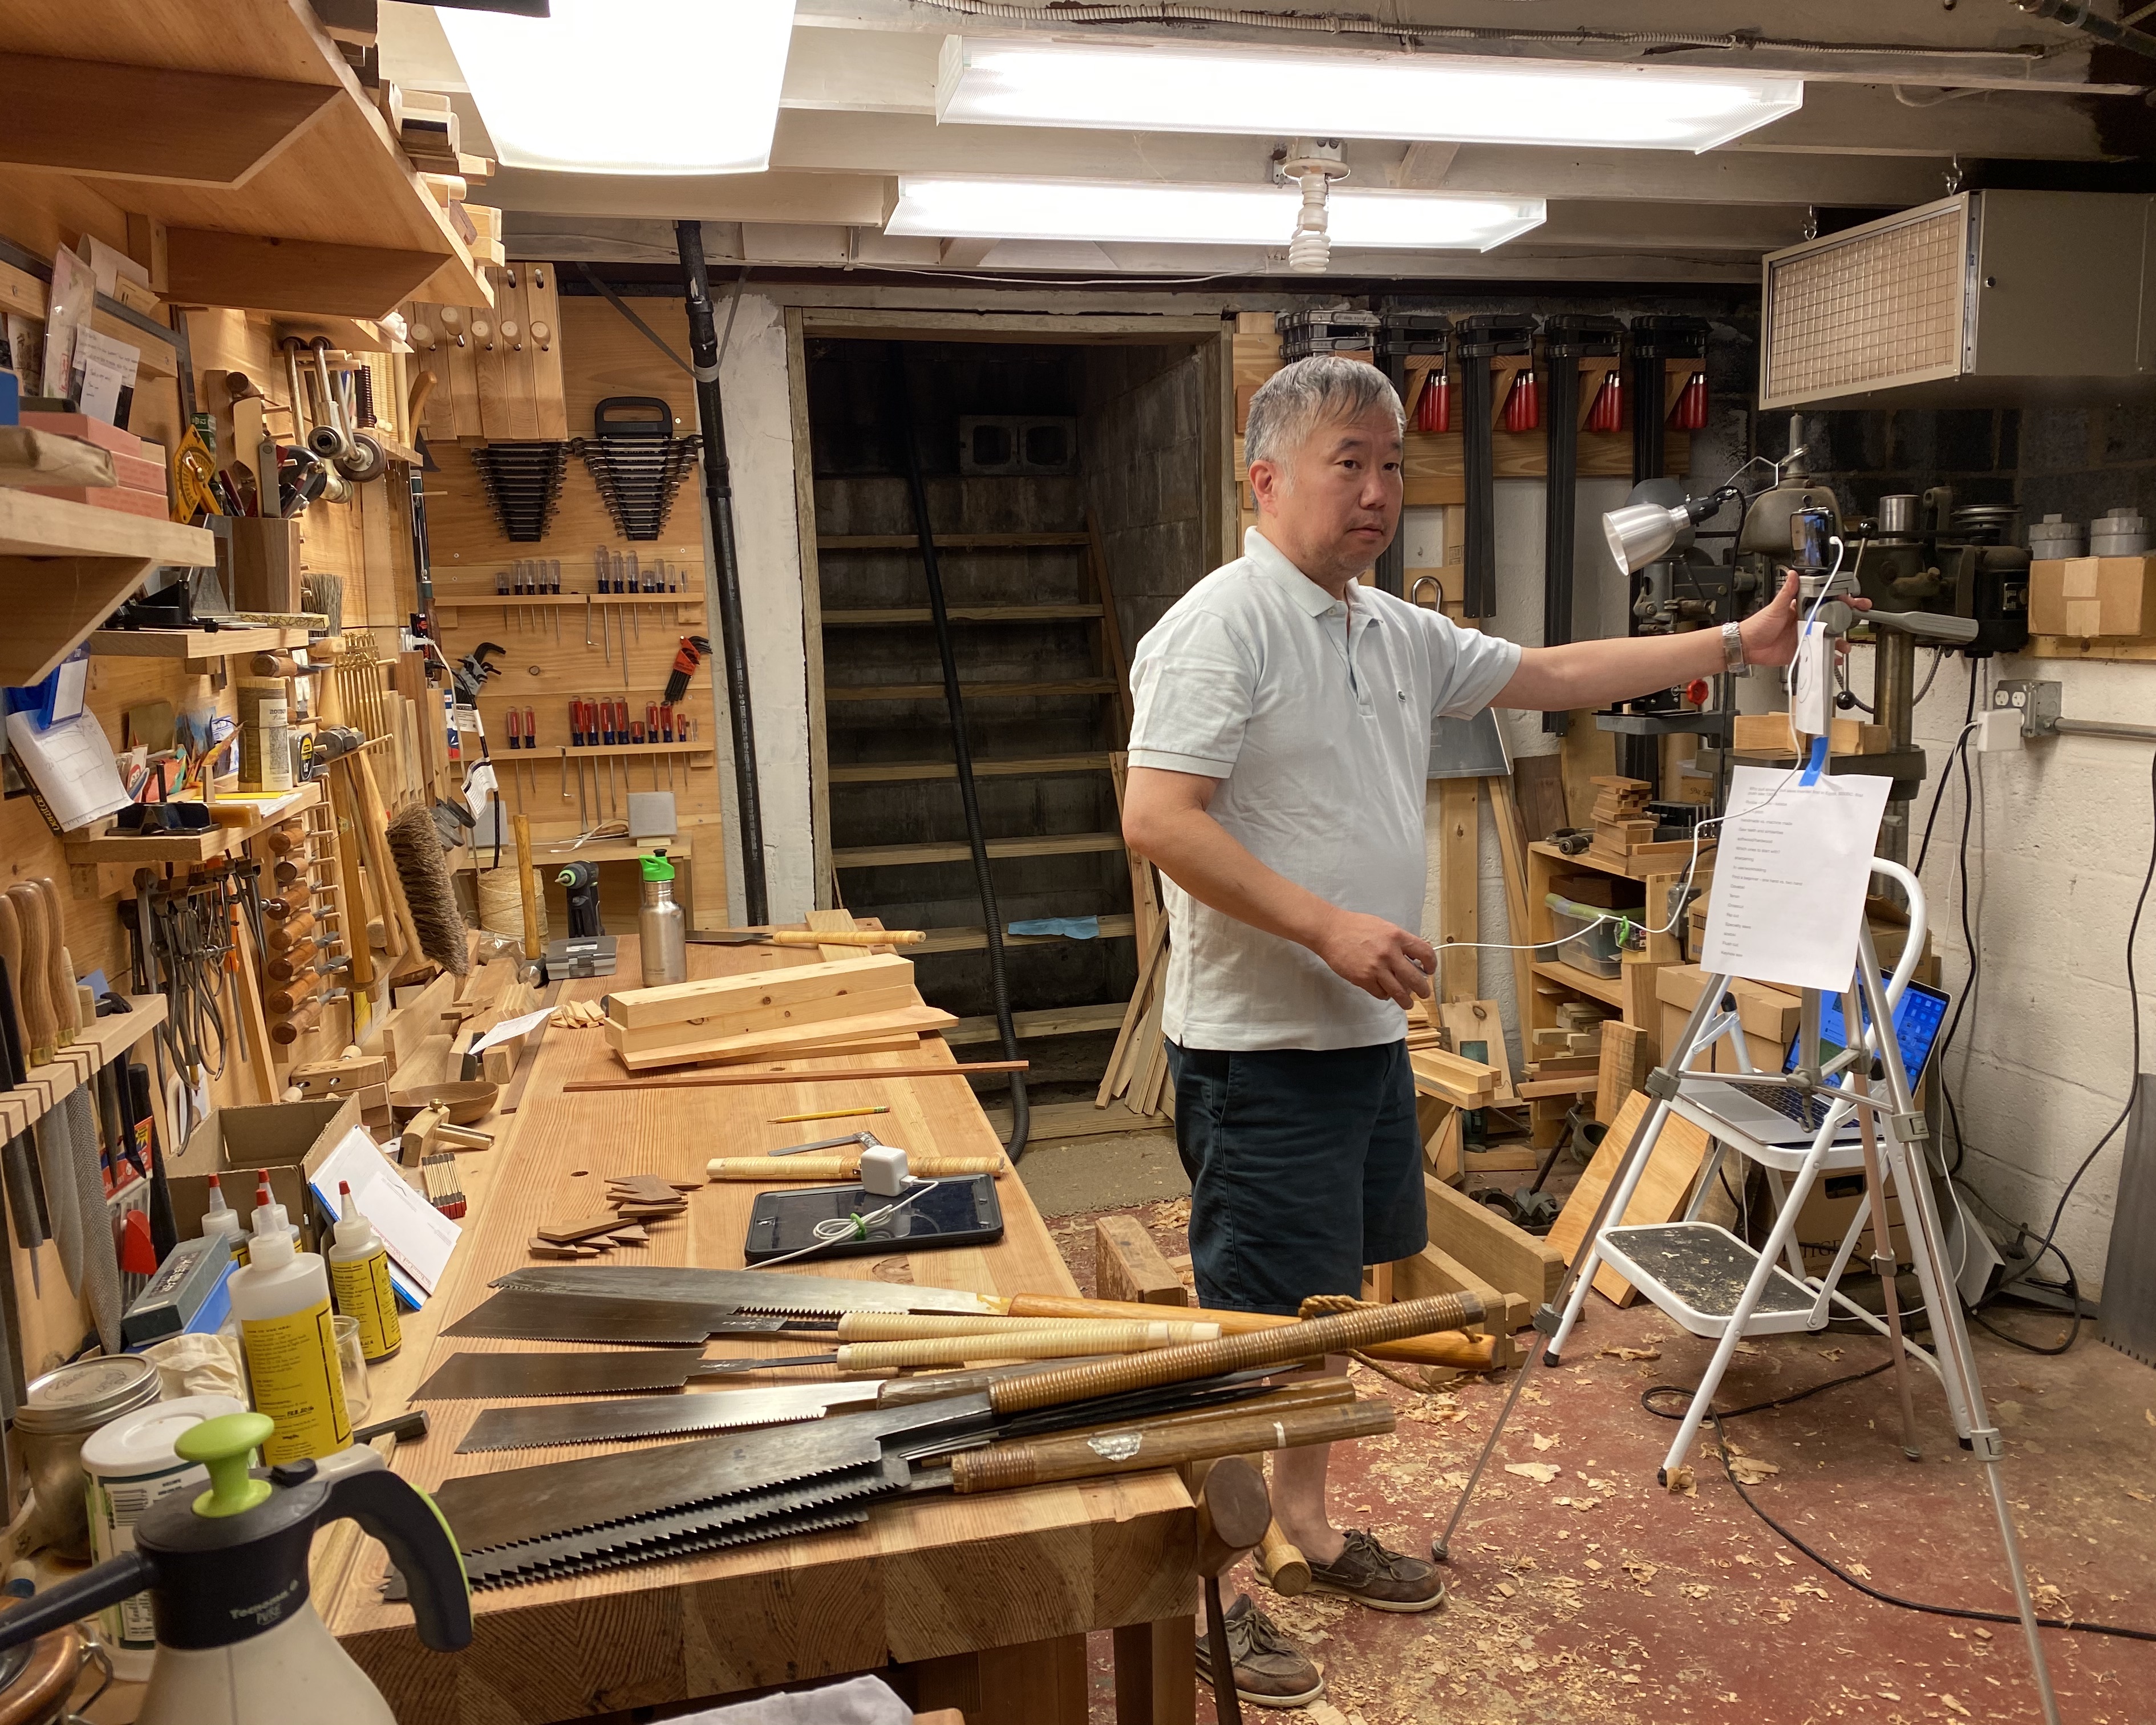
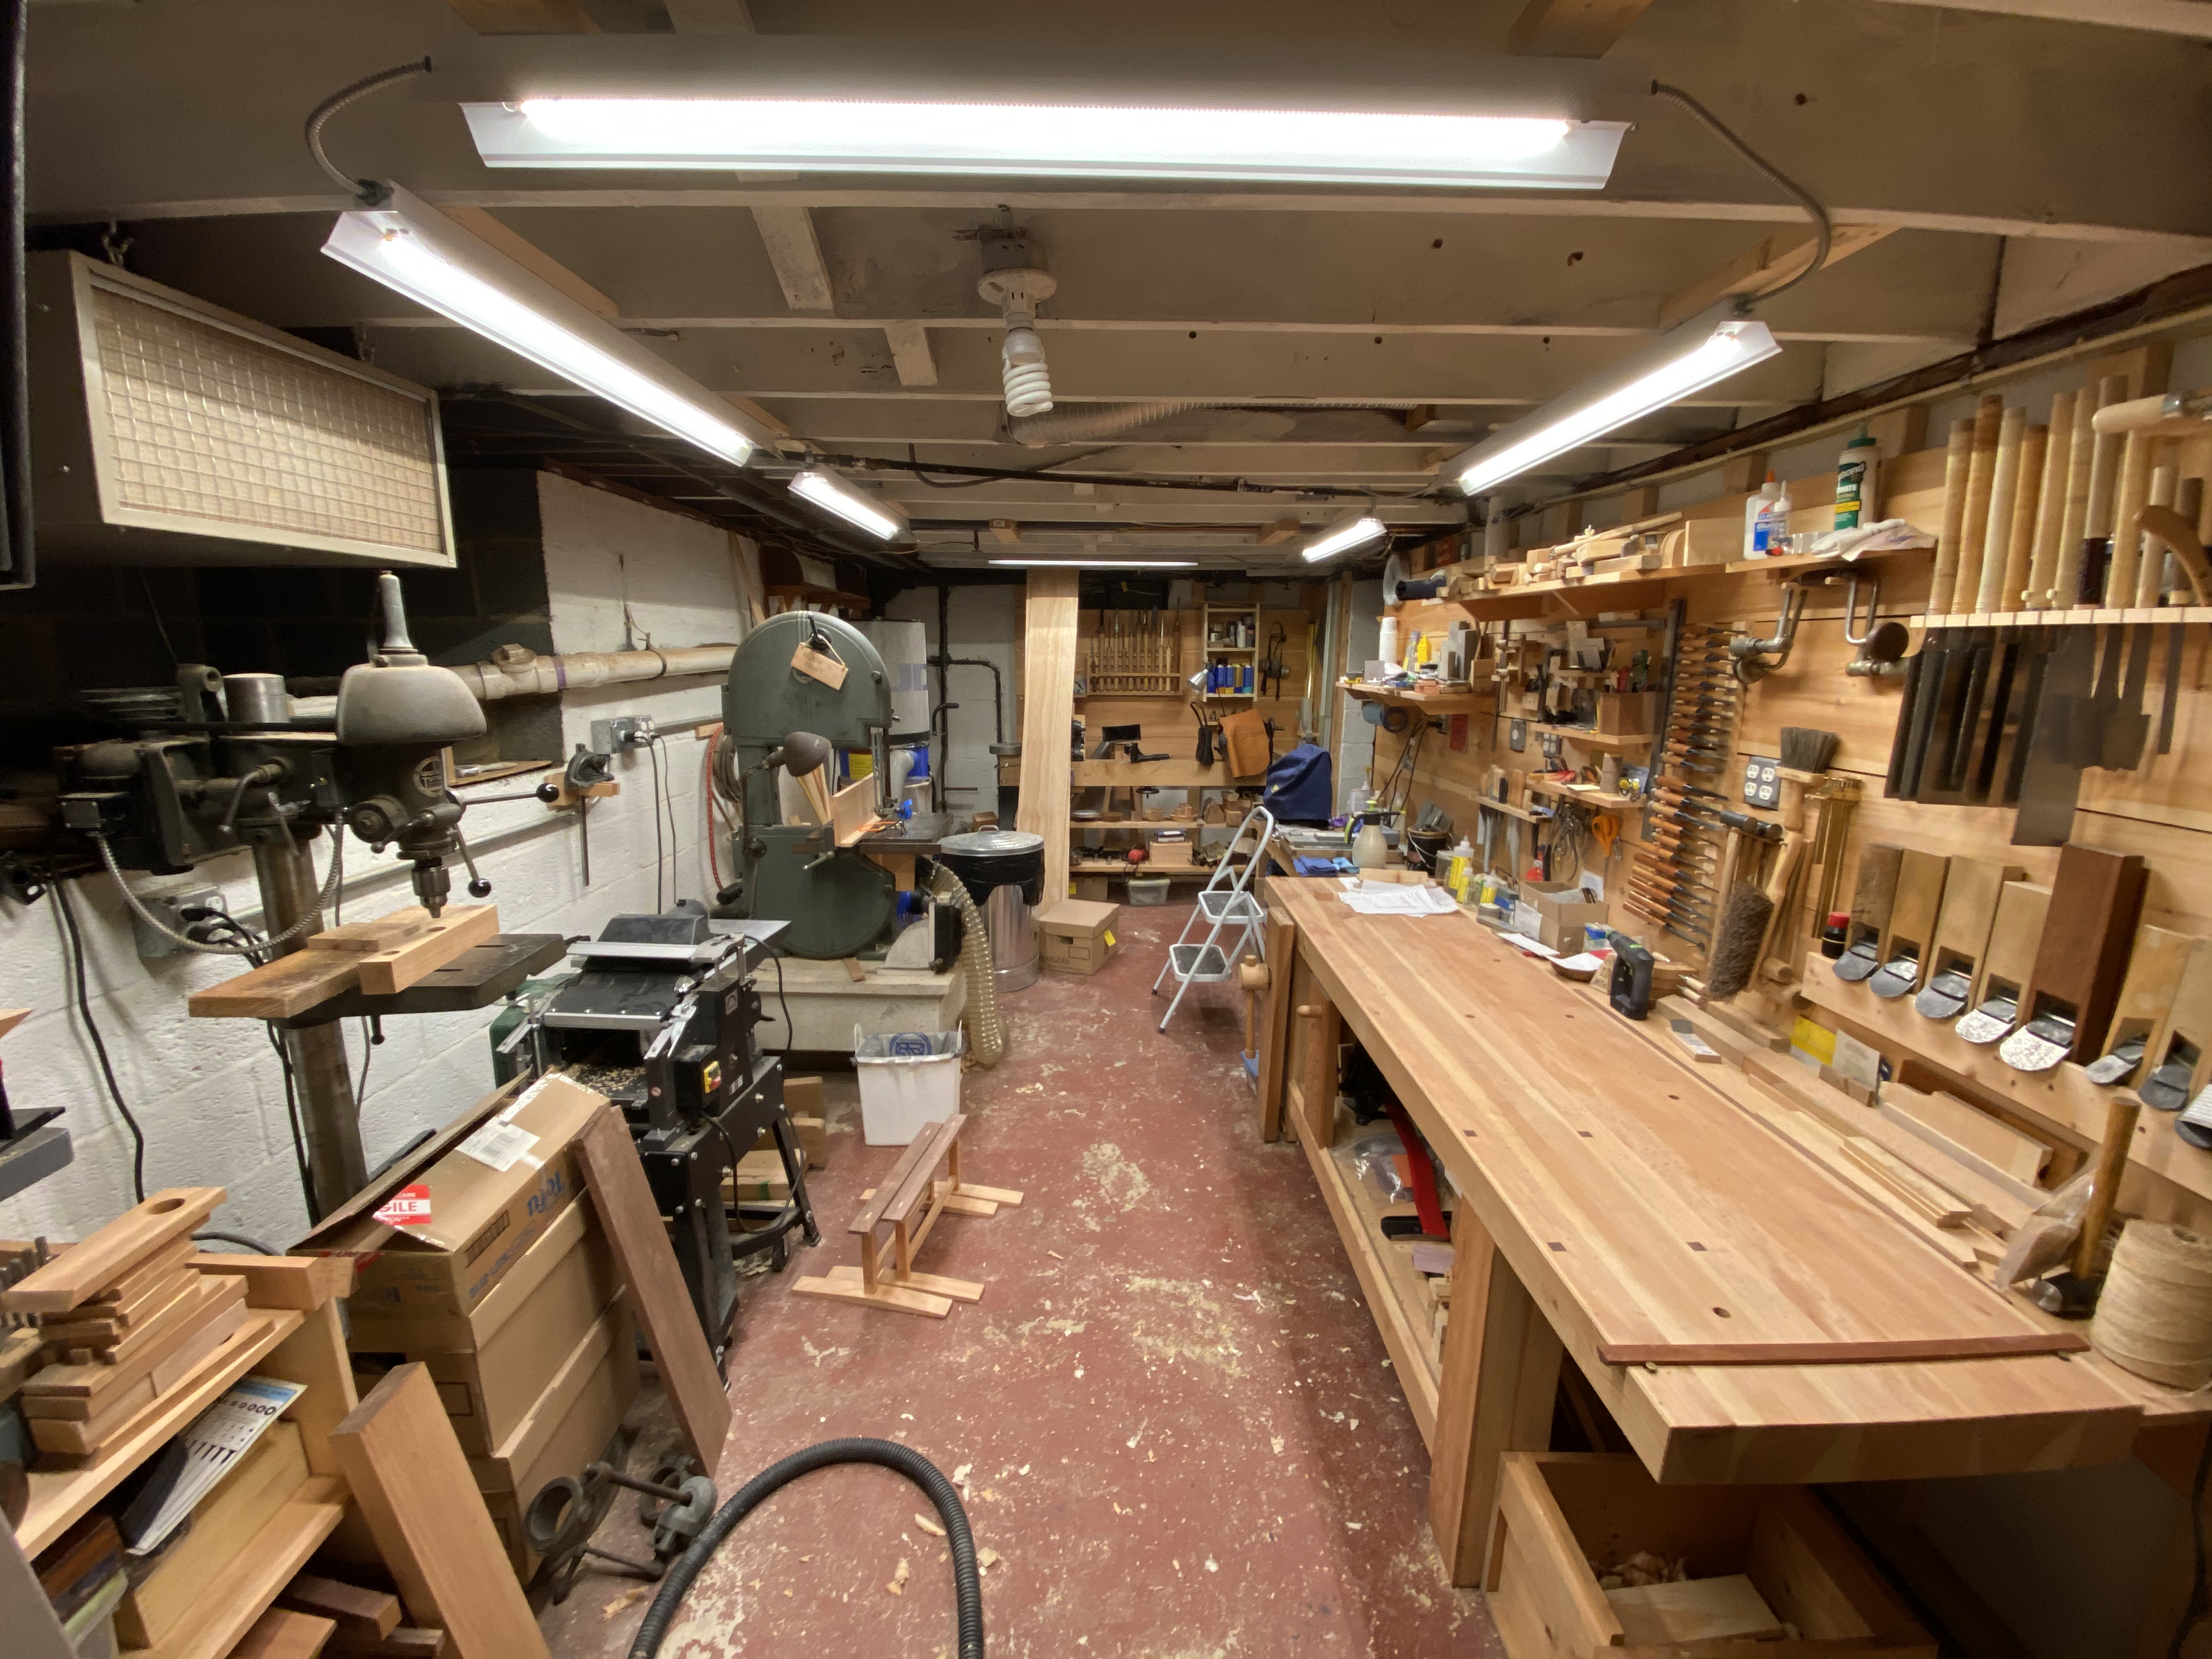
Wilbur Pan, like so many others, has been teaching online during the past year; here, he’s doing so from his basement shop.
When Wilbur Pan was doing his pediatric residency at Children’s Medical Center/University of Texas Southwestern Medical Center in Dallas, he and his colleagues developed a routine. Each Saturday, when they were on call, they’d go through their rounds as swiftly as possible so that the residents who were on call the previous night, and any patients who could be discharged, could go home – as Wilbur notes, no one sleeps well at the hospital, and that includes children.
Wilbur calls this shot “Time wasted in medical school.” He spent a lot of spare time playing in bands as part of the Chicago music scene. Here he’s playing at Kingston Mines, a Chicago blues club.
They were usually done with rounds by lunchtime. Saturday afternoons were generally quiet – they got few kids in the Emergency Room. So Wilbur and his colleagues would “sit around in the residents’ lounge watching college football,” he says.
After the football Wilbur would grab the remote control and switch the TV to PBS “to watch Norm or Roy.” Because they watched “The New Yankee Workshop” or “The Woodwright’s Shop” every Saturday afternoon, they quickly figured out how the episodes typically progressed. At some point during any given episode of “The New Yankee Workshop,” Wilbur recalls, “one of us would say, ‘Hey, I bet Norm’s going to get the dado stack.’ And then Norm would say, ‘I’m going to get the dado stack!’ and we would all high-five each other.” Ironically, he goes on, “none of us did any woodworking.”
What a bunch of geeks.
Wilbur made this replica of an Enzo Mari bookcase using Japanese hand tools and cut nails, even though the parts look as though they were made by machine.
Today, Wilbur does as much woodworking as he can. He started – or more precisely, started back up – around 2006, after he and his wife, Mary, bought a house in East Brunswick, N.J. After living in apartments for most of his life, it was the first time since high school, when he took a shop class that taught him to make a bellows (which his parents still use), that he had a place to do woodworking at home.
Wilbur was born in Lafayette, Ind., in 1964. His parents had emigrated from China to Taiwan in the late 1940s, and from Taiwan to the U.S. in the late 1950s. His father, Jaming, completed a master’s in physics, eventually completing a Ph.D. in electrical engineering as well; his mother, Clara, has a master’s in accounting. They met in Chicago, then made their home in Homewood-Flossmoor, a suburban area south of the city. Dr. Pan senior taught at Purdue University-Calumet, in Hammond, Ind., just over the state border; it was less than a half-hour commute, which gave the family the best of both worlds: steady employment, while continuing to live close to the city they loved.
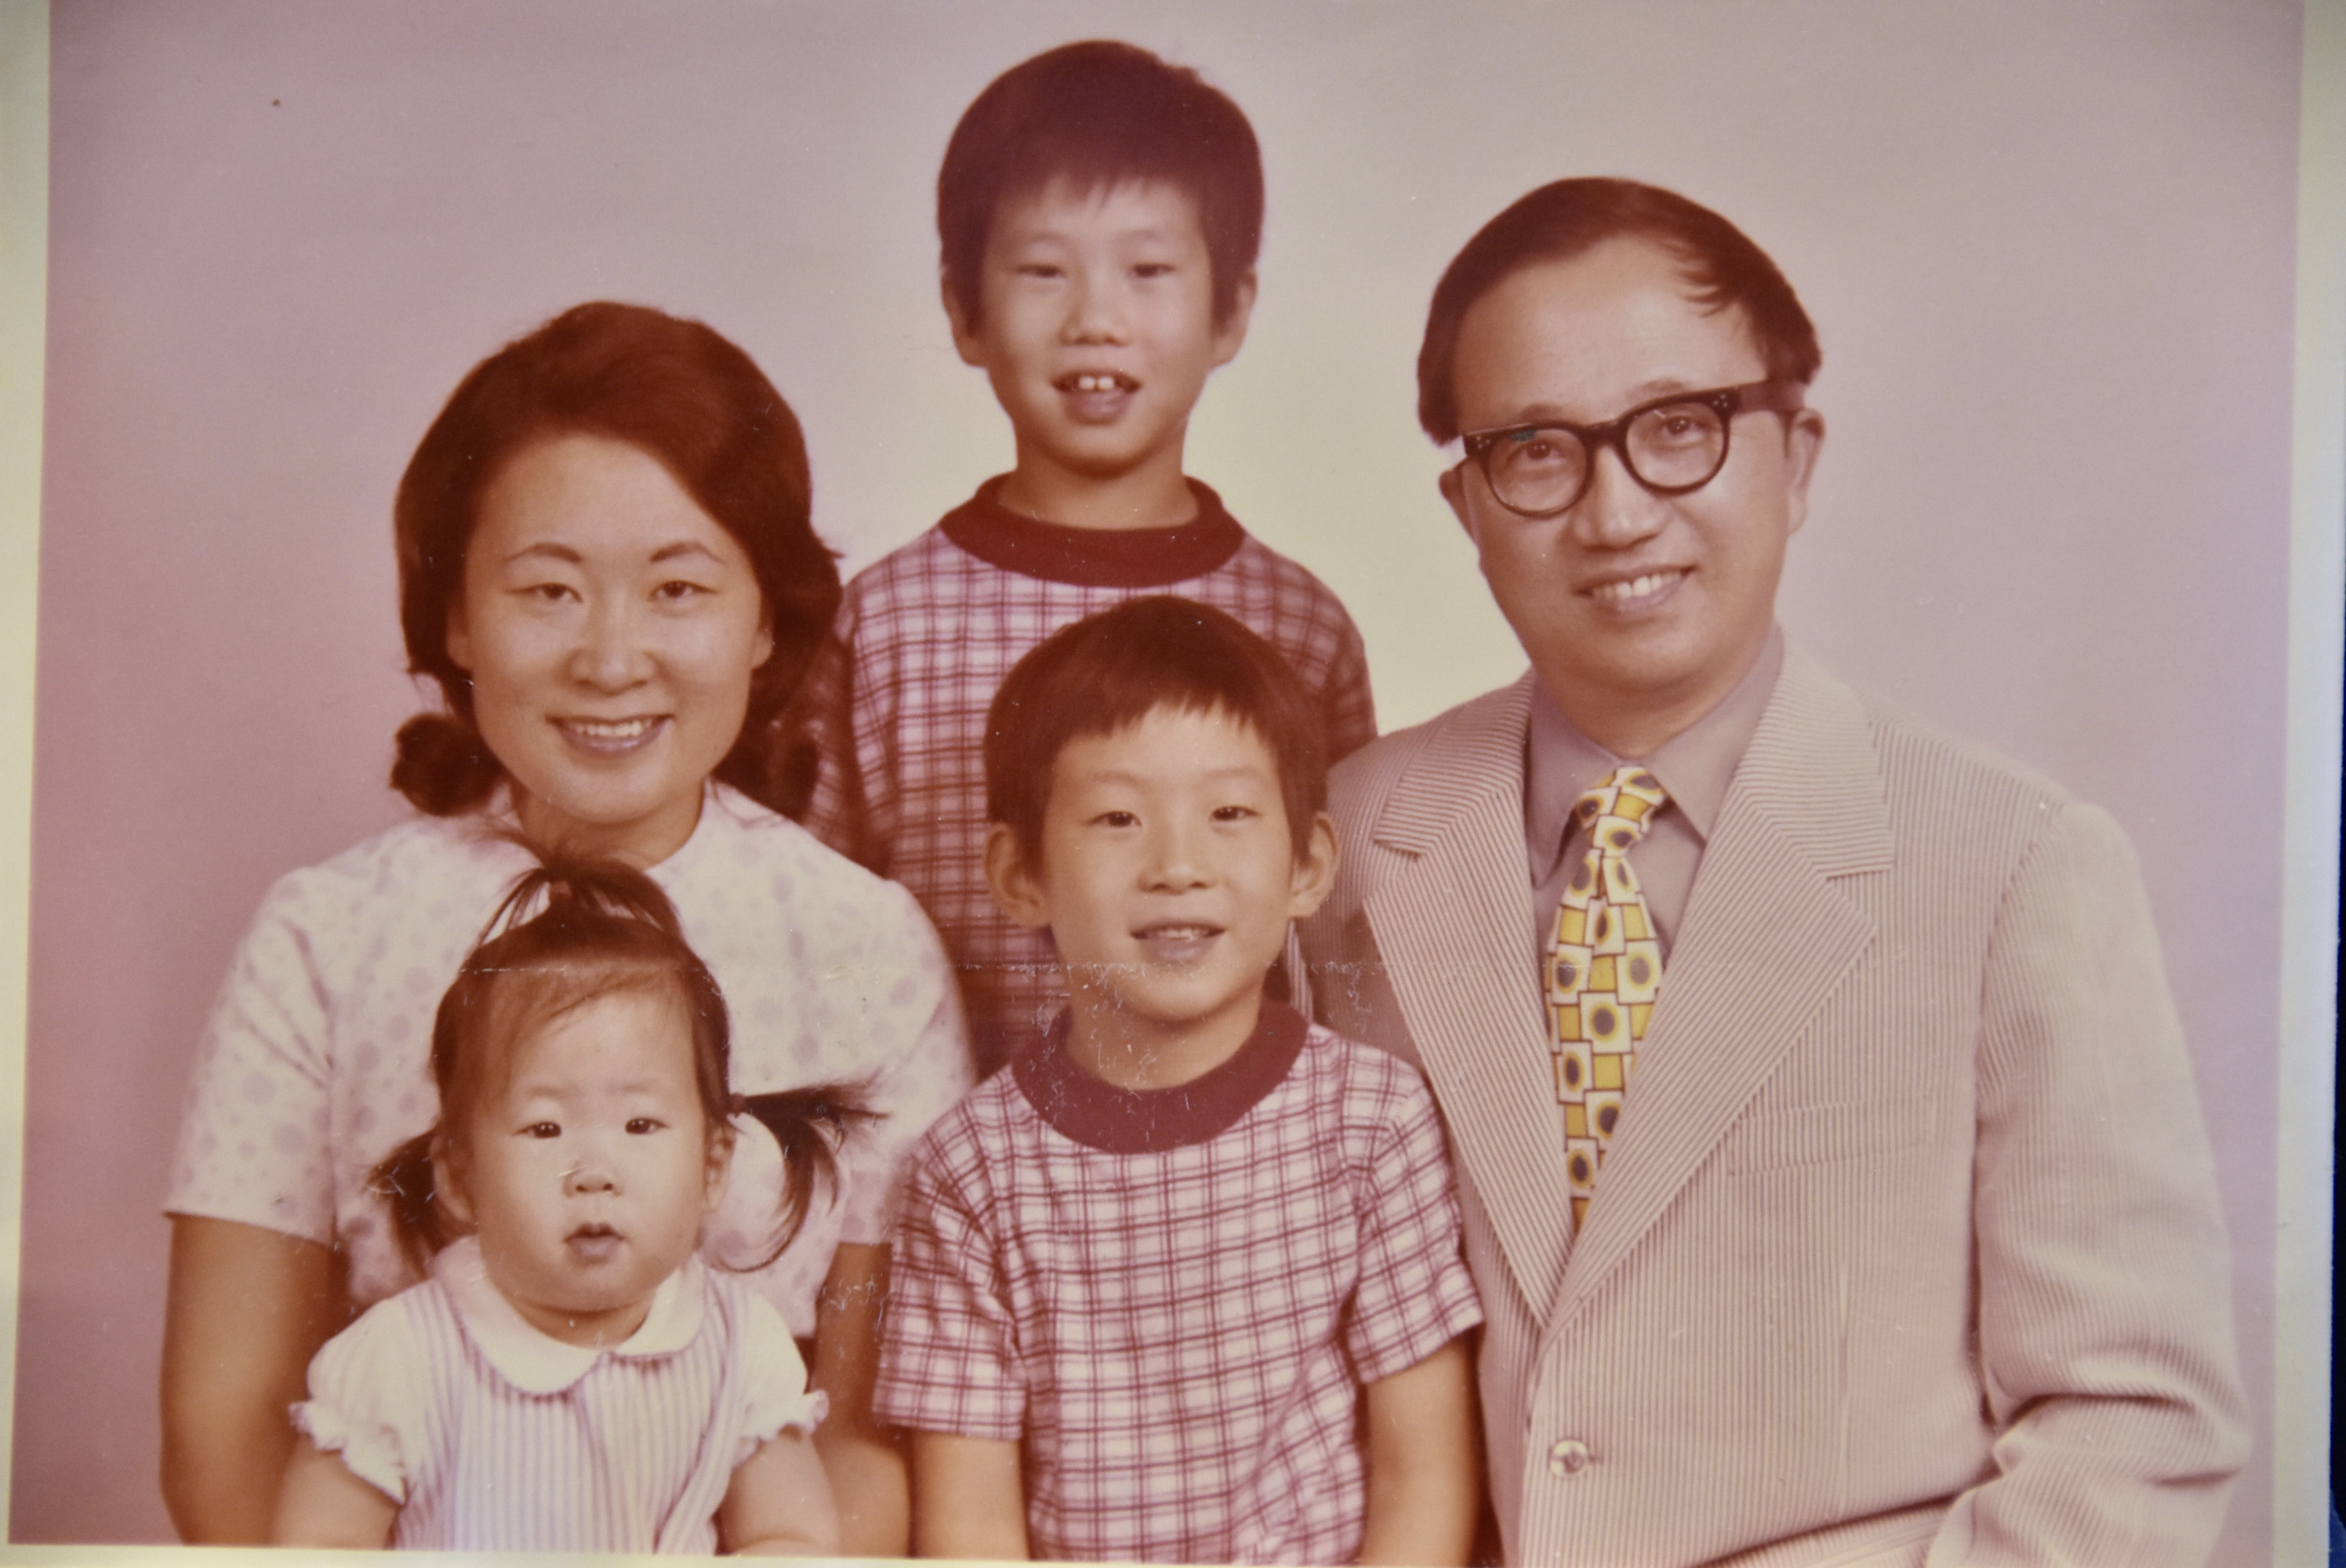
Wilbur (top, center) with his parents, Clara and Jaming, and siblings, Wileen (left) and Huby. The photo is from a family trip to Taiwan in the 1970s.
When Wilbur was a boy, his father built a set of bookcases for their home, a project that Wilbur found inspiring. You could turn some bit of creative imagination into practical, handsome objects for the family? Pretty amazing, when you think about it.
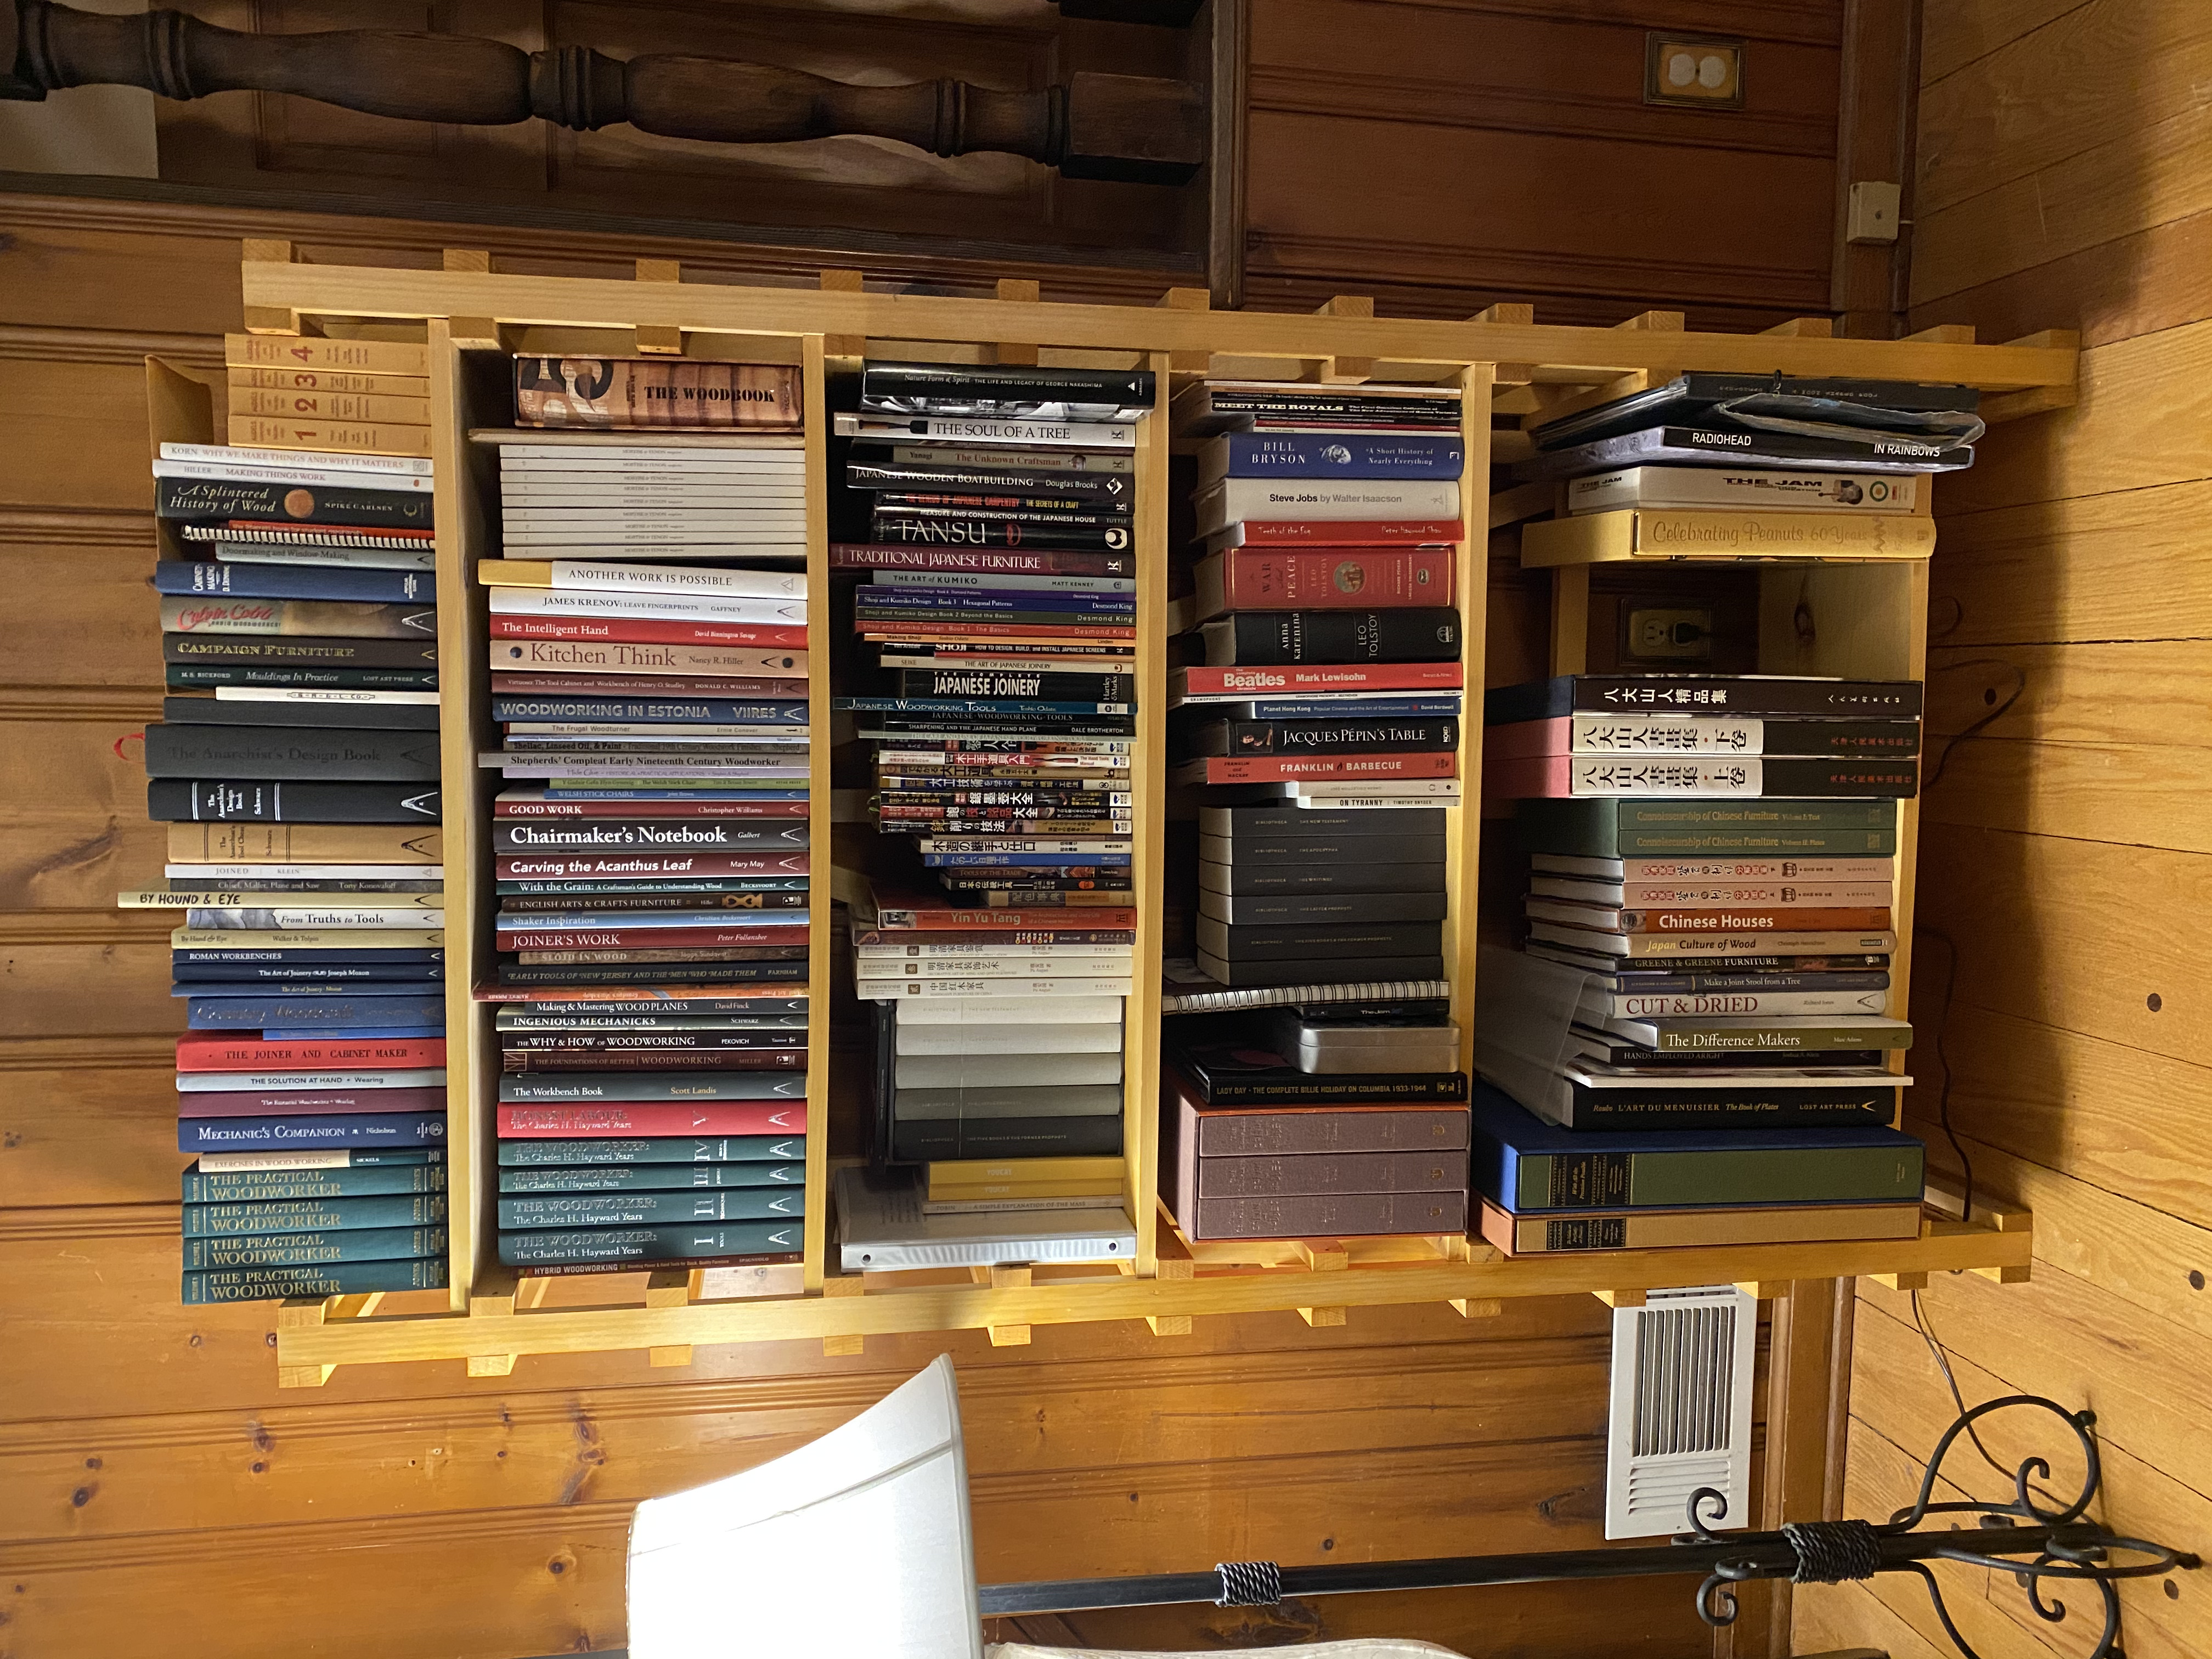
Among Wilbur’s earliest woodworking influences is this pair of bookcases built by his father, Jaming. Although Jaming built these oak-veeered bookcases out of necessity (there are no fancy joints, just nails and glue), they have lasted more than 45 years and survived a move. To this day, Wilbur appreciates this project of his dad’s for inspiring him with the idea that you can build things for yourself.
Wilbur attended Northwestern University, then graduated with an M.D./Ph.D. from the University of Illinois College of Medicine in 1994. After completing his pediatrics residency in Dallas, he did a fellowship in pediatric hematology/oncology at Children’s Memorial Hospital/Northwestern University Medical School back in Chicago. Bart Kamen, an attending physician he’d worked with in Dallas, happened to get in touch one day; he asked whether Wilbur might be interested in caring for children with brain tumors…in New Jersey. On a lark, says Wilbur, he flew to New Jersey for the interview; on the way back, he had a job offer – the hospital wanted him to build a pediatric brain tumor program from scratch.
By this time, Wilbur and Mary, a Chicago native, had married. They moved to New Jersey with a mutual understanding that they could always move back to Chicago if the East Coast didn’t feel like home. That was 21 years ago; they’re still in New Jersey.
Although he uses Japanese tools almost exclusively, Wilbur’s shop looks like those of most hobbyists, with a workbench and assorted power tools.
His shop is in the basement of their house, which was built in the 1940s. On moving in, they learned that their neighbor Marc was an excellent woodworker who had built the kitchen in his family’s house, as well as most of their furniture. Wilbur credits Marc with showing him the difference between a finely sharpened tool (specifically, it was a handplane) and one that…well…is not.
Having lived next door for many years, Marc was able to share what he knew about the Pans’ new-to-them house. The father in the previous family had used part of the basement as a woodshop – one wall still had the painted outlines of tools he’d hung there. Marc recalled that after spate of noisy banging around, his former neighbor emerged from the basement with a boat.
Mary and Wilbur with their sons, James and Kevin, wishing you a happy Chinese New Year.
In around 2006, Mary thought a gift certificate to a woodworking class would make a good present for her husband. Marc referred her to an adult education program run by their county’s community college. The teacher, Mike Zaslav, had trained at the College of the Redwoods. Wilbur signed up.
“I go to the first class and Mike spends the whole time teaching us how to sharpen a chisel,” Wilbur reports. Wilbur was hooked. He learned how to sharpen and picked up the basics of working with power tools. He made his first dovetail joint, edge-glued boards together and made his first mortise and tenon.
Beyond that course, his training as a woodworker has been less formal. “It was a lot of me messing around and reading, and trying to figure out how things work.”
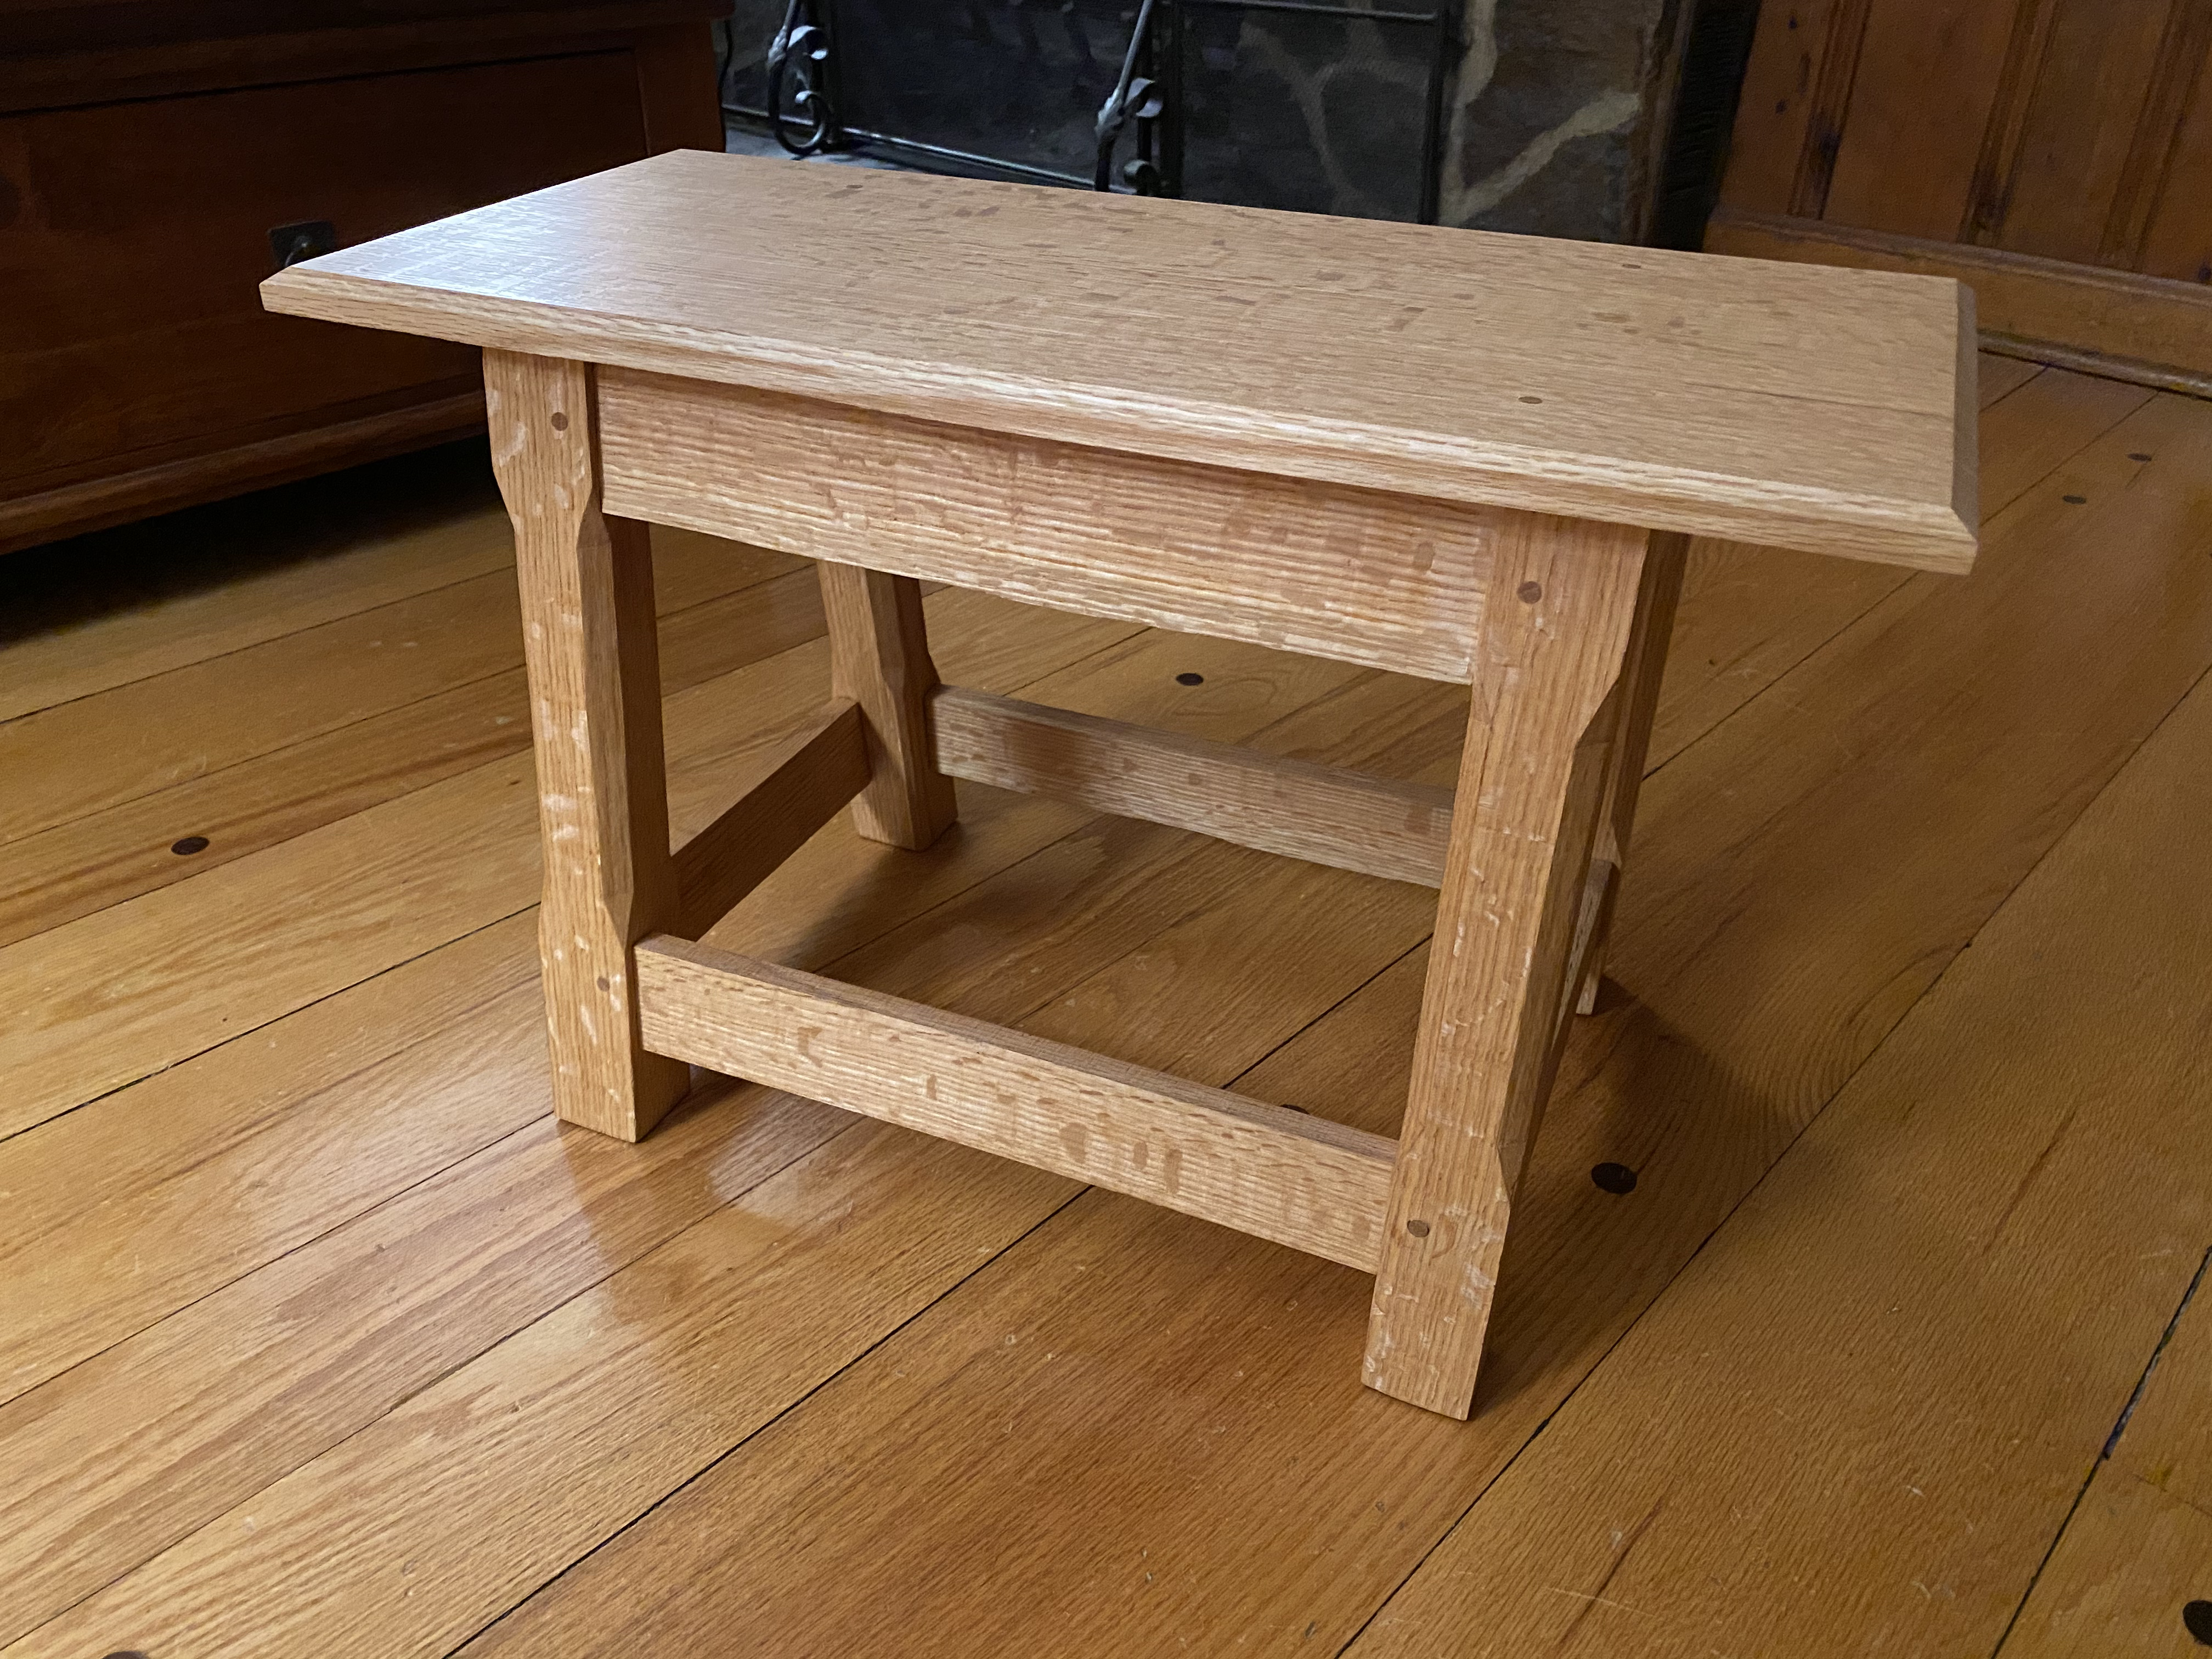
Regular readers of this blog will recognize the inspiration for this joint stool in quartersawn oak.Wilbur built it using Japanese tools.
When Wilbur was first getting started in his 10’ x 20’ basement shop, he understood that he’d be working with limited space. He had to choose between a table saw and a band saw – the shop was too small to accommodate both. He chose the bandsaw. Besides its small size, his shop’s location beneath the family living space led him to minimize the production of fine-particle dust, which the HVAC system would spread around the house; both of their kids were young, and Wilbut knew the kind of damage dust can do to children’s lungs. Hand tools would be better for everyone.
Then Wilbur learned about Japanese hand tools. So many woodworkers were crazy about them and considered them superior to Western tools. He couldn’t figure out why they had the cutting properties they did, so he starting researching the question through practice, as well as reading. He was intrigued, as a woodworker, as a scientist and as an American of Chinese descent. “Probably the whole Asian thing kicked in and it was easy for me to get interested in them,” he suggests (I imagine with a wink).
His father had taught him to look at things from the perspectives of science and reasoning, so Wilbur was not about to accept that Japanese tools were superior without some systematic investigation through reading, reasoning and hands-on research. “Japanese woodworkers have the same priorities as Western woodworkers,” Wilbur says. “They have sharp pieces of metal that they use to shape wood so they can build things, and they want to do things as efficiently as possible. If that was true, then the tools must be similar,” he inferred, adding “at least, in certain ways.”
He decided to focus on how the tools were similar instead of how they were different. Based on his research to date, he says, “If there is a divide, it’s not an East-West thing but a pre-industrial versus industrial thing,” He shared what he learned along the way through his blog, articles, an “End Grain” essay for Popular WoodworkingMagazine and presentations at Woodworking in America. It was at Woodworking in America that Wilbur first came to my attention.
“It’s true that there are obvious differences between Japanese and modern Western hand tools,” Wilbur acknowledges. “But if one looks at pre-industrial Western hand tools, when blacksmiths were making chisels and plane blades, there are similarities that stand out. Chisels and plane blades were made by forge-welding a hard piece of steel to a softer piece of steel. And both chisels and plane blades were made in a way so that there was some concavity to the back, for ease of sharpening.
“My approach is that I want to present a straightforward explanation of how to use Japanese tools. I try to stay away from the Zen stuff. I go on the assumption that the audience’s workshop is your typical hobbyist workshop in the U.S.; I’m not expecting people to work on the floor. The things I teach are centered on your typical woodworking shop – I have a typical workbench, a band saw and a drill press.”
What about Chinese tools, I wonder? After all, they would be more directly related to Wilbur’s cultural heritage. “For woodworkers, China has a tradition that may be more interesting to woodworkers interested in furniture making,” he replies. “There’s tansu [in traditional Japanese woodworking], but people in Japan didn’t have chairs and tables for the most part. They sat on the floor.
“China had furniture you’d recognize, made with tropical hardwood species – lots of rosewood and ebony. The joinery is very intricate; decoration can be very elaborate. But not much is known about the tools that Chinese woodworkers used.”
He attributes the differences between what’s known about Japanese and Chinese tools partially to differences between the two cultures in how they think about objects. “I think there’s a case to be made that in Japan, objects seem to be fetishized. There seems to be this reverence for objects that doesn’t exist to the same extent in China.”
For example, in Japan, much attention has long been paid to samurai swords. China has a similar tradition with respect to swords, but in China, swords occupy a less-central position when it comes to symbolic appeal. “In a Chinese movie a warrior may have his sword that’s a family heirloom. And then he loses or breaks his sword in a battle,” Wilbur has noticed. “He picks up something else, like a chair, and fights with that.” In Japanese films, the warrior often seems lost without his sword.
In China, he says, tools were historically valued in instrumental terms: They got the job done. The Cultural Revolution resulted in the loss of much traditional knowledge; such information is still hard to come by, especially for those who are not based in China. “It’s coming back, though,” he says, mentioning a school that teaches traditional techniques for carving with hand tools. But today, he notes, this school also teaches students how to carve by CNC, because they recognize it’s a means to produce furniture that’s affordable to vastly more people.
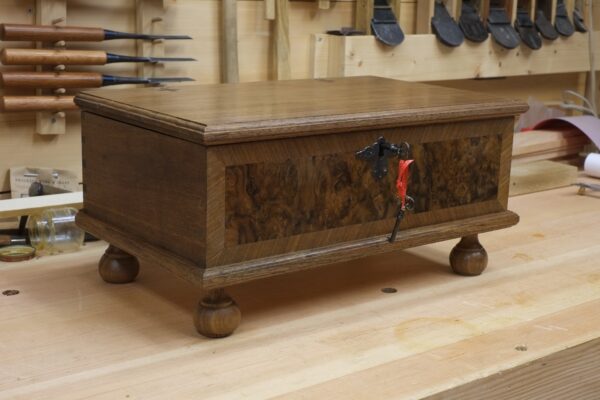
This joined box is a late-1700s American form, but aside from the turned feet, Wilbur made it entirely with Japanese tools.
Wilbur values woodworking as a counterpoint to his daily work. He still cares for patients, although now indirectly as a director of breast cancer clinical trials for the pharmaceutical company Merck; he left pediatric oncology after 18 years on faculty at the Rutgers Cancer Institute of New Jersey and Rutgers Robert Wood Johnson Medical School. But when it comes to his medical work beyond basic physical exams, it’s very hands-off. He spends “a lot of time in front of a computer.” As a result, he says, “woodworking fills this urge to be able to create something physical and scratches an itch I think a lot of people have.”
That said, he notes that while “a lot of things in medicine are done with protocols and algorithms, there is a lot of creativity in medicine because there’s always the patient that comes along and doesn’t fit any protocol. So you have to figure out how to take care of that patient. Plus, the process of diagnosis is a creative act, because there’s a puzzle you’re solving.”
He ends with a nice metaphor. Several years ago he made a joined box (pictured above), “a completely American form going back to the late 1700s in the Philadelphia area.” The one he made “looks just like an old one.” But he made it entirely with Japanese tools.
“It doesn’t matter what part of the world your tradition comes from,” he concludes. “There are more similarities than differences than you might think.”
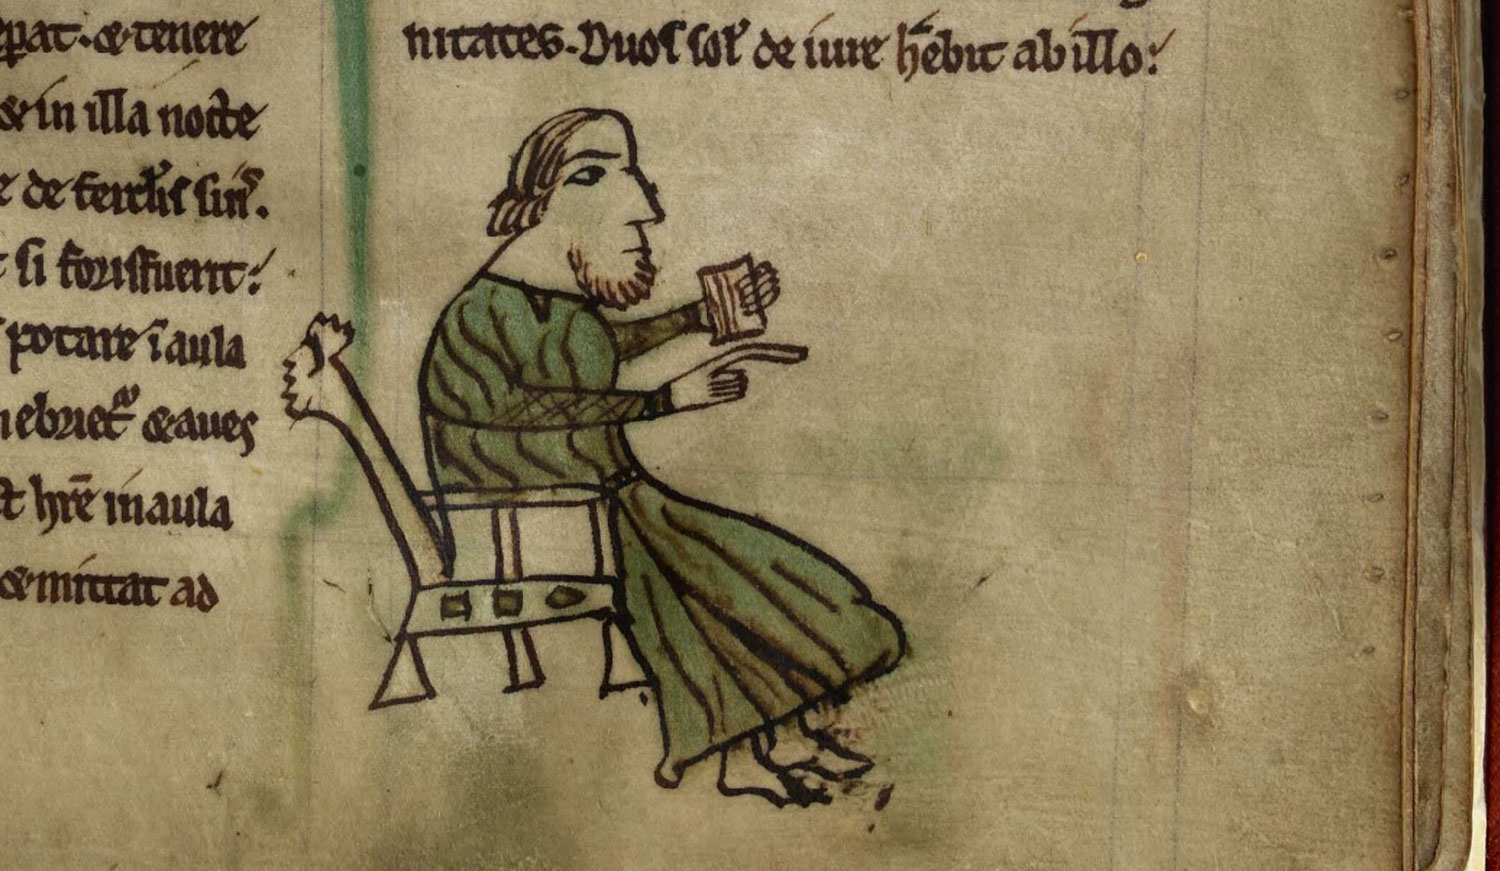
An image from a Latin version of “Laws of Hywel Dda,” a Welsh law book. This version dates from the late 12th century or the middle 13th century. Note the tapered legs and the sticks beneath the arm.
Editor’s note: The following is a draft chapter from “The Stick Chair Book,” due out later this year. I just wanted to give Peter Galbert a heads up that we’re changing every reference to “Windsors” in “Chairmaker’s Notebook” (just kidding).This piece has been updated to reflect ongoing changes in the manuscript.
When people see a stick chair for the first time, a typical response is to call it a “primitive Windsor.” Unfortunately, every syllable of that expression is incorrect.
And that’s OK. We live in a world where the term “Windsor” has expanded like a gas to mean almost any piece of furniture where stick-y components are mortised into a plank – Windsor table, Windsor stool, Windsor bench, Windsor printer stand.
It does make you wonder: Where did this furniture come from? A place called Windsor?
Perhaps.
As furniture historians point out, the origin of the word “Windsor” to describe a class of chairs is complicated and has yet to be definitively settled.
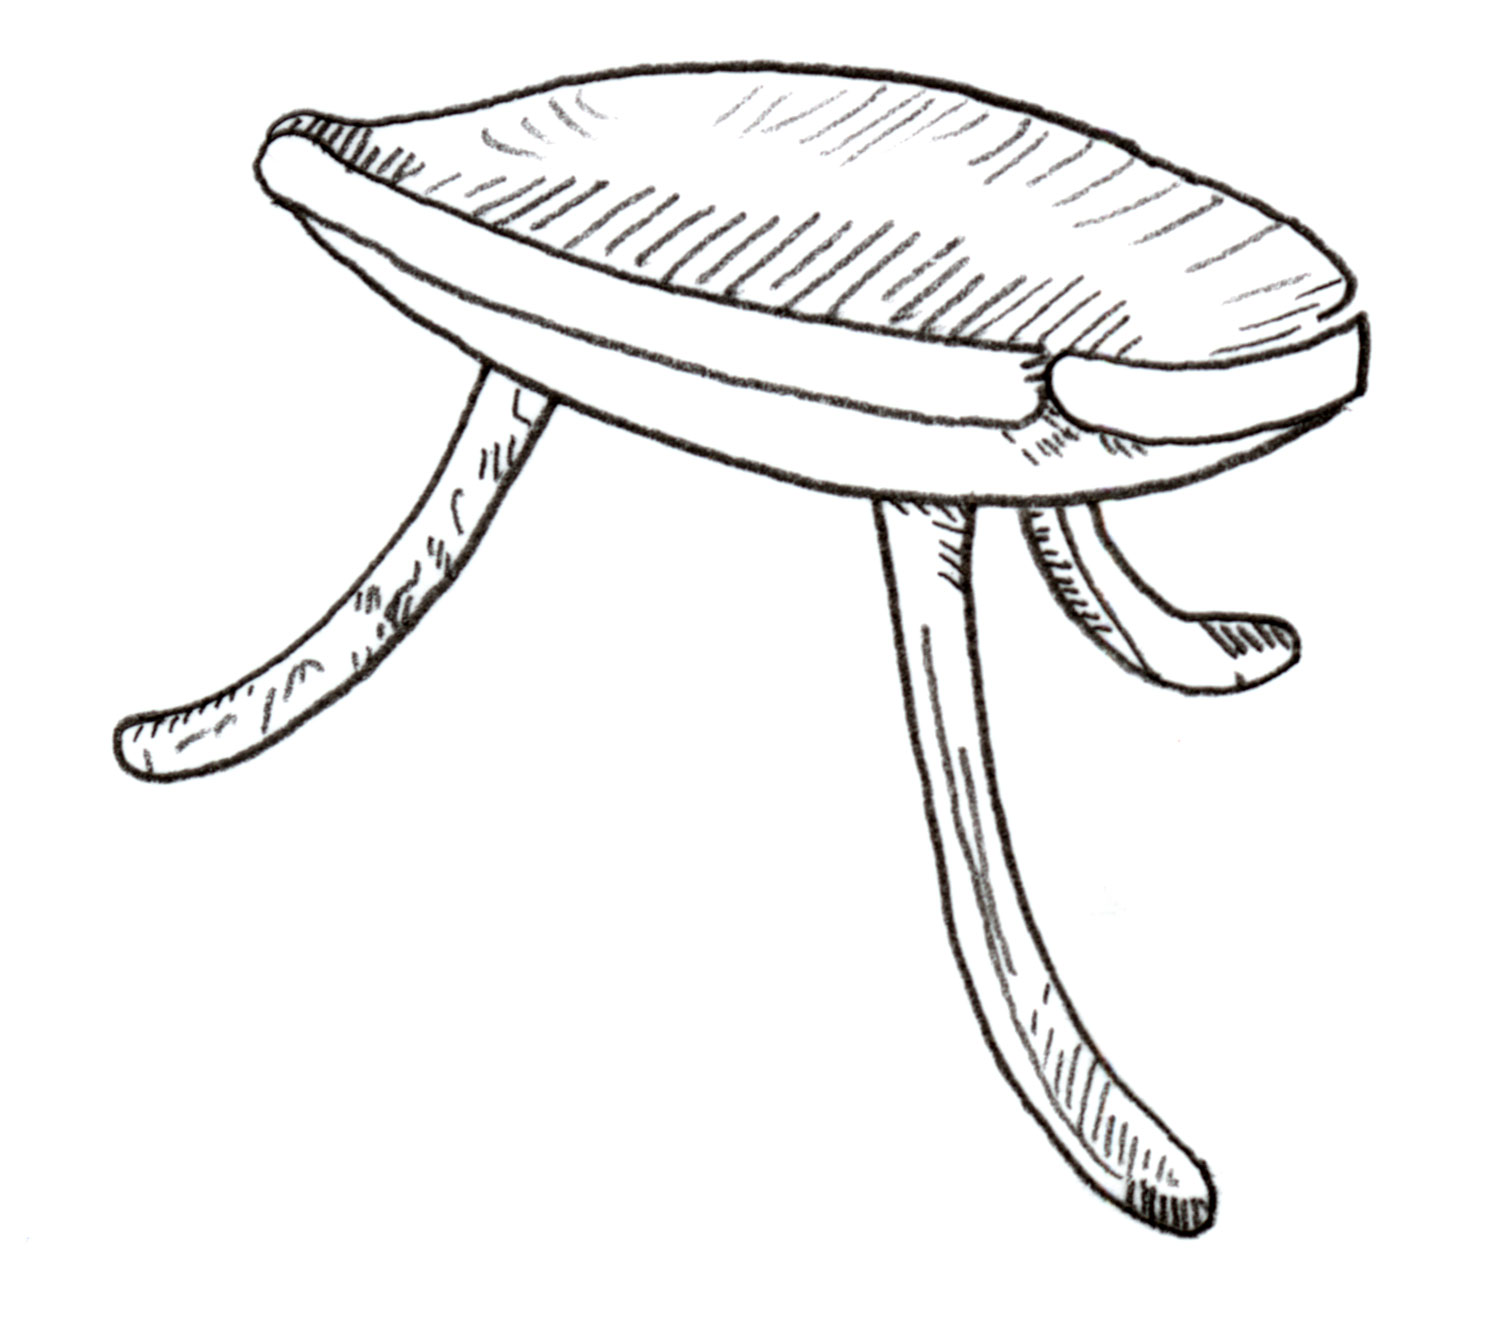
So let’s start at the beginning. Furniture where legs are tenoned into a plank – what is sometimes called “staked furniture” – goes back at least to the ancient Egyptians. Three-legged staked stools with beautifully curved legs and a saddled seat have been found at Thebes (1400 BCE). And the National Museums of Scotland has a similar one from the same time period.
A low stool from Thebes, Egypt. Found at the tomb of Kha, Eighteenth Dynasty. Note the curved legs and saddled seat.
Staked furniture of all kinds shows up in Western paintings and drawings through most of human history. Stools, benches and tables are the most common forms. So, the idea of putting sticks into a slab of wood is at least 3,400 years old.
What I’m interested in, of course, is this: When did people start making chairs this way?
The simple question is complicated a bit by language. The term “stool” can sometimes mean a “backstool,” which is a stool with a backrest that is a solid board or an array of sticks. Some people consider a backstool a “chair” and not a stool. So that clouds the timeline. Old writings that mention “stools” might actually mean “backstools” and those might be chair-like.
The earliest stick chair – legs, seat, arms and backrest – that I know of is from a Welsh book of laws that dates from the late 12th century or the middle 13th century. The book is the “Laws of Hywel Dda”; the chairs are drawn in a particular copy that was written in Latin instead of Welsh (this copy is referred to as the “Peniarth MS 28”).
The book is illustrated and has two images of important men sitting in chairs (one is at the beginning of this chapter). Both appear to be armchairs. Both chairs have tapered legs below the seat. One has sticks under its arms, and the other has four shapes below the arm. The shapes could be cut-outs in a solid plank. Or the shapes could be objects holding up the arm.
Also from “Laws of Hywel Dda,” this chair is slightly different. The structures under the arms might be cut-outs.
“Welsh Windsor chairs sounds to me like saying Welsh Scottish oatcakes, or Welsh Wexford glass” he wrote. “The chairs I am writing about are very definitely Welsh, and they are called stick chairs in Wales. They do, however, fulfil exactly the definition of what has come to be known, in Britain and the United States, as Windsor chairs. My judgement is to stay true to my original thoughts; only time will tell if I am mistaken.”
So if early stick chairs aren’t Windsors, where did Windsor chairs come from?
First, let’s dispense with the myth about the origins of Windsor chairs that gets repeated in popular culture.
“The most popular meaning stems from the story which describes how George III was caught in a rainstorm near Windsor,” writes Ivan G. Sparkes in “The English Country Chair” (1973). “Taking refuge in a cottage, His Highness sat on the best chair in the room and being well pleased with its comfort, required similar ones to be made for Windsor Castle. Unfortunately for this theory, the style existed and was so called long before the Georges came to the throne of England!”
Another (slightly more plausible) theory appears in “Popular Technology; or Professions and Trades. Hazen’s Panorama” (1846) by Edward Hazen.
“The Windsor chair seems to have been first used for a rural seat in the grounds about Windsor castle, England; whence its name. It was originally constructed of round wood, with the bark on; but the chair-makers soon began to make them of turned wood, for the common purposes of house-keeping.”
I do like that this theory hints that bark-on sticks played a part in the history of the Windsor and they were originally outdoor chairs.
In the last decade or so, historians have used probate inventories and paintings to present a clearer picture of the origin of the term. The best synopsis of the current thinking was published in Regional Furniture, Vol. XXIV, by Robert F. Parrott in 2010.
The most interesting part of the evidence are two inventories taken two years apart of the same household, one in 1721 and the other in 1723. The first inventory was for the husband who died of a stroke; in the listing of the equipment for the garden are “Forty eight Forrest Chairs.” Two years later there is another inventory, and in the section on garden equipment are listed 60 “Windsor” chairs. Presumably these are the same chairs, but the household has bought another dozen.
“Presumably therefore, the type of seat originally described as a ‘Forrest’ chair sometimes went under the alternative name of a ‘Windsor’ chair,” Parrott writes. “This, then, may be another reason why the early history of the Windsor has been so difficult to ascertain.”
A very early English chair from a private collection in the United States. Could these early chairs, which have no backsplat, be the “Forrest” chairs referred to in early 18th-century inventories?
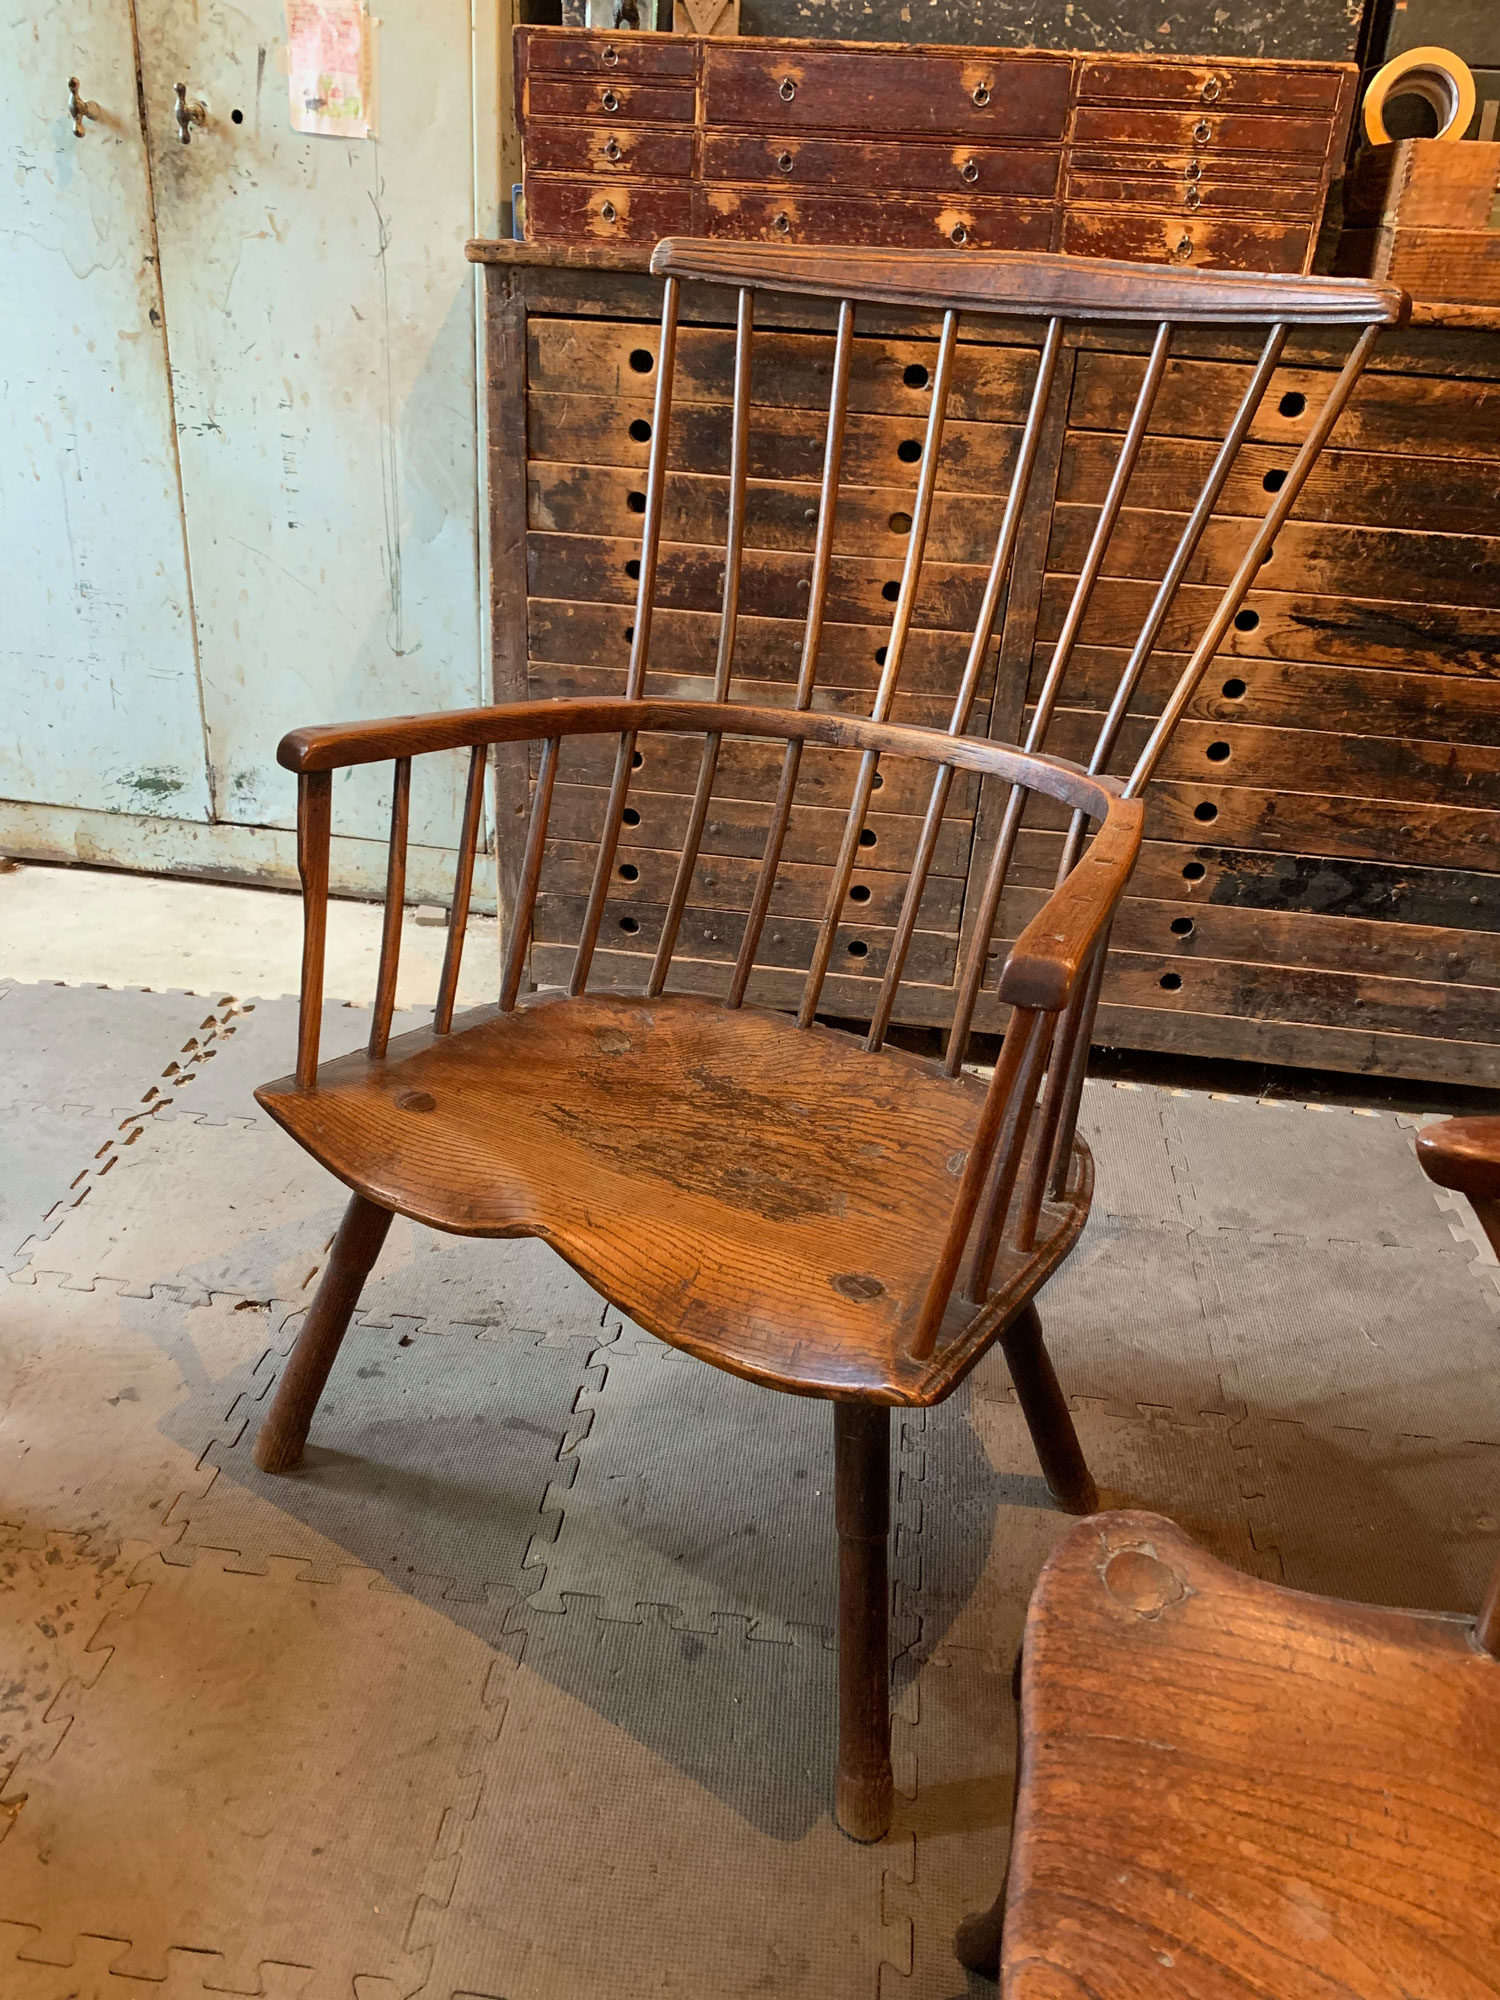
Forrest Chairs We don’t know exactly what these early chairs looked like, but we have some clues. Since the 1970s, several early chairs have shown up at auction houses, at the Victoria & Albert Museum and through some sleuthing. These chairs are far simpler than the typical later English Windsor and could be a stylistic link between stick chairs, Windsor chairs and American Windsor chairs.
These early chairs share many characteristics with stick chairs. There are no stretchers – the strut legs are simple turnings. There is no backsplat – a very common feature on English Windsors. And the ornamentation is incredibly restrained compared to later English Windsors. There is a simple scratched groove around the seat and the comb. The front posts under the arm have a little shape. But that’s about it for decoration.
As a maker of stick chairs, I contend these are the prettiest English Windsors I’ve ever seen. I am also struck by how much these early chairs resemble American comb-back Windsor chairs. It’s rare to see an American Windsor chair with a backsplat. And the rake and splay of the legs looks far more American than English.
It makes me wonder – and this is a bit of conjecture – if these early chairs inspired American makers.
John Brown also had some thoughts on this matter. He came to a slightly different conclusion.
“The oft repeated statement that American Windsors derive from the English chair could be in error,” Brown wrote. “For historical reasons, and because of similarities in design, there seems to be a more direct link between the Welsh chair and the American Windsor. Perhaps the English version is the cousin, and the Welsh chair is the father!”
So About that Name, ‘Windsor’
Once you know these chairs may have been called “Forrest” chairs, you have to wonder, why did the name switch to “Windsor?” Was it because the chairs were first made in a place named Windsor?
William Sergeant found evidence of the earliest-known maker of Windsor chairs in a village in Lincolnshire, which he discussed in a 2018 article in Regional Furniture. That maker, Joseph Newton of Fenton, placed an ad for “New-fashioned” Windsor chairs in July 1725.
Newton’s ad also mentions there are makers of these chairs in London. What’s important to know is that Newton’s shop was nowhere near Windsor Castle (it’s about 140 miles away).
Parrott and other historians have found connections between chairmaking activity near Windsor and where those articles went to London. But Parrott admits the link is still tenuous.
One possible theory for changing the name is that the term “Windsor” gave the form a royal flavor and is in line with the French naming furniture styles after kings (i.e. Louis XIV).
Or perhaps the name “Windsor” could have become popular first as an insult to the chairs, as Sparkes wrote in 1973.
“In the end I find myself agreeing with those writers who connect the origin of the name with the manufacture and sale of these chairs to the London dealers at the Windsor Market and along the main road from Windsor to London. For one can imagine the London chair dealers, used as they were to the finer mahogany and walnut products of the London workshops, referring in a derogatory way to the latest batch of beech chairs ‘up from Windsor’.”
Today the term “Windsor” gets applied to broad classes of furniture that have no connection to Windsor Castle. Or pieces that have nothing to do with the House of Windsor, which was founded in 1917, or the town of Windsor. It can be confusing. At times I fantasize about a world that has switched back to the earlier and more evocative name for this distinctly English chair: Forrest Chair.
The term “Forrest” is far more descriptive of how the chairs were initially were used: as a seat for the outdoors. And, unlike the word “Windsor,” the term “Forrest” describes without a doubt where the chair came from.
And so, in this book – as a bit of a lark – I will refer to “Windsor” chairs as “Forrest” chairs.
I am certain this will catch on everywhere – just like Esperanto.
Figure 4.1. Local color. Keep your eyes open when in museums. Thanks to Suzanne Ellison’s sharp eye, this painting provided an important clue about the use of notches in workbenches. And the painting happened to be right up the road from me in Indianapolis.
The following is from “Ingenious Mechanicks,” by Christopher Schwarz – this excerpt from Chapter IV, by Suzanne Ellison.
Tracing the history of workbenches takes one into the realm of Greek myth, along ancient trade routes, through the harshness of secular and religious empire-building and the glories of golden ages in arts, science and literature. There are many frustrations in the great gaps in the records, and regret over the loss of civilizations, languages and traditions. But the one thing that never disappoints, and alleviates the frustration and regret, is the wonder of human ingenuity.
The research for this topic began in 2014 when Christopher Schwarz asked me to translate an 18th-century description of the fresco from Herculaneum. I picked up the Herculaneum trail again in 2016 to search for contemporary accounts of the excavations and also 19th-century accounts of the condition of the fresco. Here and there, in other research, a low Roman workbench would turn up, but the majority of the images Chris uses in this book, and the workbenches discussed in this chapter, were found in June through September of 2017.
I primarily used publicly available image and text databases maintained by museums, universities, photographic archives, auction houses, academic journals and papers, and used search terms in seven languages. Occasionally, I contacted an archivist or academic researcher, and (with few exceptions) they were more than willing to offer assistance. A conservative estimate of the number of images viewed last summer is 8,000 to 10,000, with images from the Spanish Colonial era contributing about a third of the total.
Verifying the geographic origins of the artwork was the starting point to connecting commonalities in history and development of workbenches with distinctive features.
In the last couple years more public and private museums and universities have collaborated to put collections and other resources online. As we get more access there will be many more discoveries to be made, and I expect the gaps in our timeline will be filled. You may find, as Chris did, a missing piece in the puzzle is in a museum near you.
The Earliest Discoveries: 1st-15th Centuries As Chris and I unearthed examples of the low Roman-style workbenches, there was an emphasis on dating the benches and thinking in terms of a timeline, especially a timeline of innovations. Thanks to my father’s brilliant idea of handing me a map to track our family trips, and to keep me quiet on those trips, I started thinking in terms of maps. I had a workbench-discovery map developing in my head. Date, and place, would become important in solving some of the questions about the technology and the quirky features we found.
Low and higher workbenches and shaving horses are seen in flat outline in Roman funerary iconography, but for our purposes we start with four benches depicted in more dimension and detail. The first four low benches date up to the Roman Empire in the second century. Three are from the heart of the Empire: an engraving of a fresco from Herculaneum; a fresco depicting the myth of Daedalus and Queen Pasiphae from Pompeii; and a piece of decorated Roman glass found in catacombs. The fourth find, and the only extant benches, are the two from Saalburg, the frontier fort on the Limes Germanicus in the Roman province of Raetia. The Saalburg benches had the added interest of puzzling notches, a mystery that was solved, we think, by a Spanish painting executed more than 1,500 years later.
After a gap of six centuries in our record I found an 8th-century fresco of a carpenter working while sitting astride a low bench. The fresco was in an Umayyad bath house in the desert at Qusayr Amra (present-day Jordan), in a region once part of the Roman Empire. The bath house follows a Roman plan and the fresco is one of several “portraits” of the craftsmen who built the structure. After another six-century gap, five benches show up in 14th-century Spain and Italy. The Spanish bench is from Teruel Cathedral in the Aragon province of Zaragoza. Two decades before Qusayr Amra was built, the Umayyad led the Muslim invasion of Spain. In Teruel, Mudejar craftsmen (Muslims who remained in Spain after the Reconquista) built the cathedral and are depicted in portraits similar to those in Qusayr Amra. The Mudejar woodworkers were using low Roman workbenches. Of the Italian benches, one is from a Sephardic manuscript and three are scenes from the construction of Noah’s ark.
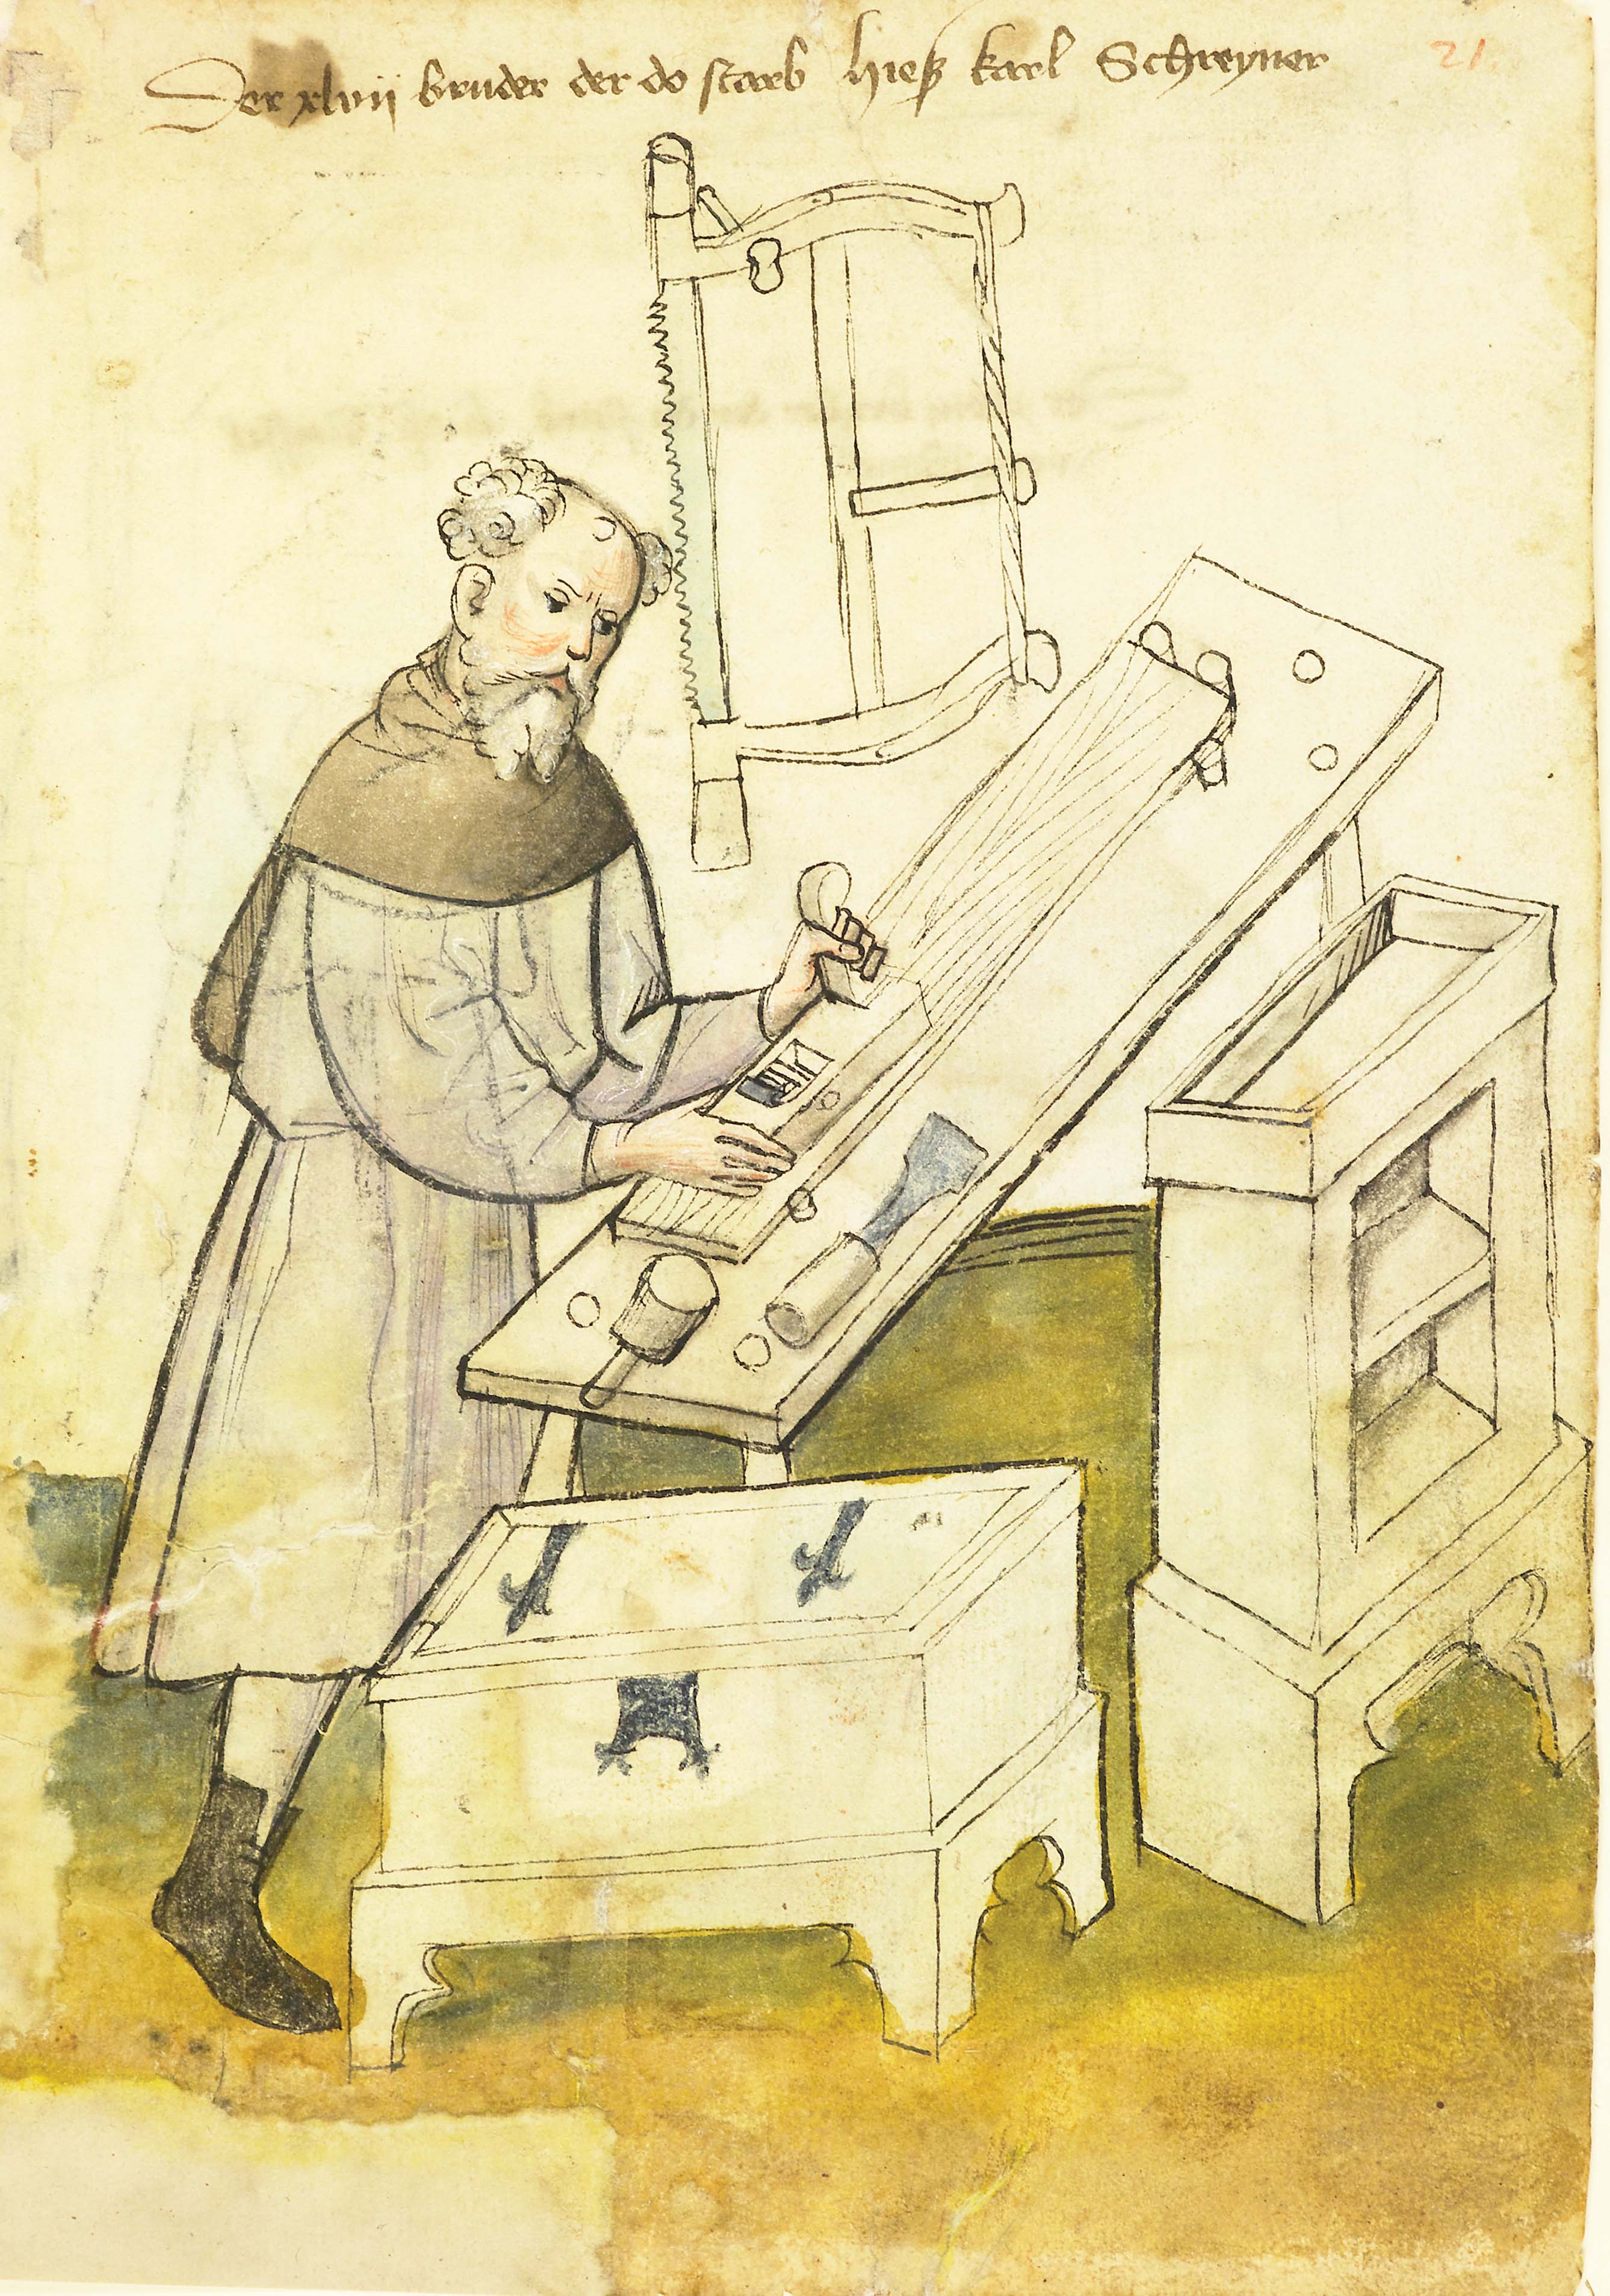
Clever Nürnbergers. The city of Nürnberg proved to be a rich source of early woodworking imagry, including this 15th-century portrait of Karl Schreyner and his ingenious pegs. Stadtbibliothek Nürnberg, Amb.317.2°, f.21r.
In the 15th century, low benches are depicted in Flemish and French paintings of the Holy Family, and in two books from southwest Germany and central Italy. Karl Schreyner, a woodworker in Nürnberg from about 1425, is one of the woodworkers in “The Mendel and Landauer Hausbücher.” In 1485, a woodworker and his bench are on the cover of a novella published in Florence. Both are notable because they are not religious images.
Each time there is a large gap in the image record, huge societal shifts were at work. In the 2nd and 3rd centuries, the Roman Empire was weakened by plague outbreaks that caused troop shortages and disrupted food production. During the 3rd century, there was a 50-year-long crisis that saw the Empire split into three warring parts. The devastation of wars and plague led to population shifts and, despite a reunification late in the century, there were cities in the western part of Europe that never recovered. In the 3rd and 4th centuries, the Empire struggled to keep control over its vast territories. And by the conclusion of the 5th century, the Roman Empire in Western Europe and the age of Classical Antiquity was at an end.
With the advent of the Early Middle Ages, Western Europe splintered into small kingdoms and city states. In the East, the surviving portion of the Roman Empire attempted to retake Italy and other areas lost to invading tribes. It was, to say the least, a time of great social and economic upheaval, and not every invading or land-grabbing group put record-keeping at the forefront. Artwork from the time does include scenes of woodworking, usually of a Biblical theme, rendered in manuscripts, frescoes, tapestries and mosaics. Representations of the construction of Noah’s ark have yielded a few low workbenches. To Chris’s delight, a series of benches in an early 14th-century Northern Italian manuscript have full face vises.
Two things to consider concerning the lack of image records from the last centuries of the Roman Empire and through the Middle Ages are: Who commissioned the art and who controlled what could be made? In other words: Who had the money and who had the power? The answer: wealthy landowners and the Catholic Church. For the wealthy, a nice selection of art might include portraits to exhibit the richness of your garments and jewels, illuminations for your Book of Hours and tapestries illustrating scenes from the Bible (and to keep out the cold). The Church commissioned frescoes to teach illiterate parishioners lessons from the Bible and the life of Christ. The civic authorities of a city state might commission artwork illustrating themes of good government and portraits of city luminaries. Artwork featuring woodworkers and other craftsmen, all of the low end of the social and economic scales, was not desirable.
How the artwork was made also figures into what survived. Manuscripts and paintings were easy to move to safety, or be looted then saved. Frescoes can be incredibly durable, but given the great age of any work created in this time period they are, nevertheless, fragile. Add in questionable conservation methods and the countless wars and conflicts extending well into the 20th century, and it is remarkable we have anything left to ponder and appreciate.
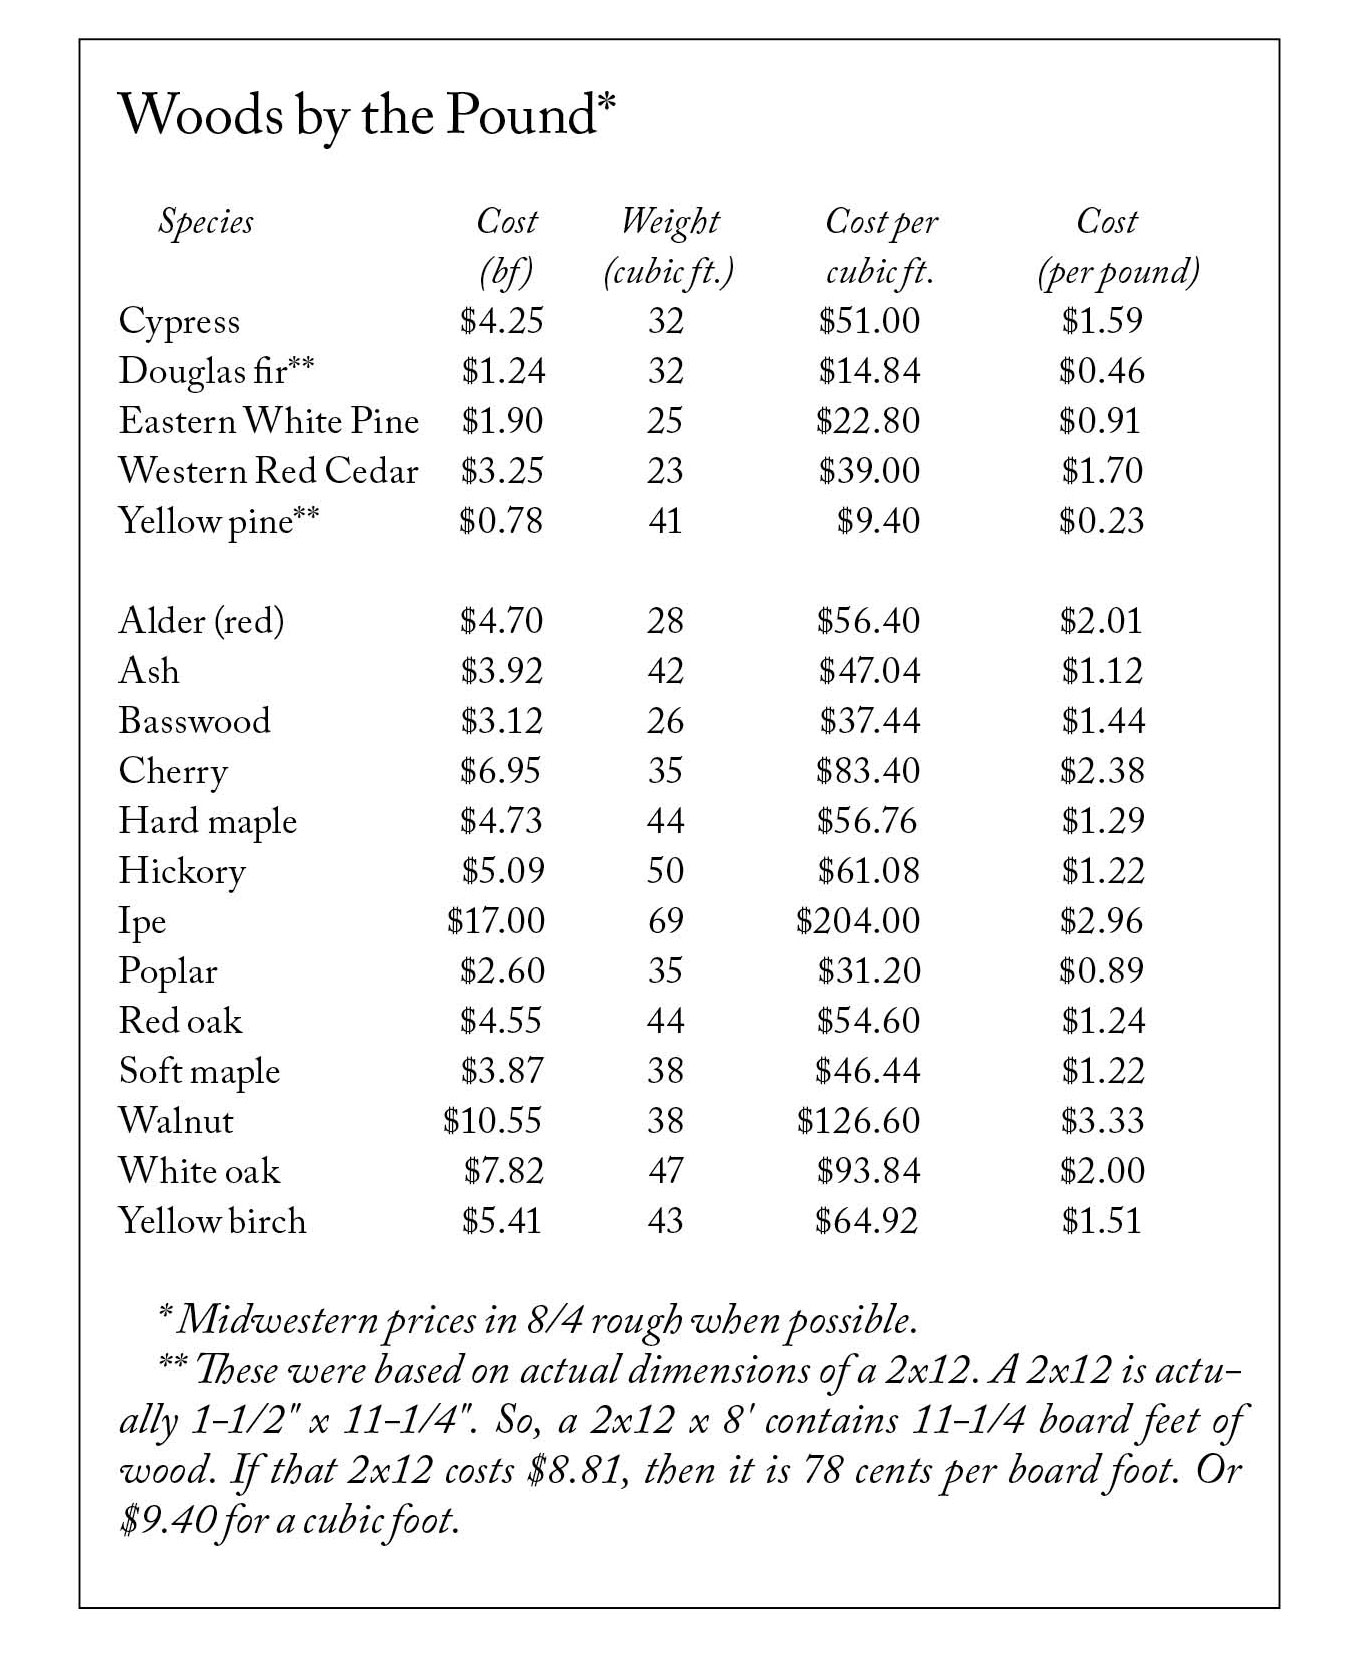
Editor’s note: The following is an excerpt from “The Anarchist’s Workbench,” which you can download for free here. This excerpt discusses one way to choose wood for your workbench: its cost per pound.
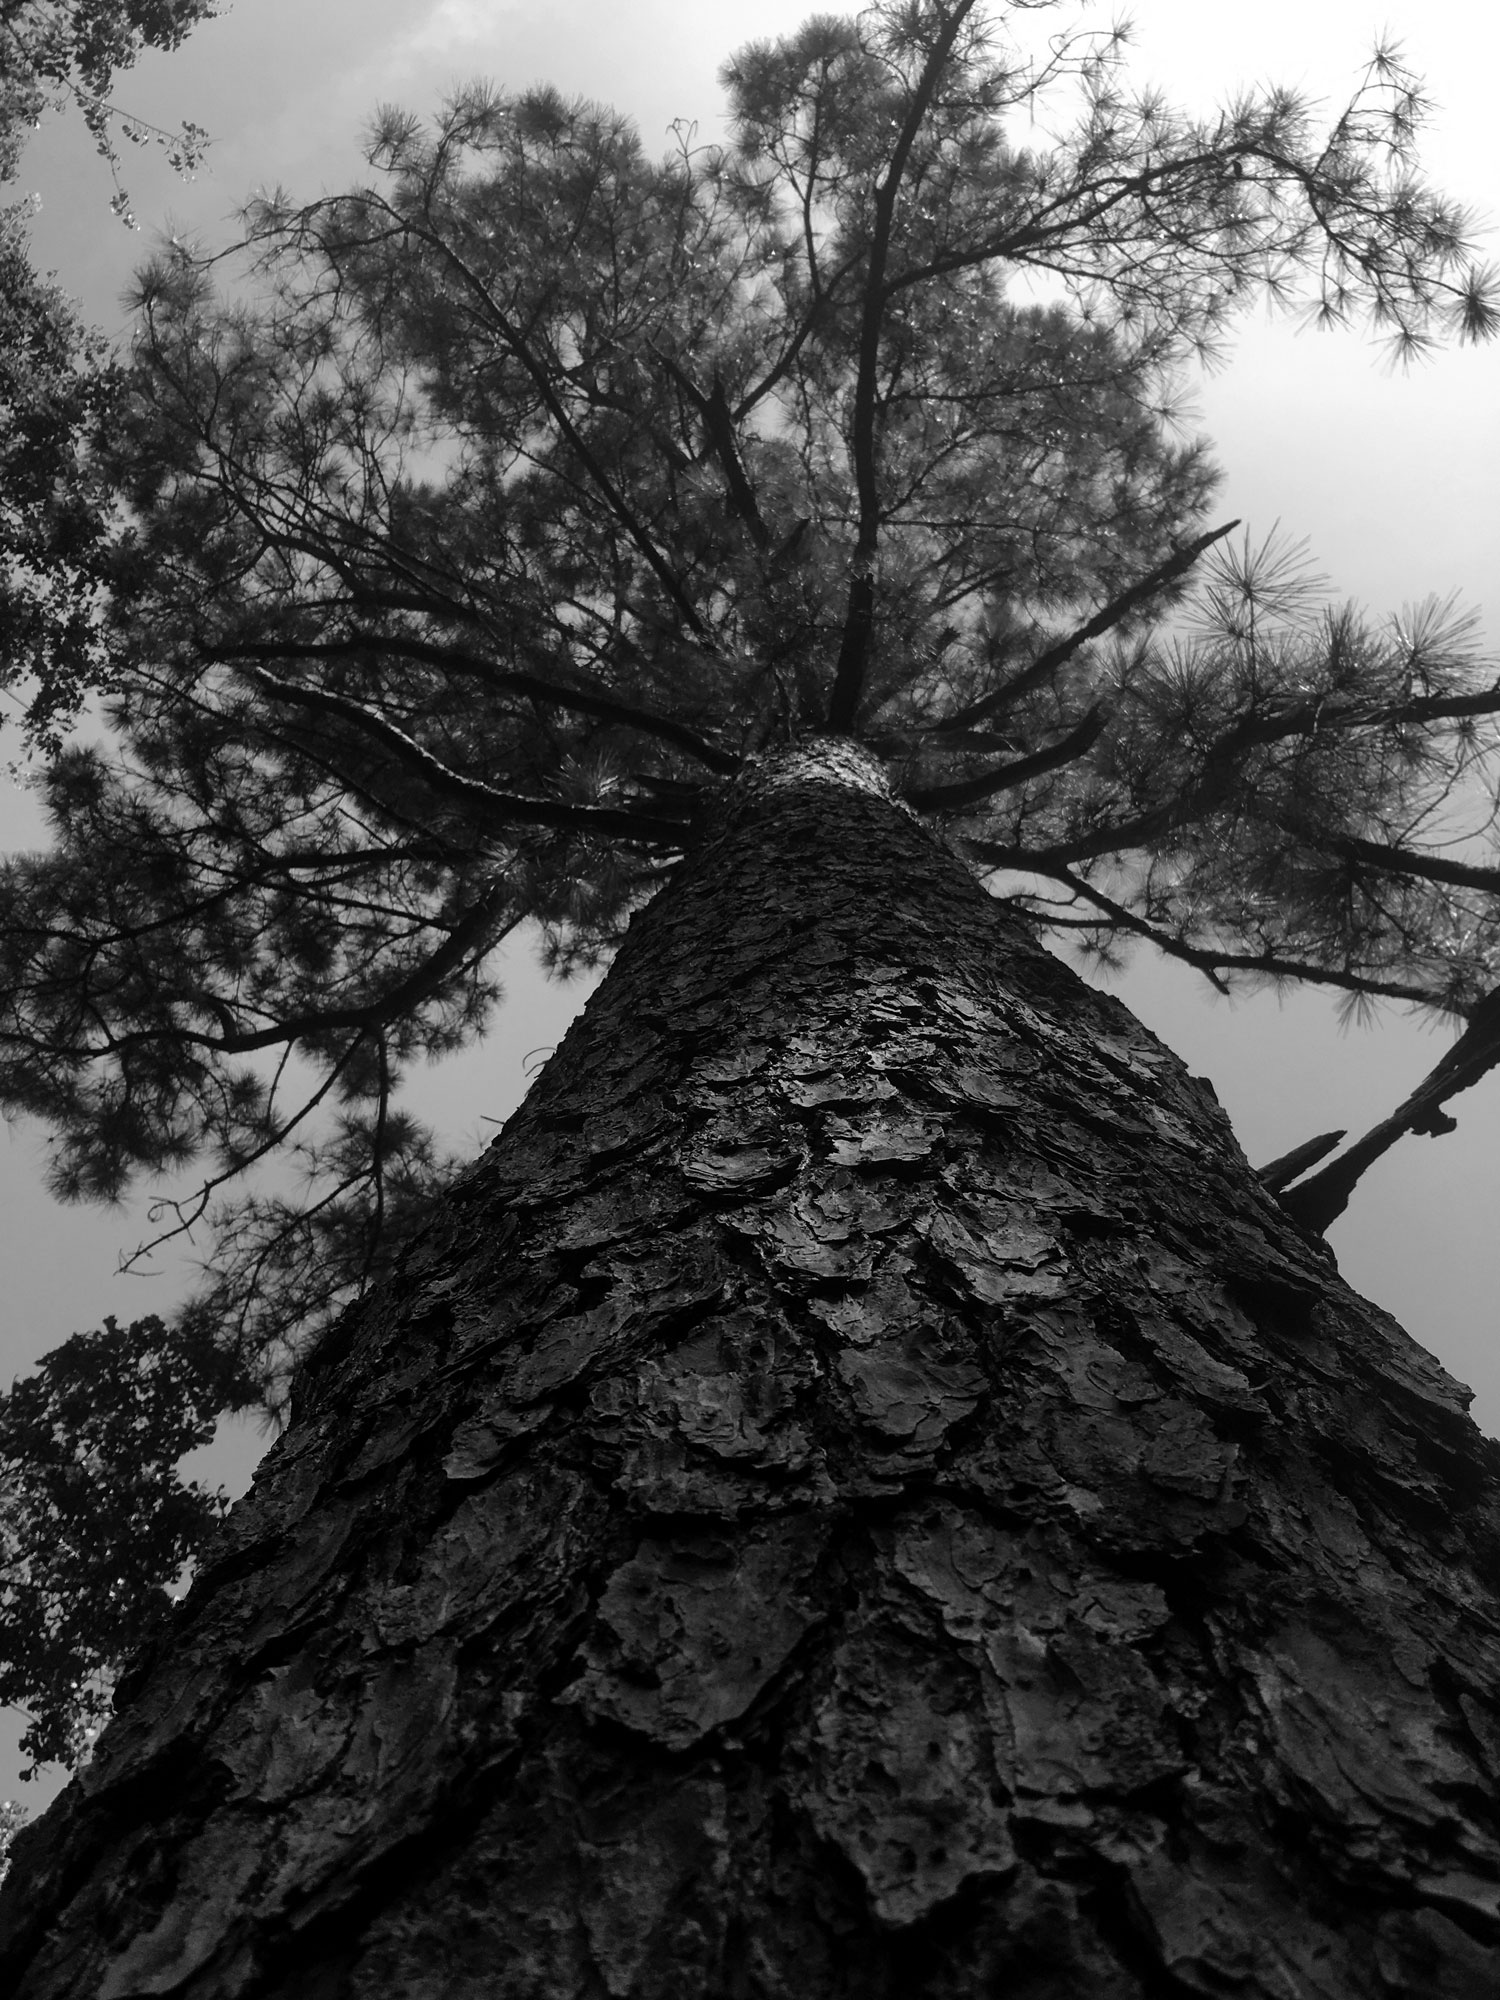
Yellow pine, Hot Springs, Ark. After years of working with yellow pine on our Arkansas farm, I convinced myself it was an ideal wood for a workbench.
Let’s Talk About Weight When you compare the weights of species, you need to make sure the comparisons are all at the same moisture content (12 percent is the typical comparison unit). You can compare the density of a species by comparing its “specific gravity,” which is a method that compares the weight to a cubic meter of water. Or you can look at the average dried weight of a cubic foot of the wood (also at 12 percent moisture content).
These are useful, but I think you can also make some important comparisons by factoring in the local price of a species. It’s like buying meat at the butcher. Is rib eye ritzier than hamburger? The price per pound helps us answer that question (and yes, it is).
For example, a cubic foot of hard maple consists of 12 board feet of maple. If maple is $4.73 a board foot, then a cubic foot of maple costs $56.76. That cubic foot weighs 44 lbs. Or $1.29/pound.
Longleaf pine (a yellow pine) is 78 cents a board foot (for No. 1 grade), so a cubic foot costs $9.40. That cubic foot weighs 41 lbs. Or a remarkably cheap 23 cents per pound.
Because I live to poke fun at Ipe, let’s run those numbers. Ipe costs $17 a board foot, so a cubic foot costs $204. That cubic foot weighs 69 lbs. So Ipe is $2.96/pound. Not a great deal at the wood butcher’s.
The chart compares some of the common U.S. hardwoods and softwoods using typical Midwestern retail prices circa 2020 (this is not wholesale or trade pricing). This cost-per-pound calculation is simple to do yourself using your local prices.
Here’s how: Take your cost per board foot (use 8/4 prices) and multiply that by 12. That’s the cost for a cubic foot. Now divide that number by the weight of a cubic foot of that species (a statistic that is easily found in books and online). The result is the cost per pound.
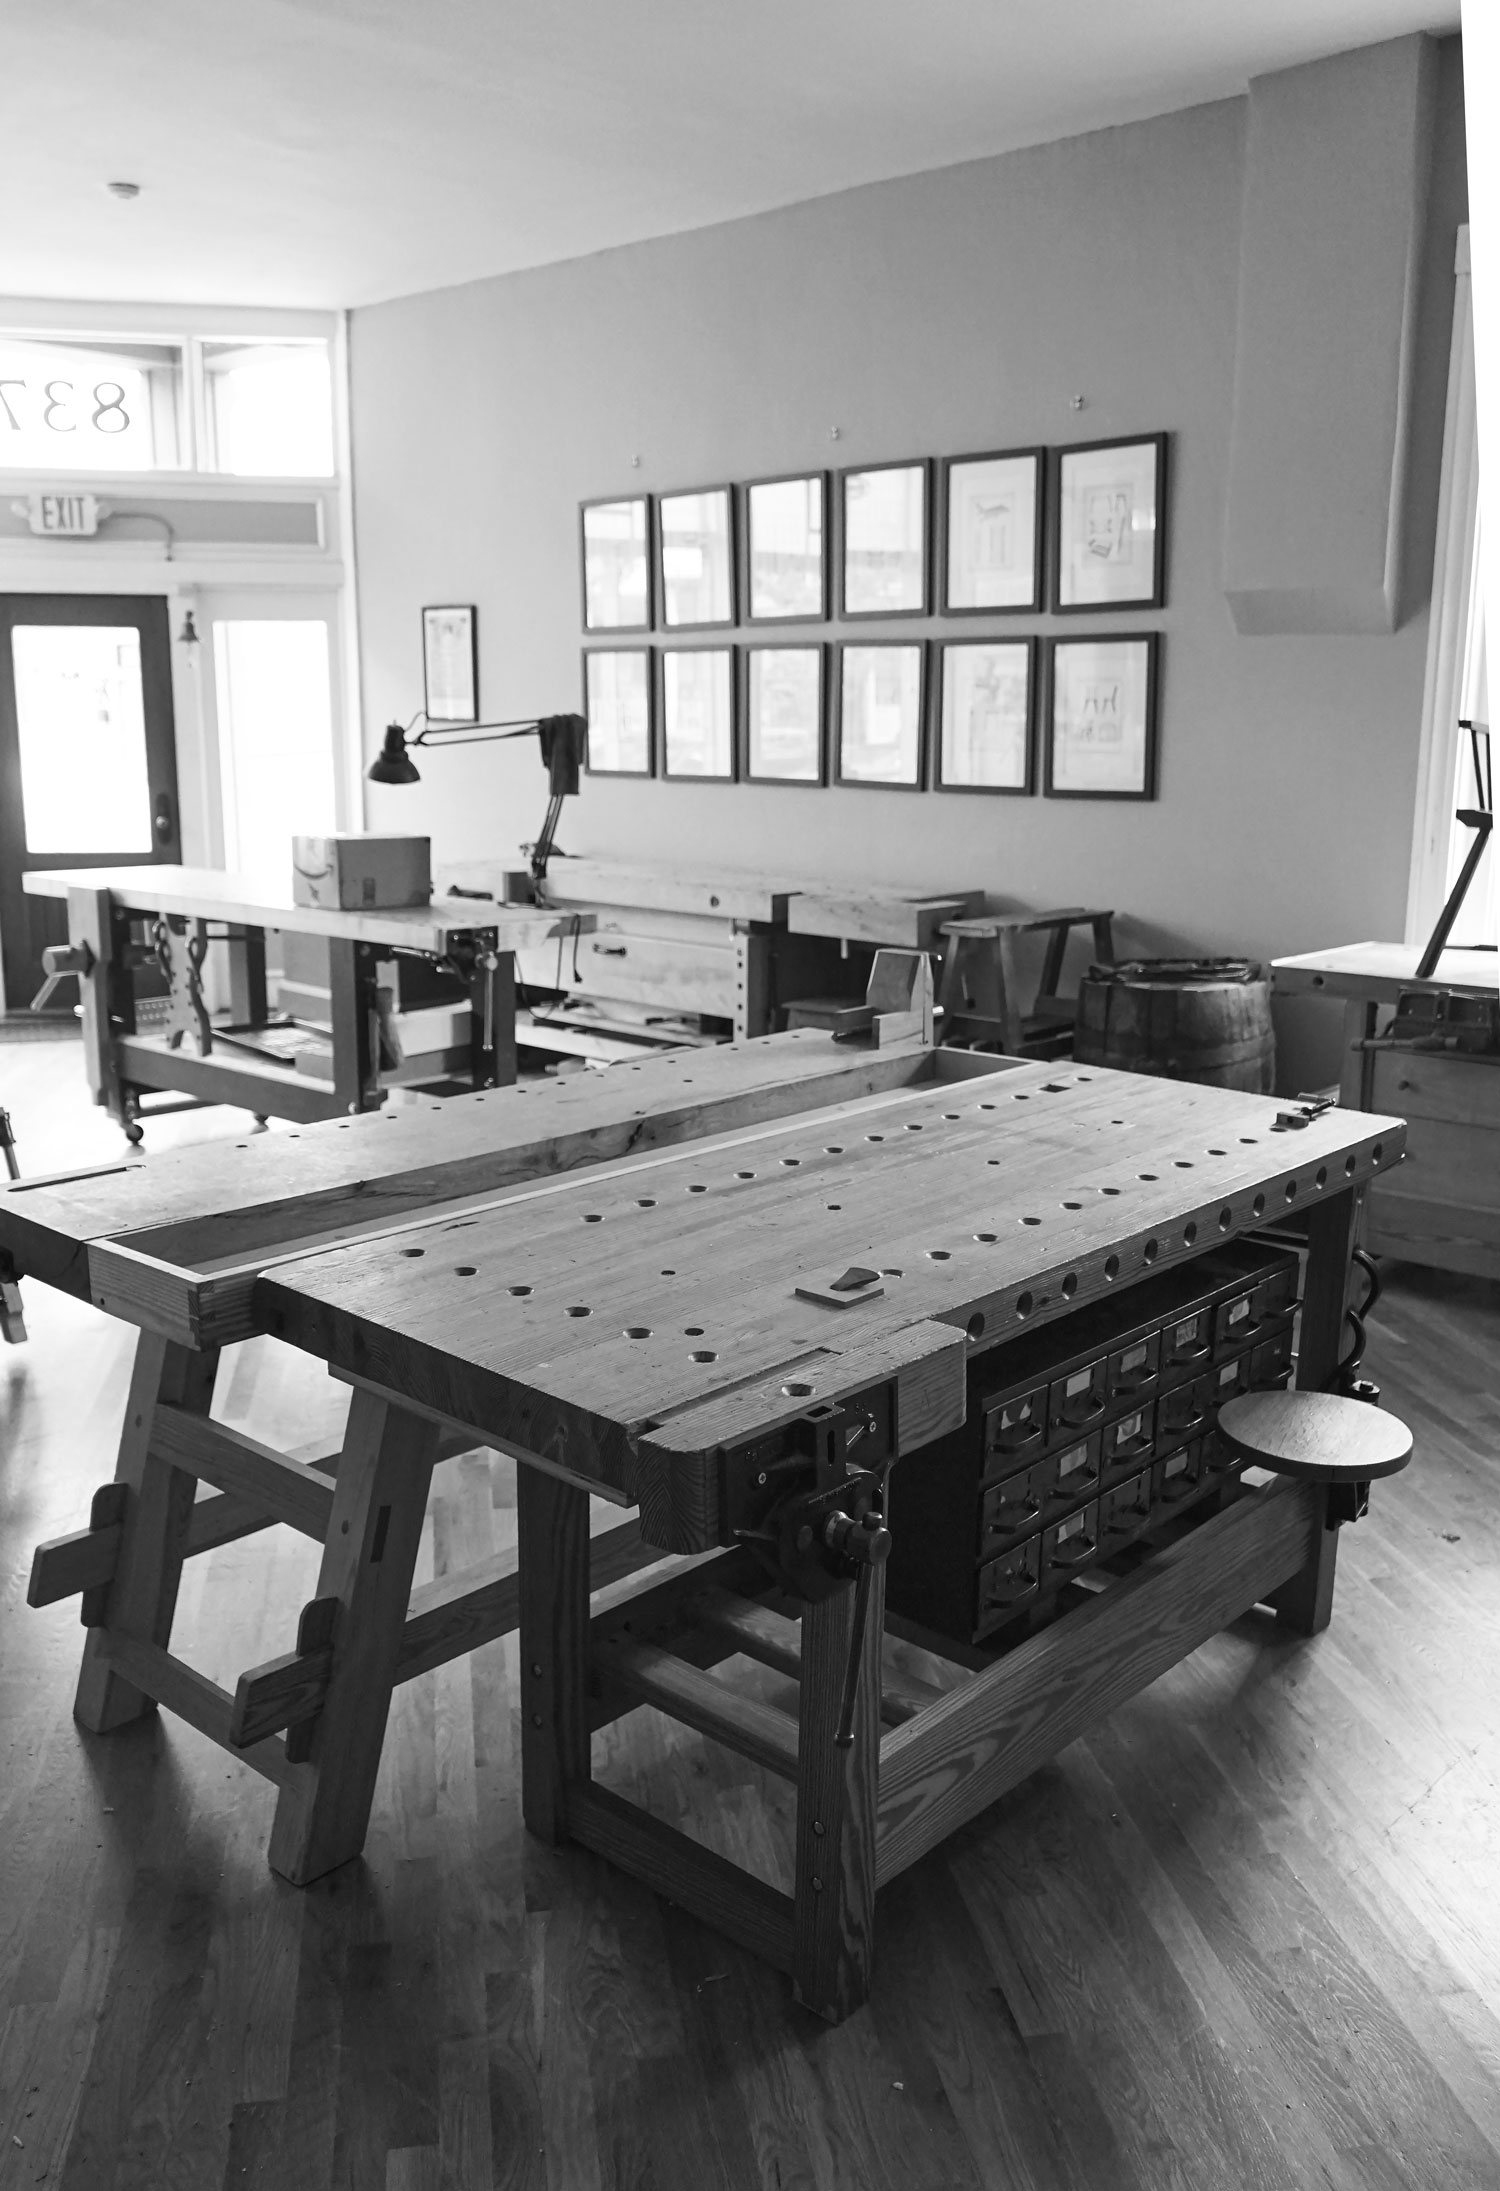
$175 workbench after 20 years of use, 2020 The yellow pine in this workbench is now about as hard as maple and moves little with the seasons.
Do the Math From the chart, ash looks like a good choice among the hardwoods. The problem with that assessment is that by the time you are reading this book, white ash might be almost extinct. The emerald ash borer has devastated the ash forests in the United States. So, you might not be able to buy it at any price. And if you do find it, you want to ensure it hasn’t rotted. We have been plagued by punky ash for the last few years as the sawyers have milled up trees that have been standing dead.
Aside from ash, poplar and the maples are a great bang for the buck. Both are easy to work, readily available and fairly cheap by the pound. I’ve made workbenches using all three species and think they’re fine. Neither is considered a noble species for a workbench, like European beech. But as long as you aren’t out to impress anyone, go for it. You’ll have no problem finding those species at almost any lumberyard in America.
But if you want to go full redneck, read on.
Softwoods that are used for structural members in home construction – the yellow pines, Douglas fir, hemlock and some spruces – are an outstanding value. They are heavy, cheap and readily available at any lumberyard. After working with them most of my life in residential construction and workbench building, they remain my No. 1 choice for workbenches.
Here’s why: Anyone can buy it. You don’t have to search out a specialty lumberyard or set up a commercial account. Just go to the home center if you want (though I always prefer family lumberyards). They have plenty.
Also important: They have plenty. A typical home center or family lumberyard will have hundreds of planks of 2x material in the racks on any given day – everything from 2x6s to 2x12s – with lengths from 8′ to 16′. At a home center, you can spend hours sifting through the racks to find the best boards – the employees don’t care. At a family lumberyard it pays to ask permission (they will sometimes be happy to help you). Either way, just be sure to restack the lumber nicer than you found it.
Here’s another buying tip: Some lumberyard chains carry No. 2 yellow pine, others carry No. 1. The price difference is minimal, but the quality isn’t. No. 1 is worth the extra nickels. If you find a yard that deals in No. 1, you might be able to buy all the wood for your bench in one swoop. If you buy No. 2, you might have to hit all the yards in your town, county or region.
Yellow pine is easy to work. I’ve built yellow pine workbenches using only hand tools, and using a full-on machine shop. It’s friendly stuff. Yes, there can be some knots, but if you pick your boards with care, you’ll have almost none of those to deal with.
So there must be disadvantages. Yes, but they are slight. Construction lumber is sold in a wetter state than hardwood lumber.
While hardwoods are typically sold at about 12 percent moisture content (or at equilibrium with some environment) that is not the case with construction lumber. It is wetter.
How wet? In the Midwest it might be 15-20 percent moisture content. On the West Coast, it might be even wetter (as in wet enough to ooze and squirt water). So, you need to gather up what you need to build your bench, cut it to rough length, stack it and wait a bit.
It might also be “case hardened” because it was kiln dried too quickly. When lumber is rushed through a kiln it can develop tension that is released when you cut it. It’s particularly obvious when you rip a board. Sometimes the wood will pinch so hard on a blade it will stop a 3-horsepower table saw like pinching out a candle.
How do you deal with this? It’s not difficult.
Plan to cut things a bit over-wide. And have some wooden wedges handy to keep the kerf open when you rip the wood. After that first rip, a case-hardened board will usually lose all of its fight.
Make your rip cut to a shallow depth at first – less than half the thickness of the board. Then raise the blade, flip the board end-over-end and finish the rip.
The final disadvantage: Softwoods are uber-redneck. No one is going to “ooh and ahh” over your choice of yellow pine. It’s the mullet of the forest.
The True Cost of Yellow Pine per Pound I’m not a trusting soul. After I calculated the cost of yellow pine per pound (23 cents) based on published statistics, I decided to see if that worked in the real world. So, I weighed several 2x12x8s and came up with an average weight of 30.4 pounds each.
These were boards I’d had in my shop for months, so they had likely lost some of their water weight (as all softwoods do). Plus, the boards in this particular pile were fairly average – not full of sap or with lots of heavy summerwood. In other words, they were a bit on the lightweight side.
Each of these boards cost $8.81 each, so that’s 29 cents per pound – about 6 cents per pound more expensive than the published weight tables indicate. But still a great deal.
I wondered, how did that work out after surfacing the boards and gluing them up? What was the cost per pound of “finished” yellow pine?
Here’s how I calculated that. The benchtop for the workbench at the end of this book is made from nine 2x12s, ripped in half, glued up and planed so the top is 5″ thick. Nine 2×12 x 8s cost $79.29. After gluing up the top, I managed to weigh it on a heavy-duty scale we use for shipping crates. The top weighed 240 pounds. That’s 33 cents per pound. Still a bargain (if you ask me).