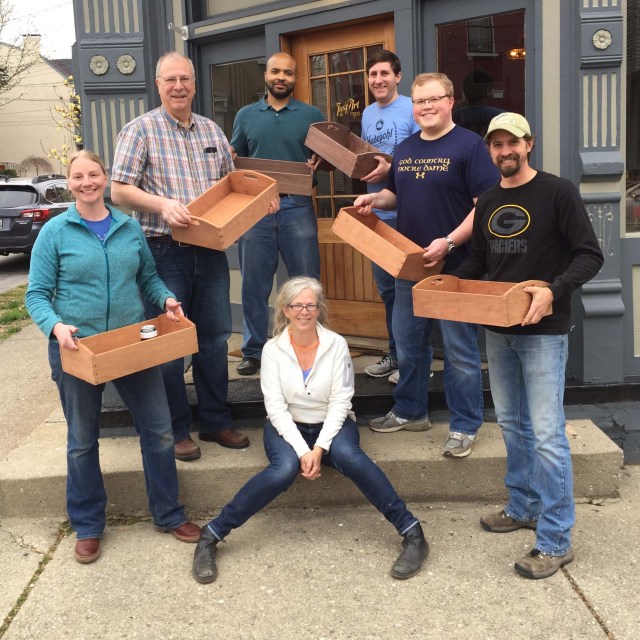
Spend a weekend in October cutting dovetails with me (Megan Fitzpatrick) in gorgeous central Kentucky at the Woodworking School at Pine Croft (with luck, the trees surrounding the school will be a riot of fall color by then!).
It’s a two-day class – Oct. 14 & 15 – in making a classic Shaker silverware tray, with gently arced ends, handholds and, of course, dovetails. And speaking of Shakers – if you’re in the area, why not also plan a day at Shaker Village at Pleasant Hill.
In the class, you’ll learn:
Dovetail layout with dividers
How to cut the joints, aiming to “fit off the saw”
How to wield a coping or fret saw
How to pare and chop to a line with a chisel
Strategies for transferring the tails to the pin board
Techniques for fitting the joint
How to lay out then cut and fair the handles (both the hand holds and the curved top edge)
How to smooth-plane your surfaces
How to use cut nails (to secure the bottom board…if you wish – but there’s an argument for leaving it loose)
And of course, how to put it all together (and why I recommend liquid hide glue).
At the request of readers, we have created a way for you to donate to help fund the two scholarship classes we are holding at Lost Art Press this fall.
In September, we are holding our second Chairmakers Toolbox class with six students. All students are from populations that are underrepresented in woodworking, including women, people of color and those who are gay, bi, trans or otherwise outsiders.
In November, Jerome Bias will lead a class of six African-American woodworkers as they build a blanket chest using hand tools.
I am picking up the tab for the wood and all the lunches during the classes. If you would like to donate to help with the wood or meals, simply click on this link, where you can make a donation with a credit card or with your PayPal account.
You will be able to designate which class the money goes to support, if that’s important to you.
I know that some of you have also mentioned donating tools for Jerome’s class. I’ll talk to Jerome about it and see if we can come up with a mechanism.
Thank you for your understanding and your generosity.
We are thrilled to announce that we will offer a scholarship class this fall for six African-American woodworkers that will be taught by our long-time friend and hand-tool woodworker Jerome Bias.
The class will run from Nov. 27 to Dec. 1, 2023, at our storefront in Covington, Ky. The scholarships include tuition, materials and lunch every day. All African Americans are encouraged to apply: men, women, straight, gay, beginners, intermediates, whatever. No previous woodworking experience is necessary. Just a passion for learning the craft.
During the five-day class, Jerome will show students how to build a six-board chest using hand tools, white pine and traditional tapered nails. The chests can be personalized with different mouldings and details on the feet. These chests are fantastic as blanket chests at the foot of a bed or for storing hand tools in a workshop.
But just as important as the chest, students will learn to wield handplanes, chisels, hammers and handsaws – the core tools of a trade shared by many of our ancestors.
Jerome is a talented woodworker, chef and interpreter living in North Carolina. In addition to building furniture, Jerome has worked as an interpreter at Old Salem Museum and Gardens and has studied the life and work of 19th-century African American woodworker Thomas Day. He has also presented his work at Colonial Williamsburg and regularly travels to former plantations to cook traditional meals as a way to enable African American visitors to connect with how their ancestors expressed hope and love while still enslaved.
Applying for the scholarship is easy. Simply send an email to: scholarship@lostartpress.com by Sept. 15, 2023. In the email, please let us know:
Your name and where you live.
A few sentences about any woodworking experience you’ve had so far.
A few sentences about why you want to attend this class.
We have room for six students in this class. Jerome will select the students from the pool of applicants. As mentioned above, the class includes tuition, materials and lunches during the class. Students will be responsible for travel to Covington and lodging – we are happy to help suggest places that fit your budget.
And don’t worry if you don’t have a lot of tools. We will be able to loan students the essential tools for the class.
Finally, please share this post with any African-American woodworker (or wanna-be woodworker) you know. We want to cast as wide a net as possible.
— Christopher Schwarz
P.S. Whenever we offer scholarships for woodworkers who have been traditionally excluded from the craft, we often hear the cry: Why not offer scholarships based on need? Our answer: We already do that. All of my teaching outside of my shop (Florida School of Woodwork; Marc Adams School of Woodworking) goes to fund need-based scholarships at those schools. I teach for free; all the money goes to scholarship funds. During my career, I have contributed tens of thousands of dollars to the Roger Cliffe Memorial Foundation, which supplies woodworking scholarships for veterans and people who face financial hardship. So please, before you take a swing at us, please know that we seek to help anyone get into the craft. These scholarships are just one of the ways we do it.
Chris Williams is visiting from Wales this summer to teach two Welsh comb-back chair classes in our shop. Session 1 is June 5-9; Session 2 is June 12-16. Registration opens for both today (March 15, 2023) at 9 a.m. eastern on our ticketing site.
Sometimes students ask what they can do to prepare for a class in handwork at our storefront. In the past, I’ve told students to sharpen their tools and try to read up on the project or the topic we’re covering in the class.
But I don’t think that’s enough. I’ve been teaching woodworking for almost 20 years, and I’ve watched students who succeed versus those who struggle. Here are some suggestions to consider if you have a class coming up with us or any other hand-tool instructor.
Get in Shape a Bit
This recommendation is for hand-tool classes only. When I have taught machine-based classes, it’s not as much of a factor. During a week-long handwork class, a fair number of people are exhausted by Wednesday evening. And the last two days are difficult – sometimes uncomfortable.
Though we emphasize conserving your energy and show ways to sit down while you work (Roman-style), students are on their feet a lot. If you are a mouse-worker in an office, standing for eight hours in a day can wear you out.
So, wear the most comfortable, lightweight shoes you own (fashion is a low priority here). Plus clothes that move easily (gusseted pants and shirts work with you; not against you). And to prepare for the standing, we recommend getting in decent cardio-vascular shape. That is as easy as taking a 30-40 minute walk each day. This will work wonders for your ability to stand at the bench for the long hours.
Diet
Forget your weight-loss diet during the class. You need energy. We have a lot of students who skip breakfast and/or lunch and are absolutely spent by 3 p.m. You need protein and carbs to do the work. It doesn’t have to be junk food. But you need to eat.
Upper Body
We emphasize using your core as much as possible in handwork. But your arms need to be in decent shape to assist with planing and sawing tasks. The best exercise for this is – shocking – planing and sawing. (More on this in a moment.) But if you can’t practice in the shop, try some beginning strength training. You can find many simple tutorials on the internet for this.
Practical Practice
Depending on the class you are taking, I recommend some different exercises to try in the week leading up to the class. If you are taking a class on chairmaking or staked furniture, there is a lot of planing. I mean, a LOT of planing.
There is a point at which you learn how to “ride the bevel” of a coarse tool, which greatly reduces the effort required to plane a stick or taper a leg. This is not something you can teach through words. It’s something you have to figure out yourself.
When smooth planing or jointing work, there is a lot of downward pressure required to end up with straight edges and flat boards. With chairmaking the goal is to use minimal downward pressure because you might take 60 or 70 strokes to shape a spindle. So you have to feel where the cutting edge of the tool is, put it to work and try to get the sole out of the equation as much as possible.
Scratching your head? Here’s how to start the process of finding that magic moment.
Take a 3/4” x 3/4” x ~15” stick of straight-grained hardwood. Place a small stop in your face vise. Press the end of the stick against the stop with your off hand. Plane the stick with a block plane set for a rank cut.
Try to make the stick into a dowel. After it’s round, use taper cuts to make it into a magic wand with a pointy tip as quickly as you can. Plane fast. Skew the tool. Try to find a place where the cutting edge is the only thing contacting the work. (It’s not possible, but it’s the goal.)
Do a stick like this each night for a week before class, and you will ace my class.
Also, learn how a cordless drill works – especially the clutch and speed settings and how they interact with the torque of the drill.
Saw to Success
Megan’s classes on casework joinery involve a lot of sawing and chopping. Most people seem to struggle with the sawing. Frank Klausz had a straightforward solution to prepare a student to cut dovetails for the first time: 100 lines.
Draw 50 lines that slope to the right (like one side of a dovetail) across the end of the board. Scribe in a 3/4” baseline. Then saw right next to those 50 lines, one after the other. Try to do each one a little better and faster. When done, saw off all those kerfs. Now draw 50 lines the slope to the left, put in a baseline and saw those.
This accomplishes a few things, some of them not obvious.
First, beginners usually own a new saw with freshly filed teeth. These teeth are grabby and difficult to start. About 100 kerfs helps break in the saw.
Many beginners have difficulty starting the kerf. Doing 100 lines one after the other rapidly (it takes less than an hour) teaches you to take the weight of the saw off the teeth when starting. I like to tell students that they should almost hover the teeth over the wood as they begin to push forward.
And the 100 kerfs help you fall into a comfortable sawing stance. Figuring out where your feet should be, how your sawing arm should swing free and that the work should be level to your elbow. Oh and stop trying to choke the saw to death (not a euphemism).
I’m sure I could come up with more exercises, but I’d worry that I’d scare you off. But these simple things will definitely make your week (or weekend) here a lot more rewarding.