The first time I met Frank Klausz we were both demonstrating at a woodworking show outside Philadelphia. I was flattening boards by hand with a panel plane when Frank walked up, snatched the plane off my bench and walked away.
I stood there like a slack-jawed mouth-breather for a few moments, and then tried to finish up my demonstration.
About 20 minutes later, Frank returned to my bench with my plane. He had taken it apart and polished some corrosion off the chipbreaker. He had eased the sharp corners of the iron with some sandpaper. And he had wiped the entire body with a light coat of oil.
“A craftsman takes care of his tools,” Frank said with a serious look on his face. “No rust. No sap.” Then he gave me a great big smile and walked back to his bench.
That day was a turning point in my relationship with my tools. I stopped looking at them as just a chunk of something that held a pointy bit. Instead, they were something to be cared for, like a pet or a child. Every part of the tool became important, not just the cutter.
Why am I telling you this? Since May I have been on a marathon streak of teaching, and I have dealt with the tools of almost 100 hand-tool woodworkers. And I’ve spent a lot of time removing corrosion, oiling adjustment mechanisms and scraping crud off chipbreakers.
And so here is my brief guide to the care and feeding of tools.
1. Own the fewest number of tools possible. The fewer tools you have, the easier it is to keep them in good shape. Think of tools as cats. Do you really want to be the lady down the street with 63 cats and all the problems that 63 cats have?
2. Have some permanent tool-care products. Get a bottle of oil (any non-drying vegetable oil or light machine oil will do). A rag (I use a micro-fiber cloth, but an old sock is also good). A rust eraser (you need only one – the medium grit is fine). A paint brush for cleaning out the escapements of your planes. An old awl for dislodging fossilized gunk from corners. An old toothbrush for cleaning crap off threads.
3. Every time you take a brief break from your work, wipe the soles of your planes and remove any dust from the escapement and under the bevel. Wipe the dust and pitch off your chisels and saws. Clear any shavings from the mouths of your moulding planes.
4. When you are done for the day, break down your planes. Take apart the iron and chipbreaker, de-crud them and wipe them down. Clean out the mouth of the tool with your brush. Make sure the sole of the plane is clean and undamaged. File or sand off any dings. With your chisels and saws, wipe off all the sap and dust before you put them away. Same goes with your knives, awls, dividers – anything that’s ferrous.
5. Every month or so, oil the adjustment mechanisms of your tools. Students are always amazed at what a drop of oil on the threads can do to improve the way their tools work.
6. Store your tools so they won’t get coated in dust. A tool chest, wall cabinet or Tupperware will do.
7. If you are overwhelmed by all this, go back and read tip No. 1. Or bundle up your naked body in an old housecoat and haul the 50-pound bag of cat food out to fill the buckets on the front porch.
Anyone who has been to my shop knows that I have a deep affection for the handplanes made by Wayne Anderson. His planes perform as well as any I have ever used – no matter the price – and his aesthetic matches mine.
Wayne’s planes are inspired by the gorgeous work of the past, but he doesn’t copy old designs, and he never seems to make the same plane twice.
I first became aware of Wayne’s work about 10 years ago through the Mid-West Tool Collectors Association, and I followed it closely until I had the guts to meet him at a tool meet in 2004. After seeing his work in person, I placed an order for an improved miter with an ebony infill.
That tool was the first of several planes that I’ve asked him to build for me. They are, without a doubt, the most gorgeous things I own.
Because of my former position at Popular Woodworking Magazine and my many blabberings about handplanes, I get asked the following question every week or two: Are infill planes worth the money?
The answer is difficult. I can make a Lie-Nielsen, Veritas, Clifton or vintage Stanley plane perform as well as an infill. But infill planes have a set of characteristics unique only to them that I like. For example, my favorite infill is short (5-5/8” long x 1-7/8” wide), coffin-shaped, has a high-pitched iron (60°) with no chipbreaker or blade adjuster. In other words, it’s a lot like an old wooden plane. But unlike a wooden plane, it has significant mass and a steel sole that never needs to be trued.
It is far more comfortable to hold than a No. 2-sized Bailey plane. And its mass isn’t so significant that it feels like you are pushing a collapsed star across your bench. It weight 2 lbs. 2 oz., which is between the Lie-Nielsen Nos. 1 and 2. It’s perfect for my style of general furniture work.
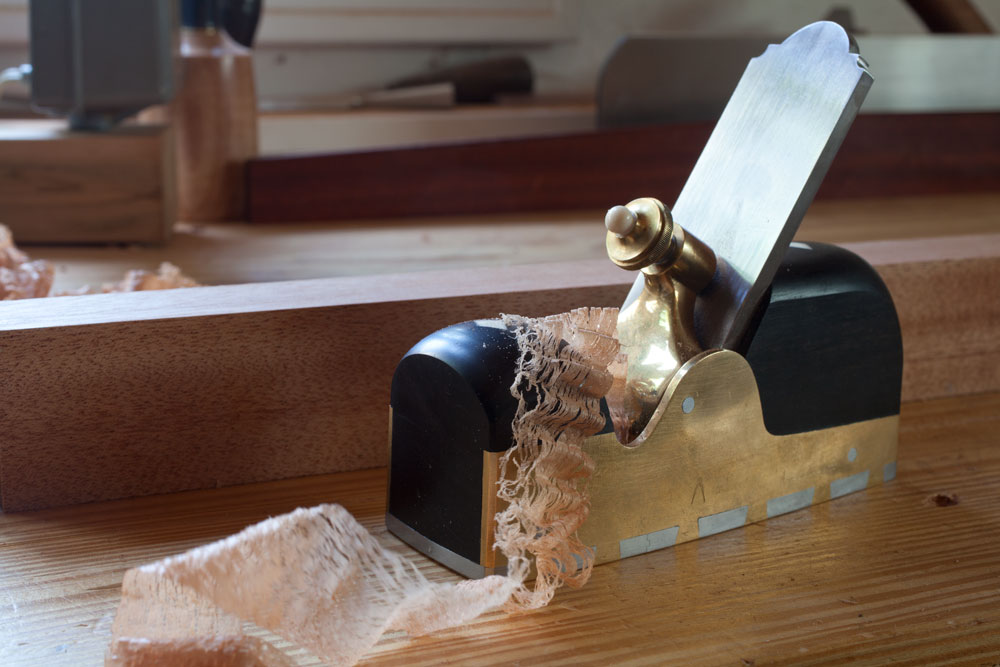
The plane I’m describing is a small ebony-infilled plane that Anderson made for me in 2006. I call this my “plane of last resort” because it just refuses to leave tear-out in its wake, no matter how sharp or dull the tool is.
In fact, the tool needs to come with a warning label. If you pick it up and use it, you will want one. Just ask Megan Fitzpatrick or any of my students who have casually picked it out of my tool chest. Larry Williams of Old Street Tool calls this phenomenon “Infill Disease.” Larry is fully recovered from the affliction. I, however, am not.
So yes, having an infill in your tool chest is a nice thing. Plus, regardless of how it performs, it’s nice to own something handmade – a feeling that many woodworkers, my family and customers share.
As those of you who have read “The Anarchist’s Tool Chest” know, I sold off or gave away most of my tools a couple summers ago, and the infills I had collected for review in Popular Woodworking and The Fine Tool Journal were no exception. Those tools are now in the hands and tool chests of good friends and comrades.
But there are a couple infills that I would never even consider parting with. One is the small smoother from Wayne. The other is a small boxwood miter from Raney Nelson.
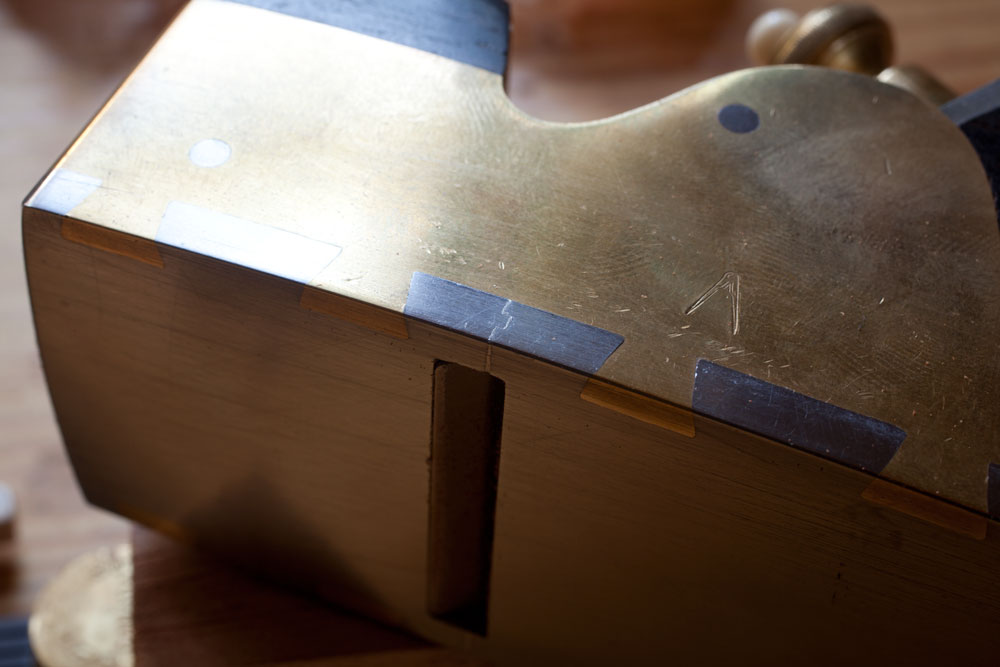
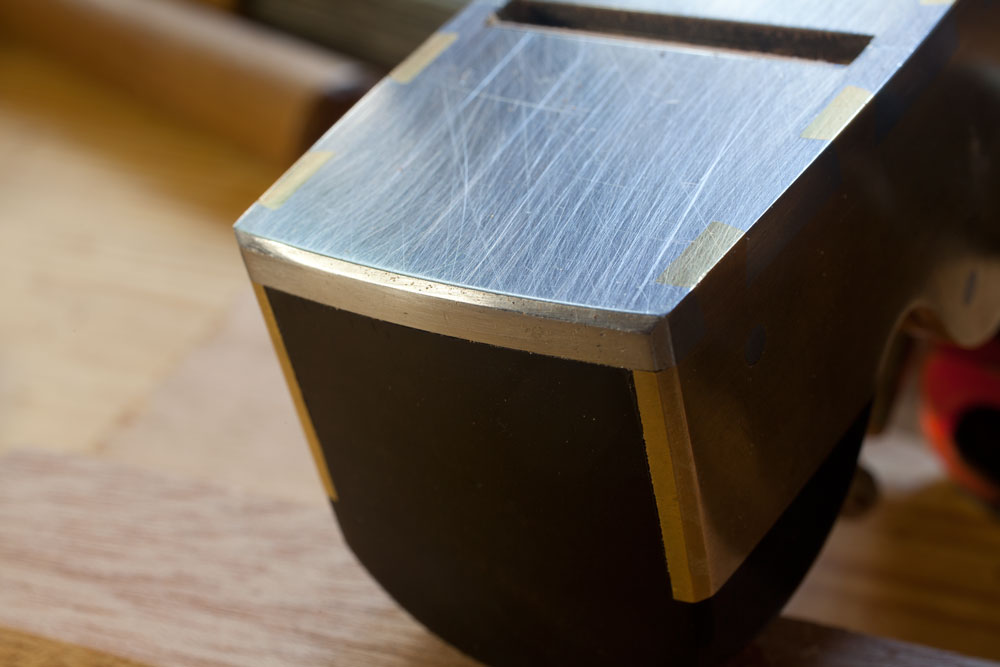
What is it about this smoother that makes me so attached to it? Well, beyond its size and perfect weight, it’s the details that Wayne pours into every tool. The mouth of the tool is made in two pieces, like an infill miter plane, which ensured that the plane’s throat aperture is just slightly bigger than the shavings. Also, Wayne files a small (1/16” x 1/16”) bevel on the front edge of the sole. This is a modification I make to my own planes, through with much less precision and style. The bevel protects the sole from damage when you run into something hard (nail, knot etc.). The bevel takes the damage and – generally – prevents the damage from then scarring your work.
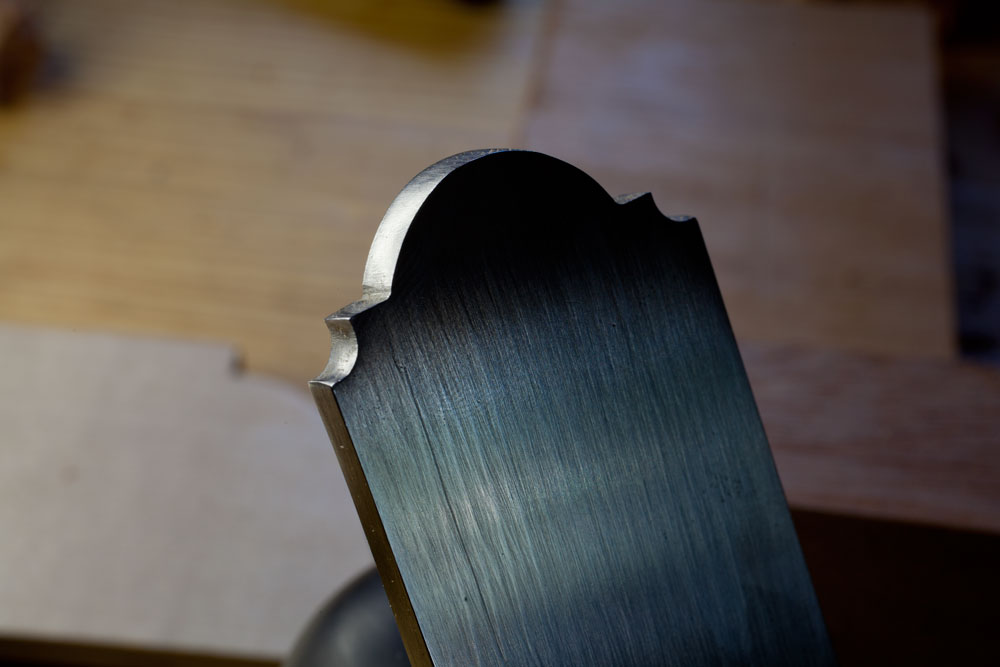
But beyond these functional characteristics, the tool is just a joy to look at and use. The tombstone shape of the top of the 1-1/2”-wide iron. The perfectly pillowed ebony infills. The lines of the sidewalls, lever cap and ivory nipple (there’s no other word I’m afraid) on the screw.
I also like the patina the tool has developed during the last six years. I was actually a little ticked off when a photographer burnished off the patina a few years ago to make it look shiny and new. I had to start over.
In any case, I had a long-overdue chat with Wayne last week about some web-site stuff and he mentioned that his lead times have dwindled this year significantly. While you used to have to wait two years for Wayne to get to your tool, he’s now only about a month out on orders.
So if you’ve ever wanted a Wayne Anderson plane, now is a great time. Drop him an e-mail at wayne@andersonplanes.com.
You might have to get in line behind me. My conversation with Wayne reminded me that I was going to get him to build me a Roman-style plane to test a few theories I have about early Western woodworking.
If you read this blog, you probably are are interested in hand tools. And if you are at the beginning of your journey, this blog entry is for you.
Popular Woodworking Magazine commissioned me to make a series of 10 to-the-point videos about hand tools that try to strip away the confusion so you can get to work with a basic set of hand tools and a minimum amount of agony.
The series is called “Mastering Hand Tools: Basic Skills for Balanced Woodworking,” and it will be available both on DVD through ShopWoodworking.com and through ShopClass on Demand, the magazine’s streaming video service.
The DVD version is on sale right now before it is released on April 16. You can save $5 by clicking here. You’ll pay only $19.99.
If you want to watch the videos now, you can get a subscription to Shop Class on Demand. If you act today (Sunday, April 1), you’ll get a half-price deal that gives you six months of unlimited access to all the videos on ShopClass (and there are a lot of good ones) for $24.99. Click here to read up on the details. They also offer a free trial subscription if you aren’t ready to commit.
They’ve posted a couple of the segments from this “Mastering Hand Tools” series on ShopClass so far and I am told a new video will appear every other week until all 10 segments are up.
I am quite pleased with how this series came out. Though I really dislike being on camera, the crew put me at ease and the videos have a casual feel like being in a one-on-one class – but they are all concise so you get what you need without a lot of blather.
So what are all the segments about? Here’s a list of what we filmed.
1. Why Learn Hand Tools? While some of this might seem obvious to those who already use them, the benefits of mastering hand tools for a power tool woodworker are sometimes surprising. They can be more accurate and faster than power tool equipment.
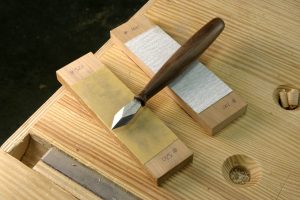
2. Knives, Marking Gauges and Cutting Gauges: The most important hand tool isn’t the saw, plane or chisel. It’s the marking knife or cutting gauge. These are the tools that guide your saw, chisels and planes. If you can mark a clear line with these tools, you will find it easy to work down to those lines.
Picking the right marking tool can be daunting. What are the differences between a marking gauge and a cutting gauge? What’s a panel gauge? Do you really need a mortise gauge?
And when it comes to marking knives, most woodworkers get quite confused. Do you need a single-bevel knife? A double-bevel? A spear-point knife? How thick? How long? The choices can be overwhelming.
In this video, we explain what is important when it comes to marking tools. We show you how to adjust any tool so it makes the kind of line that hand tools need. It’s not hard – you just need to think like a saw, plane or chisel.
3. Handsaws: Where to Start, How to Saw and How to Become a Maestro: No matter how much you love your table saw, there are times that it is neither the safe nor smart option. For example: Knocking down rough stock in a parking lot, cutting short stock to length or cutting fine dovetails.
However, if you are smart, you can get into handsaws with only two inexpensive saws that will never need sharpening and will fool your friends at Colonial WIlliamsburg into thinking you are a handsaw maestro. The trick is to pick the right (cheap) saws and know the insider tricks.
This video will show you how to do lots of work with an inexpensive dozuki and Sharpoint saw. You’ll learn the 10 mistakes that most sawyers make and how to track a line every time (it doesn’t take years of practice). Once you have mastered these two saws, we’ll explore the traditional kit of five saws (two handsaws and three backsaws) and what these five saws can do for you if you decide to go deeper into the topic.
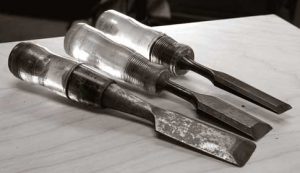
4. Chisels: Basic Sharpening, Paring and Chopping & Mallets: Sharp chisels make woodworking easier. They square out routed corners, they chop out waste and they can pare plugs flush with your work. But modern sets of chisels can cost as much as $250. Then you have to buy the sharpening stones (another $200) and learn how to sharpen.
What if we could show you how to take two home center chisels, some sandpaper from your shop and a $10 jig and be set for life? It’s true. You don’t have to get a PhD in metallurgy or sell a kidney to have the sharpest chisels in the city.
Once you have these two chisel sharp, we’ll show you the right way to chop and pare with these tools – chisels are the most dangerous hand tool, period. You’ll also learn about the most important tools that work with your chisels: the mallet. Learn the differences between the round- and square-headed varieties and what weight you should choose for your work.
5. Rasps: Shaping Curves and Cabrioles: Cabriole legs look intimidating, and sculptural forms (think Maloof rocker) look impossible if you are a fan of plunge routers instead of rasps. But the truth of the matter is that you don’t need a whole tool roll of rasps and carving tools to make shapely curves.
Instead, you just need one inexpensive tool – that never needs to be sharpened – and know the basic strokes to turn out cabriole legs and compound shapes with ease. Once you master this Shinto rasp, we’ll explore the traditional rasp kit of the hand-tool woodworker, including cabinet rasps, modelling rasps and rattails.
We’ll look at the difference between machine-made and handmade rasps and why it is usually worth the extra money to buy the better tool.
6. Card Scrapers & Scraper Planes: No matter how awesome your planer and jointer are, there are going to be small areas of torn grain that will resist your every effort to remove them. Card scrapers are the secret weapon in the war against tear-out. The problem is that sharpening them seems to require a lifetime of experience or some crazy jig.
We show you how to sharpen this essential tool with a file, a block of wood, some sandpaper and a burnisher. You’ll be making wispy shavings and tear-out-free surfaces in one afternoon. Plus you will learn how to prevent your thumbs from burning using a trick from your refridgerator (seriously).
Once you can sharpen a card scraper, you also can apply that knowledge to a cabinet scraper, which is an inexpensive and highly effective scraper plane. We’ll show the basics of using this tool, which can save your thumbs if you have a lot of scraping to do.
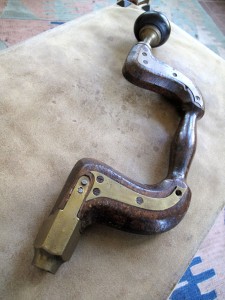
7. Braces and Hand Drills: The Ultimate Cordless Drills: No matter how big your cordless drill is, there are some wide or deep holes that will cook your drill. That’s why we think every woodworker should own an inexpensive brace, which allows you to make huge and deep holes with little effort – once you understand how to sharpen the bits with a common file.
You don’t have to spend a lot of money, either. We show you how to pick a garage sale special for $5 and pick bits from the 25-cent bin. You will be amazed at what a brace can do once you have a sharp bit.
Once you have a brace, which powers bits from 1/4” and up, you’ll want to learn to use a hand drill, which drives the smaller bits. Used hand drills, which are sometimes called “eggbeater” drills, are available almost everywhere and are safe and fun to use.
8. Jack Planes: The Widest Jointer Ever: If you have a 6” or 8” jointer you know the heartbreak of buying 14”-wide rough boards. What do you do to get the boards flat? Ripping the lumber into narrow widths is almost a crime.
You need to learn how to set up and use a jack plane. With a properly set up jack you can surface the face of almost any rough board in 15 minutes (and not be out of breath!) so it can go through your powered planer. The trick is learning how to shape the plane’s cutter and how to use the tool in a way that exploits the weakness of the tree.
We’ll cover grinding the iron, honing the iron and using the jack plane in ways you probably never imagined. It can reduce boards in width with shocking speed. It can also add texture to your projects, which is a nice detail if you build reproductions.
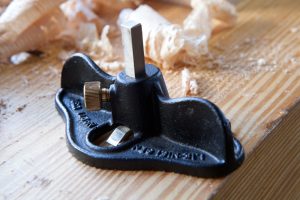
9. Router Planes: The Power-tool Woodworker’s Friend: Router planes are excellent at cleaning up machine-made joinery. They flatten the bottoms of dados, adjust rabbets and can even cut hinge mortises so you don’t have to balance a huge router on the edge of cabinet.
Router planes are easy to set up, sharpen and use – even if you’ve never used one before. We show you the trick to sharpening the L-shaped cutter – it’s easier than you think. We then show you how to make the tool do things that most machines cannot, such as getting a perfectly sized tenon on a rail that is in the absolute center of the work.
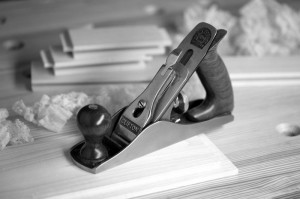
10. Smoothing Planes: Stop Sanding! Few woodworkers like power sanding. You can reduce (or almost eliminate) your sanding chores by learning to sharpen and set a handplane. This will turn one of the dreariest parts of a project – sanding – into one of the most enjoyable – planing.
We’ll start with a block plane. One of its most amazing feats is that they can save you from sanding the narrow edges of your projects forever. With one or two swipes, you can produce a perfect, ready-to finish surface.
We show you how to set up a block plane using sharpening materials you probably already have on hand. And we show you a trick to setting them up that hand-tool afficianados have been guarding for centuries.
Again, the DVD is on sale now until the release date. Click here for information or to order it from ShopWoodworking. Or if you want to start right now, go to ShopClass on Demand.
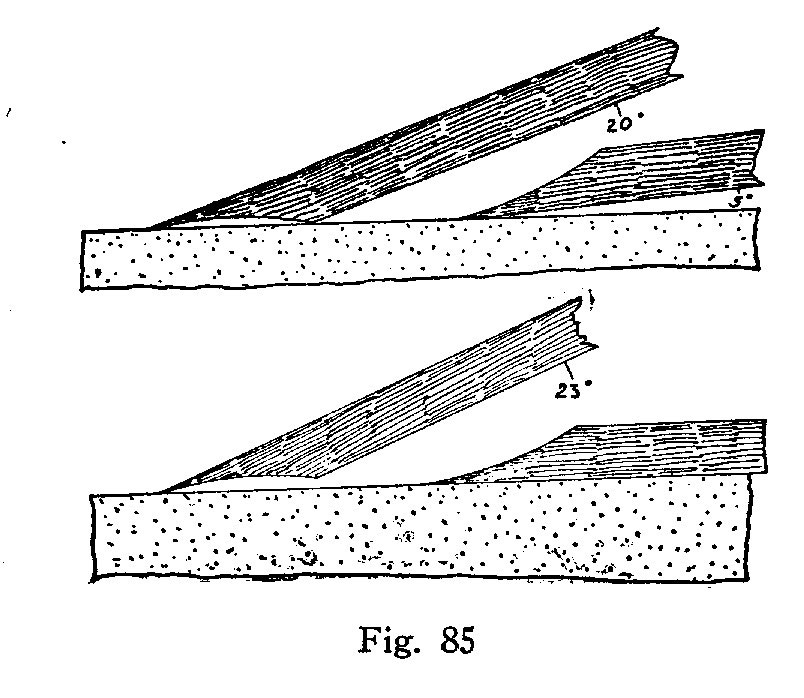
Some people use back bevels on bevel-down planes to increase the cutting angle up from the standard 45°. This reduces tear-out. However, some sources recommend these back bevels for block planes only.
Huh?
Yesterday evening I read “Carpenters’ Tools” by H.H. Siegele (Frederick J. Drake, 1950), which is a fascinating little book filled with surprises. In the chapter on block planes, Siegele recommends honing the tool’s bevel at a very low 20°. Then he says you can either sharpen the back flat or raise the back 5° off the stone.
Siegele says this 5° back bevel is more common than sharpening the back flat. Why is it useful? He doesn’t say exactly, but he states the back bevel is an improvement when the bevel has been hollow-ground on a grinder with a small-diameter wheel.
To me, that says Siegele is trying to improve the edge life of his block plane – especially because he is honing at 20° to 23°. But there’s more at stake than edge life alone when you look at all of Siegele’s advice.
In the book’s section on bench planes, Siegele recommends again a low 20° hone for easy woods, but he says you always sharpen the back flat. No back bevel.
So why use a back bevel on a block plane but not a bench plane?
Easy. The wear bevel. When you use any handplane, the part of the blade that gets the most wear is the little bit of metal that faces down against the work. On a bench plane, that means the primary bevel takes the most abuse. That’s not a big deal because the primary bevel also receives most of the work when you hone it.
But with block planes, it’s the back of the blade that gets beat up and worn away. So a back bevel on a block plane is a very good thing. Yes, the back bevel will improve edge life, but it also ensures that your edge will actually be sharp by getting you to hone away the wear bevel.
Jeff Burks is a finish carpenter, dogged researcher and definitely a member of the “inner circle” of the world’s wood nerds. His healthy obsession with old books and trade magazines in particular has led me down some fun rabbet holes.
And this week, he has done it again with an article called “How to Plane a Piece of Wood,” which was printed in the June 10, 1892, edition of English Mechanic and World of Science and Art and likely penned by Joseph Gregory Horner.
The author of this fantastic piece of writing is one of the “cranky old dudes” who show up in these trade magazines from time to time to show young apprentices how it is done. I love the cranky old dudes (and they love to e-mail me).
So while your boss isn’t looking or you are pretending to listen to your spouse, download this article from Jeff’s web site, carpentryarchive.org.
It is, quite possibly, one of the most entertaining articles on planing I’ve ever read, and I’ll bet you a doughnut that you’ll start using the expression “a veritable donkey’s bridge” after you read it.
Thanks to Jeff, who has given me a lot to read this week. More to come, just as soon as I finishing packing these outstanding book orders.