For most of my career, I have helped other woodworkers “get published.” That task could be as simple as spell checking their excellent work. Or as involved as being a ghost writer – taking an oral history of their work and transforming it into an article or entire book.
After 25 years of doing this, I find most skilled woodworkers fall into two categories: Those who want to make things easy for other woodworkers. And those who want to make things hard.
Both approaches are valid.
Making Things Hard
It’s difficult to argue with this approach. Woodworking is inherently difficult, and pushing others to do things “the hard way” creates hard-bitten, independent, skill-junkie woodworkers.
Sometimes the “hard road” is about withholding information from students. If you decline to explain critical steps of the process, the student then has to fill in the blanks. The information is then earned, rather than given. And it is therefore cherished when finally obtained.
Sometimes the “hard road” is about setting limitations on tools or materials. If you want to build a certain piece, then you lay down the only accepted way to go about it. One example: Want to build a 17th-century-style carved oak chest? Then you must learn to rive green oak. Dry it a bit. Then carve it. Lumberyard kiln-dried oak will never look right.
And sometimes the “hard road” is about cracking the whip. The lessons are complete and detailed. But if you don’t follow them to the letter, there is a price to pay. You will be yelled at, belittled or mocked until you learn to do things correctly.
It’s difficult to argue with the results of these approaches, and I am in no way criticizing these approaches. Some of my best teachers approached their lessons these ways. And I have been subject to all three. One boss delighted in “firing me” at least once a week when I did something too slow or poorly.
Making Things Easy
I cannot for the life of me make things difficult for students. It’s not in my programing. I am far too terrified that the craft will shrivel away because I didn’t explain to the next Norm Abram the right way to saw a tenon shoulder.
So I spend hours at the bench agonizing over how to explain a technique to readers. How can I make this easier? How can I do this with fewer tools? How can I reduce the need for years of practice from this operation (without adding some complex machine)?
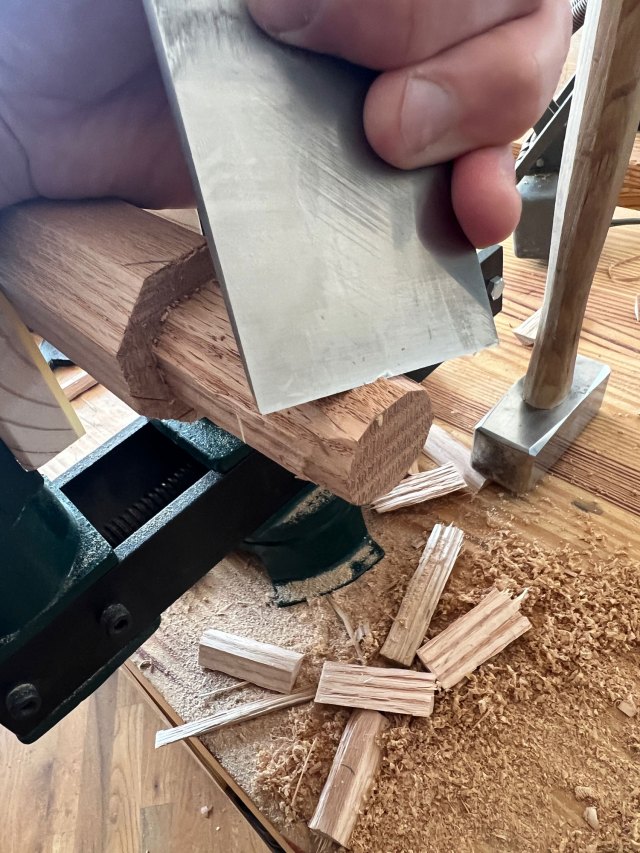
This month I have been obsessed with figuring out the best way to cut 1″-diameter x 2-1/4″-long tenons on the ends of chair legs.
The expensive way: Buy a lathe.
The hard way: Shave them to fit.
The easy way? That’s what I have been working on. I have developed two approaches. The first involves sawing the tenon’s shoulder, then riving away most of the material with a hacking knife or chisel. Then finishing the tenon with an inexpensive tenon/plug cutter chucked in a brace or a drill. The result is perfect tenons that look “traditional.”
But my brain wanders. Why can’t the tenons be “loose” – like a Domino? All this approach requires is a 1″ drill bit and some 1″-diameter oak dowel. Drill a mortise in the end of a leg. Drill a mortise in the seat. Glue the loose tenon (made from a dowel) into the leg. Then glue the completed leg into the seat. Easy.
Too easy?
— Christopher Schwarz
Like this:
Like Loading...