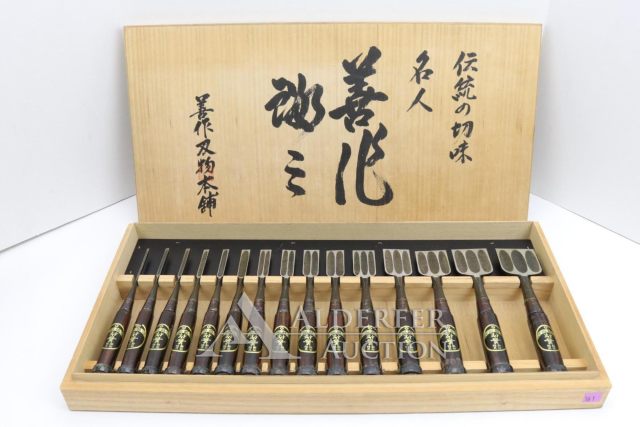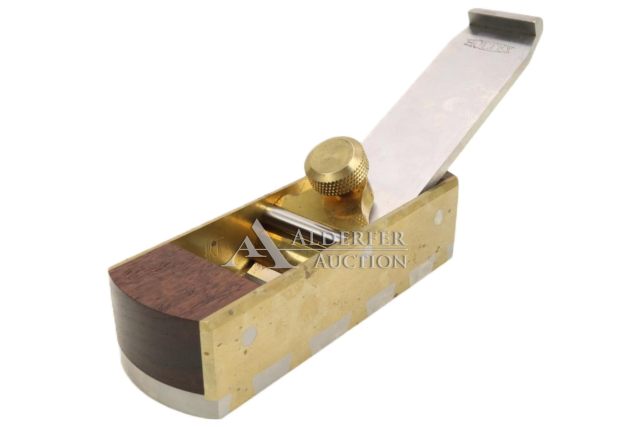
The catalog for Day 2 of the Fred West Tool Collection Auction is available; bids are accepted for Day 2 items through 10 a.m. on Nov. 9. (You can read a bit about Fred in this post, for the Day 1 catalog.)
— Fitz


The catalog for Day 2 of the Fred West Tool Collection Auction is available; bids are accepted for Day 2 items through 10 a.m. on Nov. 9. (You can read a bit about Fred in this post, for the Day 1 catalog.)
— Fitz

I admit, I’ve chosen an easy bay for this Covington Mechanical Library post (it’s been a frantic – and slightly under the weather – week). Today, it’s the Foxfire series, volumes 1-12 (which is an almost complete set – I believe there are two additional anniversary editions).

For those of you unfamiliar with the series, it’s a compendium – assembled from a quarterly magazine of the same name – of the crafts, culture and heritage of Southern Appalachia. The first was published in the early 1970s; Chris doesn’t remember a time when there wasn’t a Foxfire book in his home.
Also in the bay are “Trades and Occupations: A Pictorial Archive from Early Sources,” selected and arranged by Carol Belanger Grafton, and “2000 Early Advertising Cuts,” edited by Clarence P. Hornung. Chris has had these two since the early 1990s, when he was editor of “The Kentucky Gazette,” a weekly political newspaper in Frankfort, Kentucky. This was before digital photography, and Chris used these to illustrate articles when they didn’t have any appropriate photography – it was either use old clip art or he had to draw Skippy the Turtle.

To the far right are seat models, one with wire to bend the legs into position for new chair designs, along with a cutaway showing how staked joints work (from “The Anarchist’s Design Book.”)
— Fitz
Click here for week 1
Click here for week 2

Katherine “the Wax Princess” Schwarz has a fresh batch of Soft Wax 2.0 now now available in her Etsy store. It’s my favorite finish for Shaker trays and tool chest tills, and Chris uses it on just about every not-painted chair. It looks great, smells great, is easy to apply, is non-toxic – and it makes my hands softer.
Instructions for Soft Wax 2.0
Soft Wax 2.0 is a safe finish for bare wood that is incredibly easy to apply and imparts a beautiful low luster to the wood.
The finish is made by cooking raw, organic linseed oil (from the flax plant) and combining it with cosmetics-grade beeswax and a small amount of a citrus-based solvent. The result is that this finish can be applied without special safety equipment, such as a respirator. The only safety caution is to dry the rags out flat you used to apply before throwing them away. (All linseed oil generates heat as it cures, and there is a small but real chance of the rags catching fire if they are bunched up while wet.)
Soft Wax 2.0 is an ideal finish for pieces that will be touched a lot, such as chairs, turned objects and spoons. The finish does not build a film, so the wood feels like wood – not plastic. Because of this, the wax does not provide a strong barrier against water or alcohol. If you use it on countertops or a kitchen table, you will need to touch it up every once in a while. Simply add a little more Soft Wax to a deteriorated finish and the repair is done – no stripping or additional chemicals needed.
Soft Wax 2.0 is not intended to be used over a film finish (such as lacquer, shellac or varnish). It is best used on bare wood. However, you can apply it over a porous finish, such as milk paint.
APPLICATION INSTRUCTIONS (VERY IMPORTANT): Applying Soft Wax 2.0 is so easy if you follow the simple instructions. On bare wood, apply a thin coat of soft wax using a rag, applicator pad, 3M gray pad or steel wool. Allow the finish to soak in about 15 minutes. Then, with a clean rag or towel, wipe the entire surface until it feels dry. Do not leave any excess finish on the surface. If you do leave some behind, the wood will get gummy and sticky.
The finish will be dry enough to use in a couple hours. After a couple weeks, the oil will be fully cured. After that, you can add a second coat (or not). A second coat will add more sheen and a little more protection to the wood.
Soft Wax 2.0 is made in small batches in Kentucky. Each glass jar contains 8 oz. of soft wax, enough for at least two chairs.


The Florida School of Woodwork is holding a raffle and silent auction to raise money for woodworking scholarships. This week’s silent auction item is a Kentucky Stick Chair made earlier this year by Christopher Schwarz. Plus you can buy raffle tickets to be entered to win one of this week’s raffle prizes: a Dixie Biggs carving, an L-Tomato fence from Chalkstone Woodworking and a finishing kit from Odie’s Oil). The silent auction for the chair and the raffle for this week’s prizes closes at 8 p.m. on Oct. 29 (OK – it’s a little more than a week). Click here for more information and to submit a silent auction bid and/or buy raffle tickets.
A follow the Florida School of Woodwork Instagram feed for the latest auction/raffle offerings – I spotted a few of them when I was there teaching last week; there are some excellent pieces still be be seen!
– Fitz

Fred West was a modern-day Medici when it came to hand tools – a true patron of the fine arts, and a driving force behind the hand-tool renaissance of the last two decades. If you were into hand tools before 2014 and attended any woodworking shows, you likely knew Fred – or at least heard him exclaiming over the inherent beauty of a fine tool, or talking about tools with his legion of friends. And if you were a maker of fine hand tools, well, you likely had Fred to thank for helping to keep you in business.
Fred loved using good tools – but he also loved supporting their makers and other users. He’d often buy multiples of new tools (and sometimes commission custom designs), then send them anonymously to woodworkers – mostly to those who couldn’t otherwise afford them – who he thought would appreciate working with them. His only request was that the tools be used.

I have two things that remind me of Fred every time I pick them up: a Vesper Tools sliding bevel (which he insisted I accept despite my vehement protestations – I’m terrible at accepting kindnesses), and the Deborah Harkness book “Shadow of Night” – he sent me his copy as soon as he’d finished reading it. (I might have liked talking popular fiction with Fred even more than discussing tools!)
Fred was one of the most gregarious and relentlessly positive people I’ve ever had the good fortune to know. Even when struggling with multiple health problems, he’d travel to hand tool conferences and events to talk tools and support toolmakers, and to hang out with his many friends. I feel lucky to have counted myself among them.

But what I didn’t quite realize was the sheer number of tools (both old and new) that Fred acquired in his all-too-short lifetime as a tool user and collector. A few weeks ago, I spoke with Susan, Fred’s former wife and mother of his daughter Eleanor, who has helped to organize an auction of Fred’s large collection. The family, she said, has realized it is time to let some things go, and to honor Fred’s work of getting tools into the hands of those who will use them. I got a preview of the auction catalog as it was in progress, and while I knew Fred bought a lot of tools, well…it turns out I had no idea quite how vast and diverse his collection was. I’m pretty sure there’s something in the collection for just about everyone – as Fred would have wished.
You can see the catalog for Day 1, November 8, here, and place bids online until the morning of November 8. From Alderfer Auction: “Auction is open for pre-bidding until Tuesday, November 8th at 10:00 AM, at which time pre-bidding will cease and the auction will go live online only at the auction center. When the auction goes live, lots will be sold one at a time, in numerical order, by a live auctioneer who will be taking bids from multiple online bidding platforms, absentee and phone bids. During pre-bidding you are able to submit a max (maximum) bid. The bidding platform or our auction staff will bid on your behalf up to the maximum bid that you have entered. Once the auction goes live if you wish to increase your bid you will have to wait until that lot opens for bidding and enter any additional bids manually.”
For more on how the auction works, and to register to bid, visit the Alderfer Auction site.
The catalog for Day 2 will be posted late this week or early next. We’ll announce it here, but you might also want to keep at eye on the site. I got a look at just some of what will be in the second catalog; you won’t want to miss it.
For questions about the auction, please email info@alderferauction.com.
