The following is excerpted from “The Anarchist’s Tool Chest,” by Christopher Schwarz.
“The Anarchist’s Tool Chest,” paints a world where woodworking tools are at the center of an ethical life filled with creating furniture that will last for generations. It makes the case that you can build almost anything with a kit of fewer than 50 high-quality tools, and it shows you how to select real working tools, regardless of their vintage or brand name.
“The Anarchist’s Tool Chest” will guide you in building a proper chest for your toolkit that follows the ancient rules that have been forgotten or ignored.
And it will make the argument that building a chest and filling it with the right tools just might be the best thing you can do to save our craft.
The first time I ever visited Frank Klausz, it was to shoot some photos for an article on dovetailing, for which he is a well-known savant. The photographer, Al Parrish, and I flew into Newark, N.J., late in the afternoon and Frank graciously insisted we come by his shop for a visit before the photo shoot the next day.
Frank’s Cabinet Shop is a large, clean and efficient commercial shop. The walls are covered in hand tools. Many are for display; many are for use. And the machinery is well cared for. After a tour and some chit-chat, the photographer asked Frank a question that took me by surprise, mostly for the fact that I don’t ask it myself more often.
“Frank,” Al asked, “what’s your favorite tool?”
Without hesitation, Frank started striding to the back of his shop. “Come,” he said. “I’ll show you.”
With Frank’s reputation as a dovetailing genius and his traditional training, I was expecting his answer to be some sort of traditional tool, perhaps something from his native Hungary, perhaps something handed down to him by his cabinetmaking father.
Nope. Not even close. Instead, we stopped at a stroke sander, a huge piece of industrial machinery. Frank launched into a speech about how much time this machine saved him. How much labor. And how he could use it to sand curved surfaces like no other machine.
I was surprised, but only for a moment. Sometimes the personae of a person gets filtered through the media in a way that’s basically right but not quite the whole story. Frank loves his hand tools and is a master at hand-dovetailing because he teaches it everywhere he goes. But when it comes to the day-in-day-out work….
Machinery, when properly used, is like having some noisy apprentices. You have to always be the one in control. You have to know how to direct them. And you never ever let them take charge of the shop.
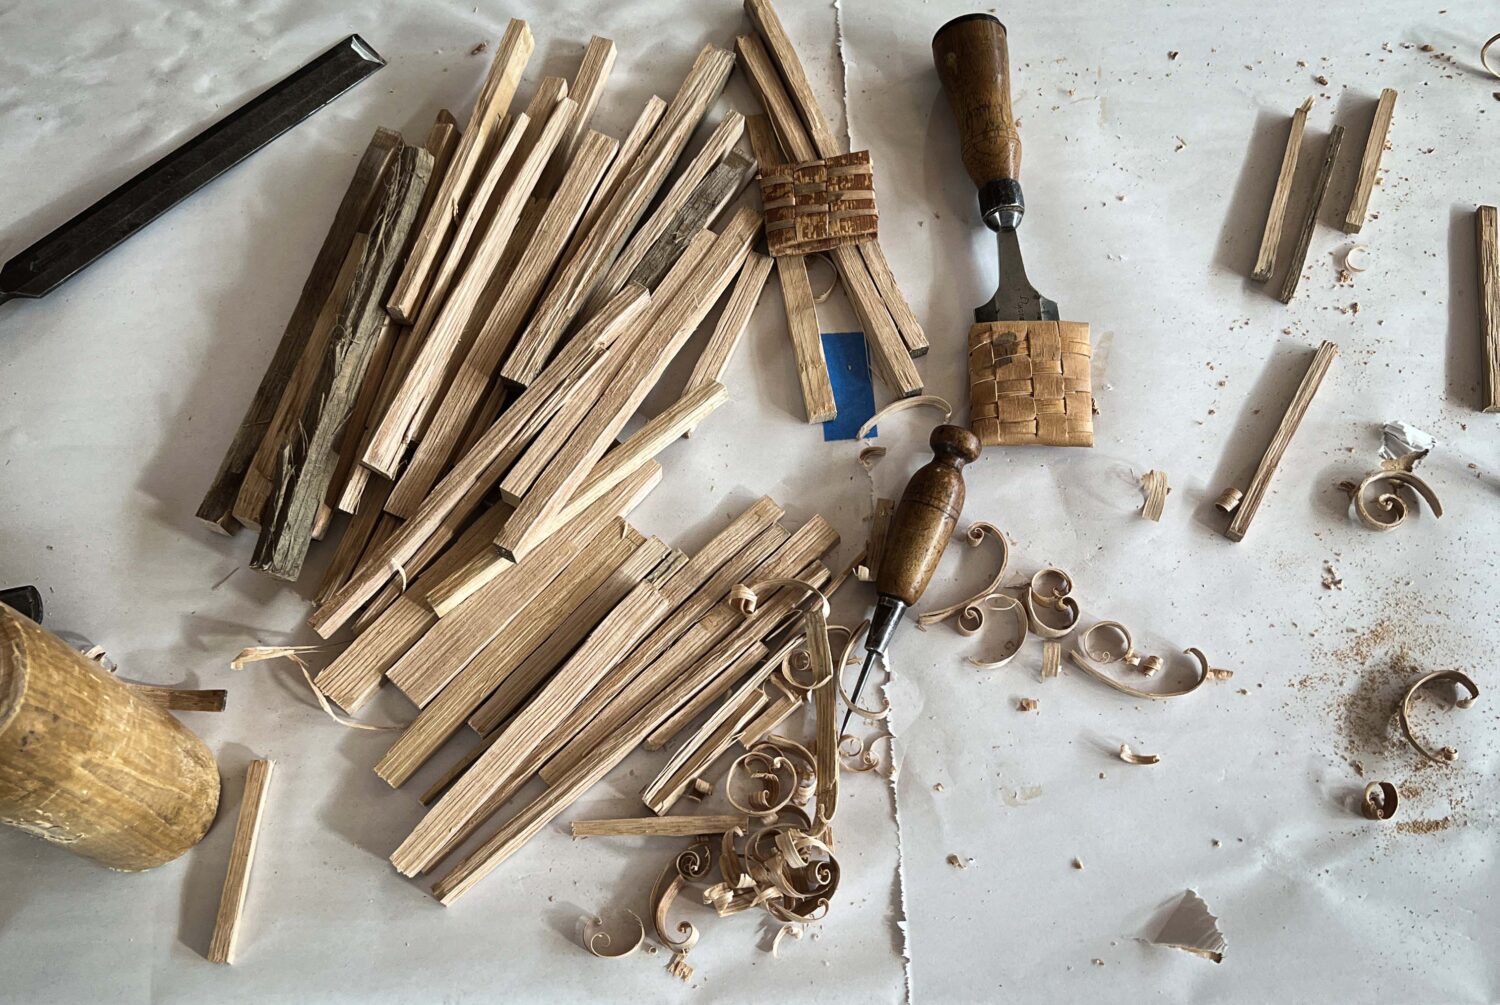
I use my machines to deal with rough stock. Dimensioning rough lumber by hand is time-consuming.
Doing it by machine is child’s play. Then I’ll use it for roughing out some of the joinery, including mortises, tenons and rabbets. Everything else gets done by hand because it is safer, more accurate, faster or looks better in the end.
As to buying machinery, I don’t have a lot to say for this book. I can cite model numbers and brand names by heart, but that won’t help you because the powered machinery business changes so fast that the information becomes outdated before you can get it into print. Heck, I’ve seen Black & Decker replace its line of cordless drills three times in a calendar year. That is just wrong.
But I can give you some helpful principles that never change when buying electric thingys.
- 1. Buy good brands. It sounds like a no-brainer. But so many woodworkers are such cheap wieners that they end up buying tools from discounters that have no track record. No-name tools always stink. I can say this because I’ve tested them. I’ve had routers flame out on me. Nail guns squirt oil all over my work. Miter saws that couldn’t cut straight.
- Purchase tools that you have observed on job sites that look like they have some miles on them. These tools cost more than the stuff aimed at the weekend picture-hanger, but they will last you a lifetime.
2. Shoot for the middle. If you spend more than 15 minutes shopping for tools, you’ll notice that they are clustered around three different price points. There will be a low-end price point ($200 table saws, for example). These tools are designed to be used a couple times, or not at all, then thrown away. Really.
No lie. Stay away from these tools. At the other end of the spectrum are tools that cost an incredible amount of money ($6,000 table saws, for example). These are great machines, but their benefits do not befit their price for a home woodworker.
So shoot for the cluster in the middle ($1,000 table saws, for example). These mid-range tools are going to be sought out by the frugal tradesman – a good place to be.
If you want a quick education in which tools are in the middle range, check out the local or Internet classified listings. The used machines that retain their value – about 60 percent of their new price – are the machines you want.
3. Buy vintage if you dare. In the last 20 years, most machinery manufacturing has gone overseas to Taiwan and China. Some of the toolmakers have done this gracefully, and the quality control is excellent. Other makers have botched it royally and are just selling their faded nameplate on crappy goods and hoping that no one notices.
If you don’t want to research this topic to death, one way to get around the problem is to buy used machinery from the disco era or earlier. You can save some serious money and get a better machine. The only real problem is that you need to be able to evaluate the machine before you buy it. Are the bearings shot? (That’s always a deal-killer in my book.) Are the critical adjustments still adjustable? Is the motor fried? Do you need to replace the wear parts, such as belts, tires, guides etc.?
In other words, you need to educate yourself before you blindly buy. Go to the Old Wood-working Machines website (owwm.com) and just start reading. In a few days you’ll be ready to go vintage.
I will tell you that there are deals to be had. I bought my 14″ Delta band saw for about half of what it would have cost new and it is 100-percent solid. Every part but one is solid metal. And the sucker just hums.
4. Metal, not plastic. An easy way to size up a machine is to examine its parts. Are the handles and adjustment knobs plastic or metal? (Aluminum counts as a metal.) Metal is always better than plastic. No exceptions.
What Machines Should You Buy?
Few people buy all their machines at once. They acquire them over time and build their shop as they build their skills. That’s how I did it.
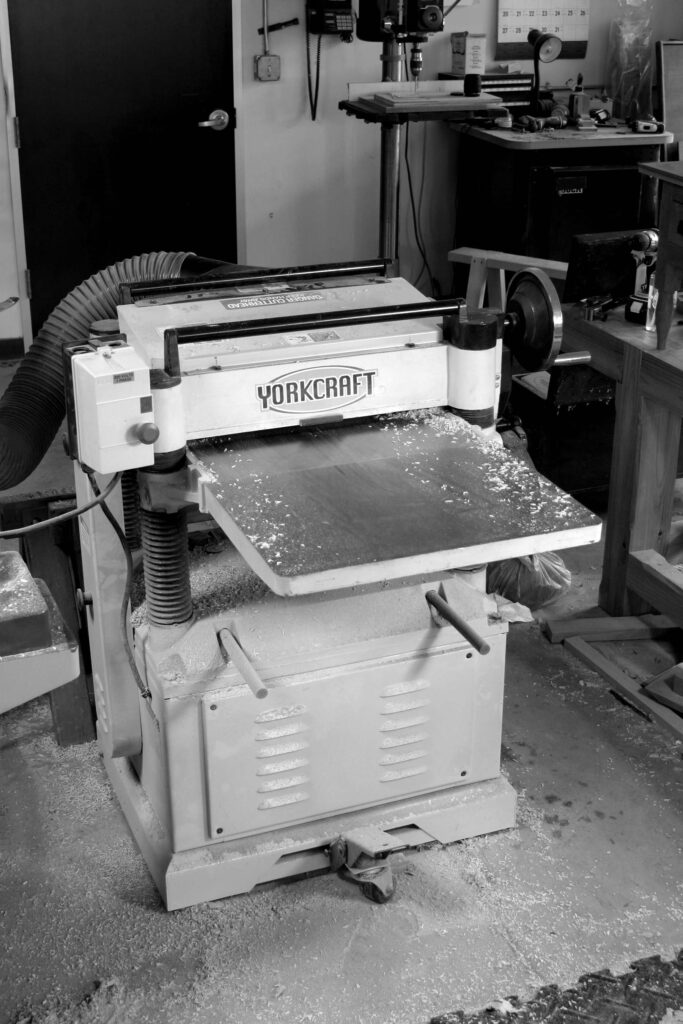
If you can’t buy everything at once, there are different paths you can follow when buying machinery. If you are going to be a power-tool woodworker, you should probably start by buying a table saw and purchasing lumber that has already been surfaced. You can go a long way with just that machine. After the table saw, you should buy a powered jointer and planer. Then (in no particular order) a drill press, band saw, powered sanding machinery and mortiser – plus lots of dust-collection equipment.
However, if your shop is going to be based on handwork, then I would recommend a much different route. My recommendations are unusual. In fact, I’ve never seen anyone else recommend this path in print. But I think it’s the right way to go.
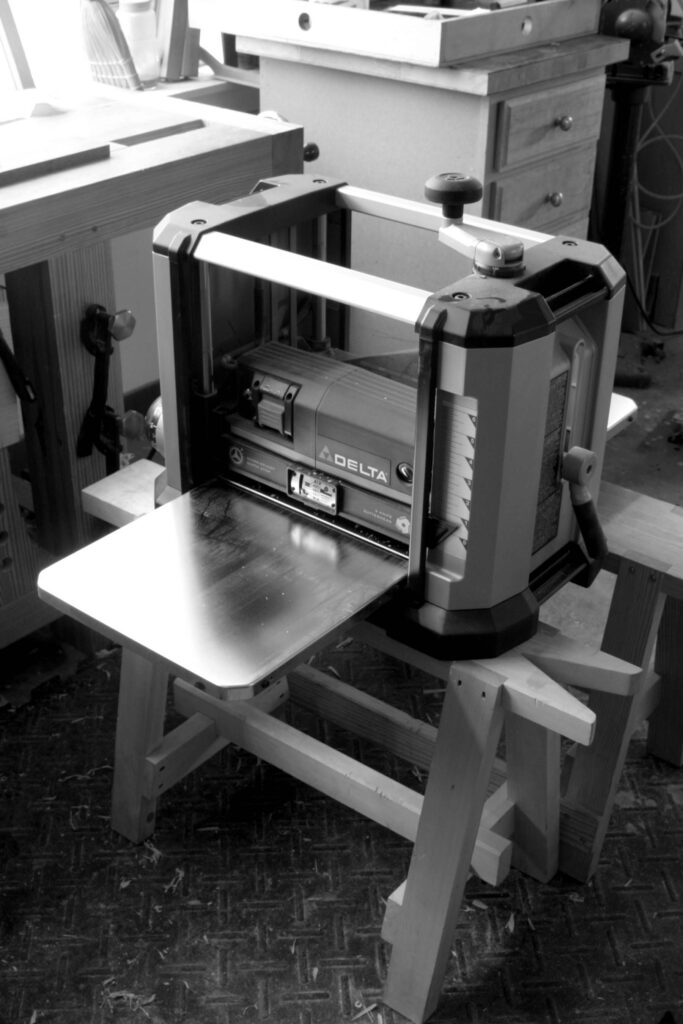
Buy a portable 12″ or 13″ planer first. Why? Because surfacing lumber to thickness is the absolute most time- and energy-consuming job in handwork. So the portable electric planer is a lifesaver. It is cheap, accurate, durable and leaves a surface finish that beats what you get from a big industrial planer. Why? Because their cutterheads are powered by high-speed universal motors.
Why not buy a powered jointer first? Good question. When you use a powered jointer and a planer, you surface one face flat with the jointer, then you thickness the board with the planer. If you have a jack plane, you can quickly surface one face of a board true, then run that board though the planer to get it to finished thickness.
What about jointing edges to make panels? A jack or jointer plane can do that job. In other words, I think you can get away without a powered jointer. But the powered planer is a must-have.
The Second Machine
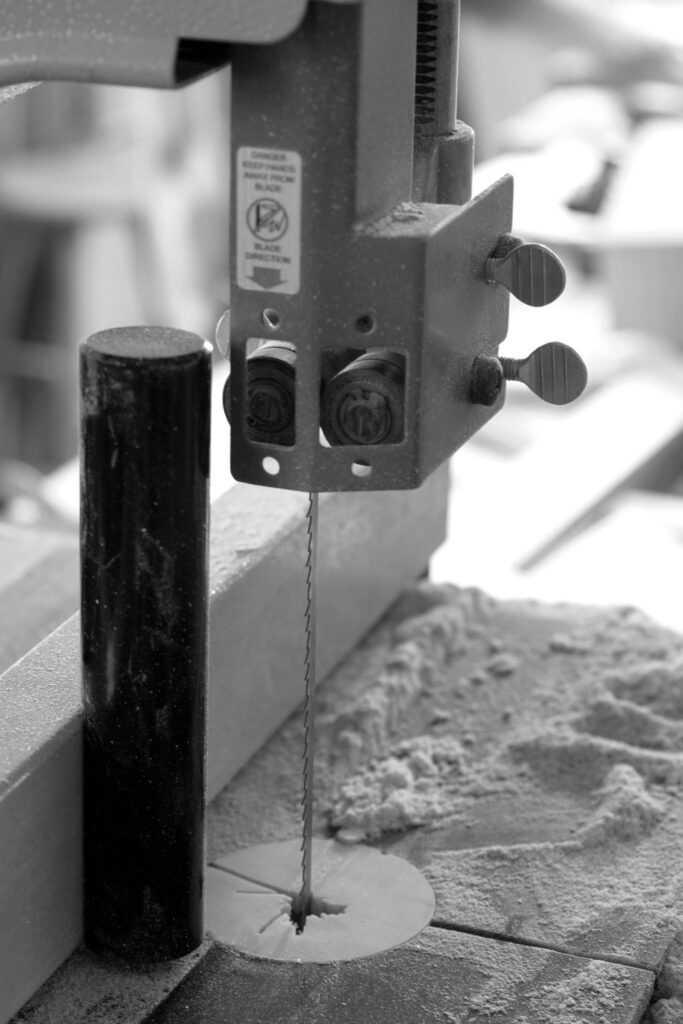
Get a 14″ band saw. A band saw will remove the other biggest drudgery when working wood with hand tools: long rip cuts. In addition, a band saw can do so many other tasks that it is mind-boggling. It can cut curves, it can knock down rough stock to size, it can make thin boards or even veneer, it can cut perfect circles, it can assist with dovetailing.
Plus, band saws are one of the safest saws ever invented. They don’t kick back on you. Their guards are safe and well-integrated into the machine so there is no need to ever remove them.
There are downsides, of course. Compared to a table saw, a band saw is fussy. You will tune it and tweak it more often than a table saw. The blade guides need occasional attention. The tires on the wheels will wear out. The blades will occasionally snap. The dust collection is terrible (but it’s terrible on most table saws as well).
Still, I would get rid of my cabinet saw before I got rid of my 14″ band saw with a cast iron frame.
The Third Machine
Again, my advice is odd. Get a hollow-chisel mortiser. Cutting accurate mortises by hand is drudgery, especially if you have more than four to do. A mortiser is a miracle machine, and it was one of the first machines developed in the 19th century.
Cutting the matching tenons by hand or with a band saw is much easier than chiseling out a mortise. I have thought many times about getting rid of my mortiser. But I dismiss those thoughts every time I build a piece of traditional furniture.
Other Machines & Tools
I think most hand-tool woodworkers would be happy with the three machines listed above plus some good dust collection. A drill press, a jointer and a table saw are all nice things to have on occasion, but they won’t save you as much labor as the three machines above. In fact, before I bought any more machines beyond the three basics, I’d buy a nice battery-powered drill. I find it almost impossible to live without one of those in the shop.
Editor’s Note: More than 15 years after writing “The Anarchist’s Tool Chest,” Chris builds few pieces that require square mortises; the hollow-chisel mortiser would not be his third machine, especially because the Domino has since been invented. The Domino can cut mortises at a multitude of angles, and takes up less space. So these days, it would possibly be his third machine choice – but it’s a toss-up between that and the restored 12” jointer in our machine room – it’s such a time saver. Your needs may vary. (I, miss the hollow-chisel mortiser; it was sold to a neighbor. I don’t cut a lot of mortises – it feels like all I do is cut dovetails – but it was a fun machine to use.) – Fitz
Like this:
Like Loading...