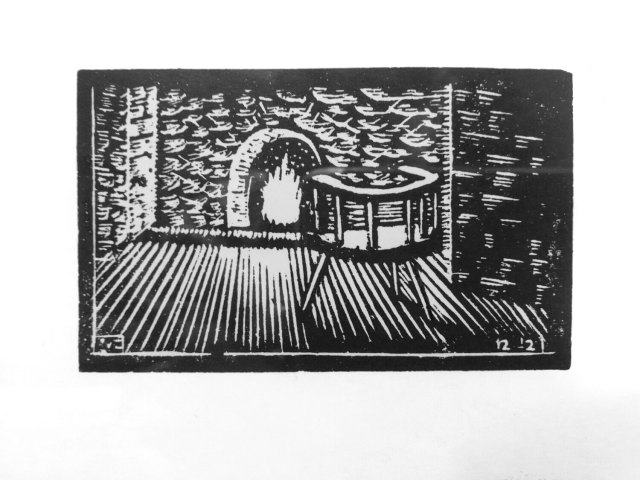
Visiting John Hutchinson’s workshop outside Columbus, Ohio, was an unusual experience. And he wanted it that way.
To get to his shop, you left his home and set off down a path through the woods. Then you encountered a stream and had to jump over it. Eventually you arrived at a small cabin surrounded completely by woods.
The shop was cozy, well-lit and wonderfully equipped. And whenever you looked out the windows, all you saw were trees.
Hutchinson, a prominent Ohio architect, wanted it this way. He wanted the trip to his workshop to require you to encounter and deal with nature. And as you worked, nature was everywhere you looked.
I know a lot of woodworkers who would build the same sort of shop if they could. But I thought it was odd. Sure, I love trees and nature and birds and deer scat as much as the next woodworker. But I don’t look at trees and say: “Eureka – there is an idea for my next cabinet!”
Instead, I have always been inspired by good architecture. Good buildings. Thoughtful details. Window layouts. Overall proportions. These things are an endless diet of good design.
Yes, you can visit beautiful cities to get a taste of it before returning to your rural or suburban home. But it is another thing entirely to live surrounded by buildings and have them seep into your skin. Good architecture – like good furniture design – requires you to live with it for a while to really understand the patterns behind it. And to see the details that escape your first (or 10th) viewing.
The short film above is adapted from a piece I made a couple years ago for the furniture conference at Colonial Williamsburg. It offers a short architectural tour of Covington and shows how some buildings have directly influenced my designs.
This is why I live in an old (for America) city.
I am sure that other woodworkers can take inspiration directly from nature. And I think that’s great. But I have always relied on architecture. And here’s a look at how that works.
I get asked (a lot) why there are so few stick chairs in the furniture record of the United States.
To that question, I reply, “Just you wait.”
Ever since I built my first stick chair in 2003, my aim has not been to reproduce the chairs I adore from Wales, Scotland, Ireland and Sweden. Instead, my goal has been to do what Americans have long done with furniture forms and other cultural movements: Adapt them to this continent and its people.
Black Americans took an African call-and-response form of music and made the blues (then rock ‘n’ roll). Rural Americans – black and white – melded African and Spanish instruments (the banjo and guitar), with spirituals and traditional British songs to make “hillbilly music” and “race music” – what we now call country music and rhythm and blues.
All cultures adopt and adapt elements from “away,” but Americans seem particularly prone to it. We even export our adaptations back across the oceans. In Naples, Italy, anyone can buy pizza topped with hot dog chunks and french fries.
Now before you start calling me “Jingo” Schwarz, know that I don’t think everything Americans do is good. Not even close. We took the éclair and made Twinkies. The baguette became Wonder Bread. It’s a mixed bag of vanilla soft serve and Vanilla Ice.
English secretary, 1810.
Wait, Isn’t This a Woodworking Blog?
In the world of furniture, American designers and woodworkers tended to simplify forms brought over from Great Britain, the European continent and elsewhere. To be clear, there were American woodworkers who equaled the ornamentation and excess of their counterparts across the Atlantic. But in general, American interpretations removed ornament, simplified overall forms and relied more heavily on the solid timber that was the greatest resource of this continent.
English secretary, 1805.
A long day’s walk down King Street in Charleston, S.C., lays out this story that played out in the 18th and 19th centuries. King Street is awash in antiques stores that specialize in British and European antiques. And there are other stores that specialize in American antiques – plus all the house museums that are stuffed with American and imported furniture.
This long stroll (it will take you all day) also shows what the market has decided, whether you agree with it or not. My father would buy English chests of drawers on King Street in the 1990s for $1,200. The American ones were entirely out of his financial reach.
American chest of drawers, turn of the 19th century.
Virginia bookcase, late 18th century.
Finally, to Chair Stuff
British Forest Chairs (aka Windsors) also faced the same story. American forms are – in general – simpler. Simpler turnings. No backsplat. Fewer carved elements. (I must add, however, that my favorite Forest chair of all time is British.)
Yorkshire Windsors, early 19th century.
Massachusetts Windsors, early 19th century.
When it comes to stick chairs, my goal has always been to Americanize them. (I’ve built only a couple close copies of antique Welsh chairs – mostly to prove I could do it.) What does this Americanization entail?
First, I have changed my designs to reflect the wood we have here. Unlike Wales, we have enormous stands of straight timber. The curved stuff – which the Welsh use for arms and combs – exists here, but it’s more difficult to find. During my two visits to Wales, a walk among the hedgerows revealed a dozens of bent armbows. So my arms are different. They’re built differently, and you will see further changes in future designs.
One of the hundreds of Welsh chairs that are among my “favorites” and influence my designs.
I also tend to favor crisp lines over curved ones. All beautiful and well-worn antiques suffer “erosion,” for lack of a better word. But I try to take that crispness or clarity a little further. I avoid rounded and pillowed profiles for the most part. I like facets. I don’t like turned, round or bulbous components.
I also tend to favor geometry that is more dramatic. Many Welsh chairs had dramatic rake and splay. But a lot of them had little rake or splay. Many had sticks that were dead-vertical. I try to take the dramatic bits and pieces from old chairs and combine them into something else. I won’t say it’s new, as there is no such thing.
I also like color and grain. I am happy to paint my chairs a vibrant color or use an oil and beeswax finish on them. I am dead certain that many old chairs got flashy paint jobs back in the day or a finish that was mostly soot and smoke from the hearth. So my finish choices stand in contrast to what the old chairs look like today.
Why am I telling you this? Well, in some small way, I know that the Welsh get irritated when someone builds one of my chair designs and calls it a “Welsh Stick Chair” on Instagram or Facebook. In truth, they are building an American Stick Chair designed by a guy who dreams of Welsh, Scottish and Irish chairs all the time. So if you want to avoid a Welsh invasion of Kentucky, I recommend you call your stuff what it is: American.
Also, I want to start a conversation about this form and what it could become. I hope that other American makers will look at 11,564 old chairs and see different details that could make up a vocabulary for American stick chairs. Because there isn’t an “American Stick Chair” yet, there is enormous opportunity to explore this idea and contribute to something that just might have some legs.
— Christopher Schwarz
Hands down, my favorite Forest Chair of all time. A lovely early example of the form.
Megan applies a coat of boiled linseed oil to our new Benchcrafted Classic workbench.
We have just received delivery of a new Benchcrafted Classic Bench in our shop, which replaces Megan Fitzpatrick’s LVL bench in the center of our bench room. Megan and I have been in long-running discussions about building her a new workbench sometime during 2022. But recently we decided to buy (actually, trade) for the Benchcrafted bench. Here’s why.
I’ve built a lot of workbenches since 2000, written five books about workbenches and have been hailed/derided for popularizing the 18th-century French bench for woodworkers who like to use hand tools. And when Megan first approached me about replacing her bench, I said I was happy to help build her a new one based on plans in “The Anarchist’s Workbench” (the book is free to download).
But after looking ahead at our schedule for 2022, my brain began to do the math. I can build a bench in about 40 hours of work. The hardware would be about $400. The wood would be about $500. On the other hand, the Benchcrafted Classic is $2,900. After about 5 seconds of ciphering (and carrying the gazinta), the decision to order the Benchcrafted was obvious.
Megan’s new workbench after its first day of work. She worked it hard.
First, the bench completely fulfills my dictum for a good workbench: That you can work on the faces, edges and ends of boards with ease. The Benchcrafted Classic comes with a Crucible holdfast and a planing stop (they added our planing stop by request), and the holdfast pattern is the same pattern that’s on my workbench.
The bench’s form is based on the 18th-century plan. The joints are drawbored. The raw material is hard maple. And the bench weighs plenty for handwork – 300 lbs. The craftsmanship is excellent – as good as any workbench I’ve made. The joints are tight. The vise runs smooth. And the top is flat.
The bench even comes unfinished – a real blessing. Today Megan added a boiled linseed oil finish to the bench, which suits the way we work. A straight oil finish adds a little protection and color, without adding any slipperiness that comes from a wax or varnish.
If you have been reading my books on workbenches, then you know that this Benchcrafted bench pushes all of my buttons. Benchcrafted got it exactly right with no compromises. And they made it for less than I could, at my hourly rate.
So about the payment. I was perfectly happy to pay cash for this bench. But Jameel and FJ said they were interested in trading the bench for one of my stick chairs and a Dutch tool chest made by Megan. So everyone is happy.
Megan has a new workbench with a leg vise that works perfectly. Her LVL workbench is going to live in her basement as “an expansive horizontal storage facility.”* And I’m sure it will be used as a workbench. It’s still a good bench – it has just been eaten up and beaten up by all the workholding experiments I’ve inflicted upon it.
And I have 40 more hours this year that I can use to work on other projects – chairs, refurbishing the bar in our storefront, books and new tools for Crucible.
Now I just need to figure out what to do with our Ulmia workbench, my least favorite bench in the shop. And then the workshop will be complete (cue the laugh track).
— Christopher Schwarz
The Crucible Planing stop in the Benchcrafted Classic.
*Megan here. I do still love my LVL bench, and the top remains dead flat after 11-plus years of hard use – an excellent result from our material experiment. But we also built the base out of LVL, and that was less successful. The stuff is made to compress a bit (to handle earthquakes and the like), and compress it did from the force of the leg vise against the top; the top got pushed back from the front of the leg over time – and despite many efforts to fix it, nothing worked for long.
Now, I have a scabbed-on piece of plywood at the top of the leg to bring that front edge flush…but I know it will move again.
It’s not that big a deal to me; I’m used to it and have myriad workarounds – but I don’t like it when students have a less-than-perfect experience with our equipment, hence my desire to build a new bench. But I am delighted to not build one. I have plenty to be going on with, too, and the Benchcrafted Classic is darn close to what I would have built anyway – basically a larger, heavier version of the petite white pine Roubo in my basement shop (which features an OG Benchcrafted Glide vise).
So now I’ll have two good benches in my basement shop – one little, one big. Oh – and one crappy built-in “bench” – I use the term loosely – that was left by a previous owner. It is indeed a horizontal storage facility. The two actual benches, however, will get used for woodworking. In my free time.
This fall, we will hold a chairmaking class at Lost Art Press the likes of which I’ve never seen. Six students will be taught by three instructors – Rudy Everts, Klaus Skrudland and me – in a way that will allow students to explore stick chairs on their own terms.
Students will design and make stick chairs using a full range of methods available today, from entirely hand-powered all the way up to full-on electrified. (To be fair, we cannot offer the full gamut of techniques. We don’t have a CNC router, and we will not teach cutting tenons with buck teeth.)
Three chairs by Rudy Everts.
Put another way, we will help you develop a stick chair of your own design using the library of templates at our shop or new shapes. Then you can build the chair using the techniques that you want to learn. Want to split out your parts with a froe and shape them with an ax? Rudy and Klaus have you covered. Want to use a band saw to speed things along? Klaus or Chris will help. Want to batch process hundreds of legs for a production run? Chris will show you how.
Want to learn lathe work? We have you covered. Shaving with a drawknife and spokeshave? Yup. Saddling with an angle grinder? Adze? Scorp? Travisher? Yes, yes and yes. If we know it, we will show you how to do it.
The class should be a bit chaotic, intense and exhausting. Oh, and it will be Rated PG-13. If you have ever read Chair Chat™, then you know that salty potatoes are always on the menu. I also suspect it will be the most fun you’ve ever had while woodworking. Klaus and Rudy are both insanely talented and hilarious. Plus I know lots of jokes about the Tax Act of 1894.
An Irish-y chair by Klaus Skrudland.
If you are interested, here are the details. The class will be held Oct. 10-14 at the Lost Art Press storefront in Covington, Ky. The tuition will be $1,300 per student plus materials (you can bring your own or we can provide them for a fee).
We have room for six students. You must be fully vaccinated against COVID to attend (this building is my home and my business). To make things as equitable as possible, we will fill those six slots via a random drawing. In July, we will open up registration for the class. After registration closes, we will select six students at random. We will post more details about the drawing and the class in the coming months.
But for now, just make sure that you don’t schedule any elective surgeries, weddings or “me time” for that week in October.
Klaus, Rudy and I are very excited about this class. I hope you will consider joining us.
The new Speedbor (right) and the old pattern (left). Please let me have my teeth back.
Because we make tools, I hesitate to criticize other toolmakers. Today I am making an exception because the manufacturer is Irwin Industrial Tools, which is owned by Stanley Black & Decker, a company that is worth $28.4 billion (that’s with a “b”).
So no toolmaker is going to go hungry because of this blog entry.
For 18 years I’ve used Irwin Speedbor spade bits in my chairmaking. They are inexpensive, they cut fast, they don’t clog and they are perfectly fine for chairs.
In the 2000s, lots of Irwin’s competitors started making crappier spade bits. They ruined the cutting geometry, didn’t surface-grind the cutting face or they added a screw tip, making them almost worthless for furniture making. But Irwin kept making good bits, and you could get them everywhere.
About two years ago, however, Irwin “improved” its Speedbors by removing the cutting teeth at the rim, replacing them with little chamfers.
These new Speedbors are supposed to last twice as long and cut twice as fast.
My first experience with the new bits was terrible. They cut slow and tended to leave a rough entry and exit hole.
I talked to my supplier at the hardware store about it. She said many of her customers also disliked the new bits and had the same experience I did.
I slapped together a rant about the bits and almost posted it. Then I thought: Maybe I should wait and use the bits some more. Maybe I’m doing something wrong. Maybe the bits can be improved with a little filing. Maybe I just got some bad bits, and the manufacturing will improve in time.
So for the last two years I stuck with the bits. And I can honestly say they still stink. I’m sure Irwin has some science that backs up its claims, but it doesn’t apply to working in hardwoods. Perhaps they did the test in Styrofoam.
I’ve searched for another brand available in the U.S. as a replacement, but I haven’t had much luck. I’ve tried four other brands, and none are as good as the old Speedbors. If you have a recommendation of a spade bit brand you use and adore, please post it in the comments. (Please spare us the “I’ve heard good things about Beaver Bits.” Or “Saul Pellers says spade bits are for punters.”)
Until I find a replacement brand, I’m sharpening my old Speedbor bits. This works great until you file the rim teeth away (I get about three filings before this happens). I’ve also purchased a two-year supply of NOS (new old stock) Speedbor bits from eBay. So I have a couple years to solve this problem.
As anyone who makes chairs will tell you, life is a never-ending search for decent or better bits.
— Christopher Schwarz
A closer look at the geometry of the new Speedbor.
A close look at the geometry of the older Speedbor.