Comments are now closed. We’ll get to any unanswered questions…soonish!
It’s time for our bi-montly Open Wire, where you can pose your woodworking questions in the comments section below and we’ll do our best to answer them. Comments will close at around 5 p.m.
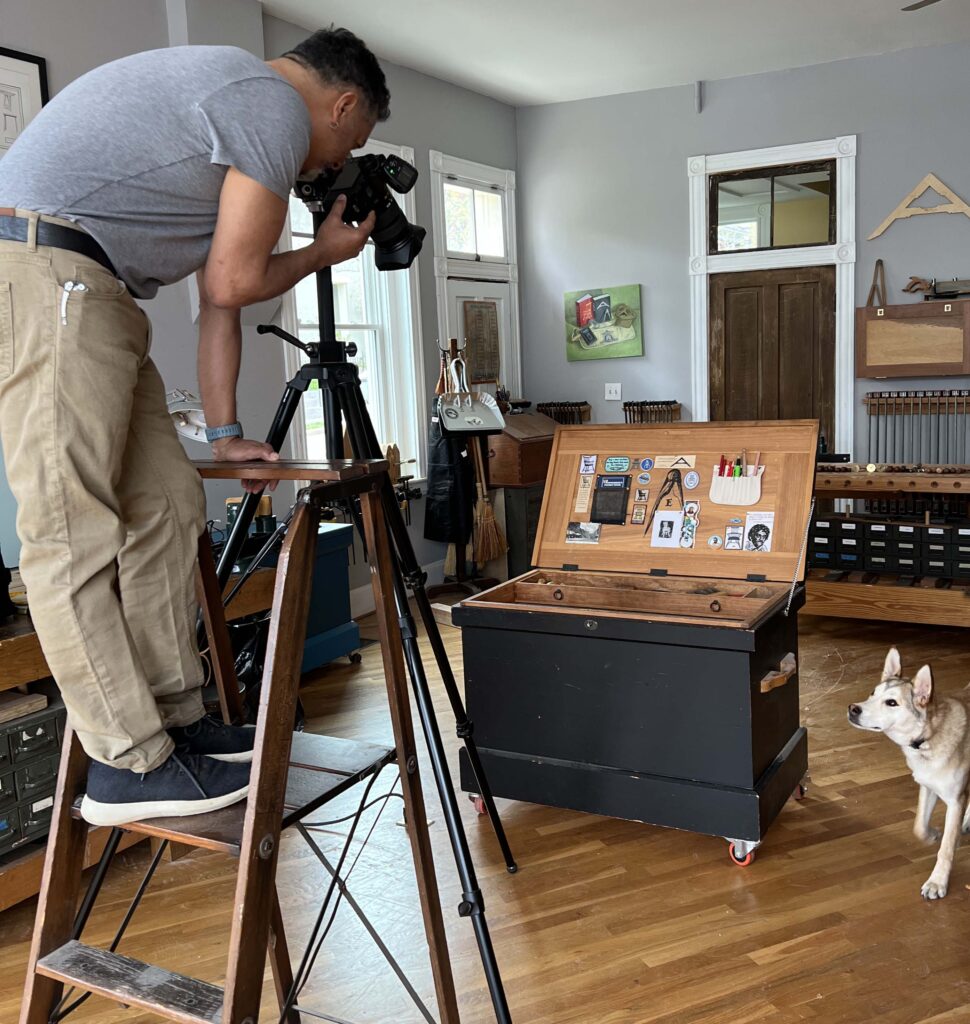
Note that there may be a lag between your asking and our answering. Chris is probably working on a chair, and I’m working on…healing. And editing the revised edition of “The Anarchist’s Tool Chest” (photos for which are happening above).
– Fitz
Do you have any experience with the Veritas Pullshave for saddling a chair seat? Is it passable as a scorp, travisher, both, neither? Right now I don’t own a travisher or scorp but am looking to make my first stick chair. Thanks!
I haven’t used one in years, I’m afraid, so I don’t have a worthwhile opinion. Now that they’re available again, I’ll pick one up and give it a go.
Good morning, a question about the Crucible holdfasts. Absolutely love the two I have. The description mentions they are cast in a foundry in Illinois. What town and foundry specifically is it that produces them? Thank you!
Lemfco in Galena, Ill.
Good morning! As always, thanks for taking to the time to help us! I just drilled the holes in the seat for the back sticks of my first Gibson chair. I did it just as Chris does in the video, even using the same spade bit. When I went to try the sticks they were WAY too tight. On inspection I discovered that the holes were slightly curved — as the drill formed the hole, it slightly walked away from me toward the front of the seat, I presume because of the extreme angle. It seems like after the full circumference of the hole was cut into the surface of the seat then the drill went straight after that. I was able to get the sticks to fit by using a Woodowl bit that cuts on the sides (as you mention in the video) but there’s a gap on the back of the hole. I hope this explanation makes sense. Any tips to deal with this for the next chair? Cheers!
Unfortunately, the answer is: practice. The drill bit didn’t wander, the driller did. Gaps around sticks are a problem until you learn to hold the drill motionless (hint: brace it against your body whenever possible). That’s when gaps disappear.
Aww, that’s no fun! 😉 Ok, advise noted. Practice it is!
Hi Iain, a trick that I learnt from Derek Cohen’s website is to drill a pilot hole first, using a bit that is slightly smaller in diameter than the brad-point on a spade bit or the snail on an auger.
Not only does this help guide the larger bit but it reduces the level of force required to drive the drill to a surprising degree. For example I have drilled one inch holes in a hardwood seat using a brace and spade bit without undue effort.
I think not having to apply so much pressure helps in keeping the bit from wandering. It works for me, not sure what Chris’s view would be, admittedly it is an extra step…..
Hey folks–thanks for doing these! My question is about installing hinges. I’ve always done it the way you all do it, but then, for my last cabinet project (in apple!), I dug out my copy of Wearing’s The Essential Woodworker and followed his method, which you all excerpted in this post: https://blog.lostartpress.com/2021/09/07/how-to-hinge-a-door-a-la-robert-wearing/. Basically, you cut in sloped mortises for the hinges…. It was alot more work, I had some unfortunate experiences with hinge screws coming out the face of the stile…. I don’t think I’ll follow that method again. My question for you all is 1) have you ever followed Wearing’s methond and 2) Why would someone follow Wearing’s method (is it just so that the hinge-side sightiline is uninterrupted?) Thanks!
It’s a 20th century British thing. I don’t know of any other accounts of this in the historical record. I’ve always wondered about it as well. Sorry I don’t have a good answer for you.
Good morning!
I used India ink on my first stick chair. The ink didn’t adhere to the durhams rock hard putty so bow I have a black chair with white spots on it. Any suggestions? I was thinking of trying black milk paint over the entire thing.
Also ai need to make a wider stick chair with a comb that is 2 or 3″ taller than the ones in the book. Any tips or things I should think about?
Lastly is there an easy way to search the comments from previous open wires?
Thanks so much!
Josh
That’s wild that the ink didn’t stick to the putty. It’s so porous. I think the milk paint is a good idea, but I would first try painting only the putty (not the whole chair) and see how that looks. Both the ink and the milk paint have a dead flat sheen — you might get away with it.
On making a bigger chair, there’s no special tricks. Just add a few inches to the seat and arm, and make the sticks longer.
You can search past comments using this nifty tool: https://lap-open-wire-search.fly.dev/
Way to bury the lede! I’ve been wanting someone to create a searchable index for these invaluable comment threads!
GM! Sorry to combine two topics in one post:
I am thinking ahead to finishing two 7-stick comb back chairs – poplar seat and oak for all other parts. I plan on painting the chairs two different colors.
1) the finish will either be General Finishes Milk Paint or Heirloom Traditions All-in-One paint. How much paint is typically necessary for this chair if applying two coats?
2) Do you have any experience with the Heirloom Traditions brand?
My next chair is the Irish Stick Chair from FWW #311. I plan to use mulberry for the seat. I have several 2″ thick slabs that have been air drying for (3) years. The drying process created several checks. Do you have any caution against using mulberry for a seat?
This chair will also be painted, so I’m also wondering about filling the checks. I’ll trim the ends to remove any checking that runs out.
I’ve not used the Heirloom Traditions paint. Sorry. On the General Finishes, a pint will do a chair no problem.
On mulberry, I’ve never used it. I’ve never seen it for sale, in fact. Judging from its numbers in the Wood Database, it should be fine as seat material. The primary consideration for seats is that the wood should not be easy to split (like oak). If the checks aren’t structural, you’ll be fine. But that’s not something I can judge without seeing the wood in person.
There’s a red oak in my yard that has to come down.
It about 80 feet tall with a 16 foot log at the base that looks (on the surface at least) to be free of knots. That log is straight but grows at about a 20 degree angle off vertical. I don’t know the perils of using reaction wood, other than it could be brash.
I know you and most people pay money for the wood you use, and for that reason wouldn’t be likely to use it to build anything.
Can you say – would I be wasting my time making chair parts and lumber with it ?
Because of the tilt of the tree, I’d be wary of it. Reaction wood is no fun – I’ve seen it pop apart in an industrial planer and stop the machine cold.
Me personally, I would pass.
Me too then. Thanks.
I’ve noticed that some woodworkers keep close by a leather strop with the green stuff and every hour or so they hone their chisels across it a few times. The claim is that this can (significantly) forestall the time of full sharpening. What is your opinion here and do you practice that?
It’s a carver’s approach to the work. You need to be quite practiced to do it so that you don’t round over the edge while stropping.
It’s not how I learned to work with traditional bench tools, so that’s not how I work (though there’s nothing wrong with the practice). But while engraving, I touch up the tool after every X cuts to keep the edge consistent.
I’m taking a 2 week trip to Europe very soon. Starting in Dublin, then Copenhagen, and ending in a longer excursion in Sweden. Where are some decent places to look for craftsman (not the brand) made tools as well as “peasantry’s” in any of those countries? I normally frequent antique places and flea markets, but I’m wondering if any of you have been to any you’d recommend in your travels. Also of you have any beer recommendations, I’m very welcome to such. I appreciate all of you LAP folks contributions to the woodworking community and I thank you for your time!
Go to every open-air museum you can (the Frielands Museet outside Copenhagen is world class and HUGE). You’ll find a lot of design-y stuff in Denmark. There is a tool seller in Ireland – the Carpentry Store – that I’ve heard good things about. The Museum of Rural Life in Ireland is outstanding (lots of Gibson chairs). If you can visit any of the Trappist breweries (Orval, Chimay) you will be blown away by the beer and the cheese.
I’m sure other readers have more suggestions.
Good morning folks. I caught a glimpse of the latest ATC & noticed what looks like a hasp on the lid. Where did you source it? Possibly Horton’s horizontal iron hasp? Thanks in advance!
That is the Horton Brasses HSP-4
I think the hasp is described in this blog post, correct Megan?
https://blog.lostartpress.com/category/dutch-tool-chests/page/5/
Yep – it’s the same one
Thank you both for doing this!
One for Chris – any modifications you would make to the hobbit-y chair from the Stick Chair Journal for a 6’7″, 230lbs sitter? (The chair will be in Sessile Oak)
One for Megan – I hope the recovery is going well. I really enjoyed your talk last year in London on Shaker furniture, and was wondering if you had any recommended reading for the social history of the Shakers?
Cheers!
Pip
Thanks – it’s going more slowly than I’d like, but it was never going to be fast enough! If you’re looking for the history side of things, not the furniture, I’d recommend “The Shaker Experience in America,” by Stephen J. Stein (Yale).
I’d increase the leg sizes to 1-7/8″ octagons. Maybe not taper them quite so dramatically.
Good morning Chris I hope you are well and Megan, I hope you are healing fast.
I’m completing another stick chair (my fifth!), this time in ash, and I’m thinking I’d like to give it a matte black finish.
What are your thoughts about using India ink? Advantages/disadvantages?
About how much would I need to do a chair?
What is the best way to apply (clean rag, foam brush, brush)?
Or, would it just be better to scrap the whole India ink idea and go with the general finishes black?
Many thanks for your insights.
I love India ink for black. I use this stuff:
https://www.dickblick.com/items/blick-black-cat-waterproof-india-ink-pint/
One bottle will do a few chairs. I apply it with a brush. It dries very quickly. You need three coats if you want black. Then I put a low-sheen finish on it: oil, or soft wax.
Chair repair question: I completed the TWW American Welsh stick chair in mid-August. About 3 weeks ago I noticed the arm bow had split cross-ways at one of the stick holes. The split is under the shoe and except for some minimal separation adjacent to the back of the split the glue joint seems to be holding. What’s your suggestion to minimize chances of the arm failing altogether?
I’d probably screw the arm pieces to the shoe from underneath. A very typical stick chair repair….
Do you have plans to write a book on finishing? Similar to your book Sharpen This? Thanks
At one point, yes – but here’s the skinny: https://blog.lostartpress.com/2020/11/30/rip-the-anarchists-finishing-manual/
That book is still on my to-do list.
I’ll buy it. Thank you
I came across this copy of By Hand and Eye at a Half Price Books in Northeast Ohio. I can’t quite decipher what is written on the cover, but my guess it is a reference to the type of paper used. Was this copy a proof of some sort?
https://imgur.com/a/BQzeCXk
My guess is it refers to the paper, but I do not know why that’s written on the cover; we don’t typically do that.
That is the paper weight we use. I might have been sent out by our printer as a sample to a potential customer. Very common practice.
Good morning. It appears that between the plans in the Stick Chair Book and the FWW article on the Curved-Back Armchair the stick tenons into the seat changed from 1″ to 3/4″ diameter. What’s the thought process in choosing the appropriate tenon size?
The 3/4″ are plenty strong and look better (to my eye). Feel free to use either in your version.
Hi, I am wondering what the requirements are for “sandwich drilling”. Do all of the sticks need to be in a straight line and at the same angle? And, how do you figure where the height of the arm will end up?
Thanks, Deke
They don’t need to be in a straight line at all. But they all have to be at the same angle.
If you build the peasant chair from The American Peasant (it’s free) out of junk wood, you will understand more about sandwich drilling than words can tell you.
The offset of the arm and seat is calculated with a full-size drawing (on paper or CAD).
I woke up at o-dark-thirty this morning and couldn’t get back to sleep.
Went in the shop to layout and cut some dovetails…and did this: https://photos.app.goo.gl/pESQMR3wfEREybet5 . Namely, I cut off one of my tails. I’m inclined to go ahead and finish the joint without this tail (there are 4 per joint) and add a tail-shaped piece after the fact. Maybe even dowel it in place.
Recommendation on an easier way? This is shop furniture akin to the rolling base for the DTC so it doesn’t have to be absolutely perfect.
Thx, MarkM
Huh, answering my own question maybe? Don’t cut out for the half-pin on the end and cut it into a half-tail resulting in a super long pin? Hmm.
If you want to do a tail implant, I’d glue it back on with CA for transfer, then (assuming it falls off during assembly) just pop it in place with whatever glue you’re using for assembly. It would not be the first time I’ve seen this done 😉
But as you note, you can also turn that remaining half-pin wood into a half tail, and have a large pin in that wide socket.
Either will work just fine.
I watched Chris’s video about turning cylindrical tenons in a lathe. In this video, Chris uses a sizing tool in conjunction with a parting tool to get the tenon to the right diameter.
Is using the sizing tool a big improvement over the ol’ parting-tool-in-one-hand-and-calipers-in-the-other approach?
Yes!
Thank for offering your time like this, it is really appreciated.
Other than species and glue selection, are there any other considerations when making a stick chair that would spend much of it’s time outdoors? I’m in Virginia, so they would see all types of weather. I’d probably not saddle the seat and I’m OK with painting them.
thanks.
Use a rot-resistant species (white oak, for example). Consider using a waterproof glue (epoxy). And paint it with linseed oil paint. Repaint it when the paint wears thin.
How would stick chairs survive outside? Would you change anything about the design/construction if you were going to keep one outside? Or are they best kept inside?
Use a rot-resistant species (white oak, for example). Consider using a waterproof glue (epoxy). And paint it with linseed oil paint. Repaint it when the paint wears thin.
Question on plane cubbies in tool chests (specifically the Dutch one). In Megan’s book, she makes her plane cubbies out of 2″ wide scrap stock (but mentions narrower stock – 1-3/4″). In the gallery section, an example shows maybe 1/4″ or 1/2″ tall dividers. What is the benefit of using the wider stock vs. narrower stock? I am thinking that the narrower stock (maybe 1″ or shorter) would make it easier to pick up smaller planes. Would narrower stock lead to the planes being jostled about when the tool chest is moved about. I am assuming that I am overthinking this.
Basically, any size works. I’ve seen some dividers that are only about 1/4″ tall, just to keep planes from banging into one another. But if you’re going to be moving the chest a lot (i.e. picking it up and slinging it around, as opposed to rolling it), I’d go with dividers that are at least 1″ tall. The taller they are, the less easily the planes can tip.
Large pin it is. Good reminder to be more careful. Also, this piece is going in a Makerspace. It’ll serve as a good example of what can go wrong. Many Thanks. Really enjoyed DTC and happy to add it to my LAP collection. Get well soon!
Thank you again for patiently answering questions and sharing knowledge today. I’ve kept track of your blog posts on drill bits over the years and have a list of recommended drill bits. I suspect you may not be still using all of them. It would also be great to know which one you use for what.
Do you still use and if so for what application: (1) Star-M auger bits (screw-like tip) (2) WoodOwl Ultra Smooth Tri-Cut Auger Bits (screw-like tip, I guess redundant if you have the Star-Ms) (3) Woodowl overdrive bits (pointy tip) apparently also like the Star-M F-type auger bits (4) Star-M 601 Precision Drill Bits for super-smooth holes and finally (6) the famous HSS brad point bits from Lee Valley. Thank you.
When you become a chairmaker, you also become an expert at bits. A lot of times, the bit I use is determined by what is available (the F-type bits are hard to come by).
So I use all the bits on your list except the Star-M augers. I don’t think I’ve ever used those.
Could you detail your process for squaring wide panels (bigger than shooting board size) such as those used in the ATC?
I found a blog post that briefly mentions it from a while back, but didn’t mention the process you use for the tweaking.
Clamp the panels together and to your bench. Use a framing square and a plane (block, smoother, whatever) to plane it square. Avoid spelching by planing toward the middle of the panel.
Thanks for doing these. There are always new things to learn just by reading the questions and responses.
A quick FYI about the links on the right side of the blog: the American Peasant link opens in the same window (target=”_self” or something similar), while Never Sponsored opens in a new tab/window (target=”_blank”).
Thanks. Will try to fix that.
Back at the first of the year Chris posted his finished fireplace surround in QSWO on Instagram. Someone posted a comment/question about the finish and Chris’s reply was “Minwax Stain and Softwax Topcoat”. What was the Minwax stain that was used. That finish not only looked good but seemed like a no fuss finish for QSWO, thanks in advance.
I use Minwax Provincial and Minwax Early American when I want a nice brown. That project used Provincial.
When making a Roubo bench, does it matter if the legs aren’t exactly the same width and depth, so long as they are pretty thick and wide, and are placed flush with the edges of the bench? So one could use a 6”x4” along with a 5 1/2” x 3 1/2” and be fine, no? The stetchers would also be flush to the front edges, of course. If so, I’d be spared a lot of dimensioning (hand-planing). Thanks!!
The legs don’t have to be the same size. Just get ‘er done.
That’s what I thought. Wanted to be sure. Thank you very,very much. So much labor saved!
I have a question on the Field Desk from the Campaign Furniture book. I’ve been working on building one, and when dealing with the hinges for the side stretchers I managed to shear off a few of the screws. I’m pretty sure I can get around/fix this problem (or just build new side stretchers), but before going to that effort can you tell me how sturdy this desk is/how well it has held up? I’m building it for my younger daughter, with the original theory being that it would be easy for her to get out of the way when she wanted to be more active/tumble in her bedroom. But it is taking me longer than I expected to it, so I’m not sure how much that feature matters anymore. And if it isn’t as sturdy I might just go with normal aprons.
And sorry Megan, the top is purpleheart as that is her favorite color. I’m figuring as it changes color she will appreciate the browner tone more as she ages 😋
Brass screws can be a pain like that. Use steel screws and a slightly larger pilot and you’ll be fine. That said, the brass screws on mine have lasted a long, long time.
Thanks!
Years ago you had a forum that you eventually shut down. I recall it still being accessible for searching, but wasn’t able to access/find it recently when I went looking for it. My guess is it is no longer accessible, but just wanted to check. (And I saw the link above about searching the Open Wire comments. That’s awesome).
The forum was hosted by muut, I can’t seem to access it either.
Chris and Megan: with regard to the glue recipe you have generously provided, have you determined any shelf life for it? Also, it sounds like you suggest for best results to keep refrigerated when not in use and then warm it up in a warm pot of water. Is there any limit to how many times you can take it from the fridge to warm or is it an indefinite amount of times? Thank you.
If you treat the glue well, it can easily last three years (I have seen titebond hide glue that has lasted even longer).
Keeping it sealed and in a cool, dry place is usually enough. We keep it in the fridge because it’s easy for us to do, and it repels bacterial attack (which is what can break the glue down).
There is no known limit to how many heats that hide glue can endure.
Good morning, as always your expertise and time are much appreciated. Is the dog in the picture a new member of the team or just visiting. In either case it looks a beauty. Am I right in assuming he/she is just past the puppy stage?
That was Barley, the dog of our photographer Narayan Nayar. He’s less than a year old and a total sweetheart.
Lucy is a cat person, so this will forever be a cathouse.
I have a couple holdfast holes in my bench that are bot plumb and the hold fast only grabs when pointed towards the back of the bench. Is there a way to fix these other than plugging them and trying again?
Not that I know of.
Good morning, I thought I remember seeing that there is a chair makers notebook 2 in the works. Any idea when this might come out? I thought I read that this has techniques to steam bending kiln dried wood for those of us without a good source of green wood.
Thanks!
I haven’t heard an update from Peter Galbert in a while. Right now his life is all about fixing up his house/barn/school.
Good Morning!
Is there any update on the release date of the chair makers notebook 2? I’m very interested in the steam bending kiln dried wood techniques.
Thank you
What do you think of Richard Maguire’s dovetail method — basically he puts the outside face of the tailboard (tails first) facing away, then instead of cutting dead straight along the waste side of the line, removes the pencil line on the on the inside corner of the tail and just barely keeps it on the outside of the tail. This creates a very subtly wedge-shaped tail, and as you fit the joint, it starts out a little loose and tightens as you tap it together. I had never seen this before, and found it very interesting.
I’m practicing dovetails every day for a month using the excellent instructions in Dutch Tool Chests, then I might try this out to see how it compares.
I’ve never heard of this method. That shouldn’t be a surprise because I don’t have time to follow everyone out there. I do love Richard (very sweet and funny guy). So give it a go if Richard says so….
Ian Kirby described that technique in a very early FWW magazine issue in an article called “On Dovetailing Carcases”.
Good morning. Two questions. Did you ever find a recommendation for the chamfering tool ? I ordered one but it was crap with no edge. Second, for the Irish-y chair with 1″ tenons, can you use the dowel making tool you wrote about to make the tenons ? I have a lathe but its bed is only long enough for the short sticks (more of a pen making lathe).
Many thanks for all of this.
Also, I recently started a job that brings me through CVG pretty regularly so it’s great to be able to stop by. I actually got to see Rumpke mountain this week 🙂
I still haven’t been able to find one that isn’t crap. Believe me when I say: I will.
You can use the dowel gizmo for tenons. But saw the shoulder first if you want a clean shoulder. The tool makes a mess.
Good morning- Re: The American Peasant- Some months ago Chris published a dictionary of spells. I printed it off at the time, but do you think i can find it? Searching the blog has been unsuccessful, so could you please point me to where i might download it again? thanks
That was an excerpt from “American Peasant.” You can download the book for free here: https://lostartpress.com/collections/books/products/american-peasant-signed-by-the-author
Chris, thanks for the answer on sandwich drilling. A few more…
You mentioned somewhere that Chris Williams uses “direct drilling” without sight lines. What does that mean?
In the ADB you use huge 2″ diameter tenons for the tables in that book. Is that determined based on the diameter of the legs or something else?
Finally, have you had any experience or even seen the Melbourne Tool Company large router plane?
Thanks! Deke
Chris uses two sliding bevels to guide him while drilling the tenons for the legs. He uses 0° sightlines (straight ahead) for drilling the mortises for the back sticks. It’s all outlined in his book if you want details.
On the 2″ tenons, that’s what I thought I needed for the tables. And I have yet to be proven wrong.
And I have not seen the Melbourne Tool router. Sorry.
Good morning! I’m building a 7 stick comb back chair. The seat is 1 1/2″ thick ash with tapered sliding dovetailed battens for a total thickness of 2 1/8″. I moved mortise locations to center the tapered leg motises in the battens. When I drilled the back sticks at 16 degrees one motise on each side intersected the bottom 1/2″ of the tapered leg motise. Should I preemptively glue a short plug in the bottom of the back stick motises and recut the taper of the leg motise with the reamer? My concern is that the back stick would be pushing on the leg in the wrong direction.
Alternatively, is the simple solution better to leave the intersecting motises and just cut the tenon on these two back sticks short? I’m also open to hearing that I have seat shaped firewood.
Thanks!
-Steve
Your second plan is what I would do. Cut the stick’s tenon so it is just shy of the mortise.
I’m currently reading your Dutch Tool Chests book and you instruct to use nails or screws to attach the shelves, bottom lip, etc. My question is can I substitute with dowels? There’s lots of information about this online and just as many opinions so I’m left wondering if it’s a plausible solution. Thanks.
that’s what I was hoping to hear. Thank you!
Thank you for that link to your Open Wire search tool! Just as an experiment I ran a search on “dovetail”, and was astonished at the wealth of comments it found on that single term. I’ve been also experimenting with various AI search tools in recent months, and my favorite has come Perplexity. So I was curious to see what a related search using that would produce. The results it returned were COMPLETELY different from your own search tool, but I thought you may be interested to see what it says about LAP Open Wire in the dovetail context. It’s VERY HIGH praise indeed, and well-deserved too!
Lost Art Press open wire dovetail
If you’re interested in Lost Art Press’s “Open Wire” and dovetail techniques, you’re likely seeking expert woodworking guidance, practical tips, and perhaps community-driven Q&A on dovetails—whether hand-cut or sliding. Lost Art Press’s Open Wire sessions are a unique resource for woodworkers, offering direct access to seasoned professionals and lively discussions about joinery, tools, and historical methods. Here are some recommendations to help you engage with this resource and deepen your dovetail skills.
Lost Art Press Open Wire Blog Series
The Open Wire sessions on the Lost Art Press blog are a goldmine for anyone interested in dovetails—whether you’re troubleshooting technique, debating tail spacing, or exploring sliding dovetails for chairmaking. These nearly-weekly Q&A threads allow you to ask questions directly to experts like Christopher Schwarz and Megan Fitzpatrick, with responses grounded in deep experience and historical context. What sets Open Wire apart is the blend of practical, real-world advice and encouragement to experiment—plus, the archives are searchable, making it easy to find past discussions on dovetail layout, waste removal, and tool recommendations. The main drawback is that Open Wire is only live on specific dates, but the searchable archives remain an invaluable resource year-round.
Dovetail Techniques and Tips from Lost Art Press
For hands-on dovetailing, Lost Art Press blog posts offer detailed, step-by-step advice on everything from efficient waste removal to achieving crisp, clean corners. Their guidance covers both traditional through dovetails and sliding dovetails, with nuanced tips like using a narrow chisel for waste removal or undercutting the waste for a tight fit. These posts are ideal if you want to refine your hand-tool skills, understand historical practices, or troubleshoot common dovetailing challenges. The main advantage is the depth and clarity of instruction, though you may need to search through several posts to find answers to highly specific questions.
Community Engagement and Learning via Open Wire
Participating in Open Wire isn’t just about getting answers—it’s about joining a vibrant woodworking community. You’ll find discussions on everything from dovetail spacing in historical chests to the merits of different finishing techniques, all with a friendly, approachable tone. This ongoing dialogue helps you stay motivated, learn from others’ experiences, and even influence future Lost Art Press projects. The only limitation is the asynchronous nature of blog comments, but the engagement and sense of camaraderie more than make up for it.
Which would be your preferred woods for the interior of the ATC? Was Chris happy with the mahogany and did he use it across the board? Thank you.
For the runners and till bottoms, something hard (i.e. oak, maple…), and straight grain for the runners. For the rest, whatever looks good to you/is easily available. (My till sides and hanging racks are walnut because I like walnut.)
While making another chair from the SCJ #1 in oak, the seat has opened up at the glue seam. My first thought was to use a mending plate underneath but with the under bevel I am not sure it would be very effective. I was thinking of possibly installing a Dutchman on the side of the seat. Have you tried this me before? Any thoughts?
Thank you.
I should have said the opening is right on the outside edge of the seat and is very small.
Either or both are traditional repairs on old stick chairs.
Are there plans to replenish Vol. 2 0f The Woodworker?
Yes, all four volumes are being reprinted now. Should be back in stock in about five weeks.
Is this THE Mike Wenzloff the sawmaker?
Totally random question: Chris you use a block plane to smooth out chair legs, why a block plane instead of a spokeshave?
I don’t have to clamp the work if I use a block plane. One hand holds the part and presses it against a stop. The other hand holds the plane.
I LOVE my spokeshaves, but I use them for curved work.
Hi there,
I am thinking about building a new bench. I built my current one years ago and it has a lot of problems with racking. I am considering adding some diagonal bracing to my new bench to secure things. Is there a reason diagonal bracing doesn’t seem to be common on benches? Thanks in advance.
There are lots of old English and American benches with diagonal bracing. Sometimes it was part of the initial design of the bench. Sometimes it was added afterwards to shore up a bench. So feel free.
Hello! One question on Anarchist’s Workbench – for the legs you mention arranging the wood grain sympathetically but not for the top. Is this due to the much larger number of laminations? Should I be concerned at all about arranging for grain in the bench top?
Thank you!
Yes, exactly. For the top, there are so many laminations that it’s unlikely that a glue line will fail.
What was the URL? Maybe it’s on archive.org?
Oops — the out-of-order reply bug bit me. I’m referring to the forum on muut mentioned above
http://muut.com/lostartpress
Maybe. Partially. But I am barely in the here and now.
I was thinking of getting them for a young handtool wood worker I’ve been giving tools to for a few years. Great kid.
Would you consider producing a crucible sector for woodworkers (maybe in brass or stainless)?
That’s a Chris question…but my guess is no? You can get one here, though: https://redrosereproductions.com/tools/The-Sector-p144028084
Sectors are incredibly cool. But they aren’t much help for a lot of woodworking tasks. Architecture? Yes. Woodworking? Barely.
This is just opinion. I played around with them – I have an old ivory one around here somewhere – and didn’t feel my mind opened.
But Red Rose’s is fantastic. Well made. etc.
Just curious if the LAP folks have any experience with hard shellac and whether you know what’s actually added to this? Or whether it actually is shellac?
https://www.pennstateind.com/store/PKSHDSH.html
The description is hilarious. Now I want to use it on pens. AND PENS ONLY.
I’ll pick some up and give it a try.
Hello! I would like to ask about a chinese comb-maker’s vise, it can be seen in picture here :
https://news.cgtn.com/news/2021-02-05/Intangible-cultural-heritage-gaining-popularity-via-internet-XDaIGfIiQg/share_amp.html
and in the following 5 min video, starting around the 2 min mark.
I would love to see more about that kind of workholding but I do not have many asian woodworking reference books. In woodworking in estonia there are a few instances of wooden lever vice and rope-holding. Have a nice weekend!
I know almost nothing about comb making. But Charles Thompson has been going down that path lately and the workholding associated with it.
https://www.charlesthompson.net/
https://www.instagram.com/charles_thompson_would/
How do you determine when it’s time to replace your bandsaw blade?
When the blade is dull it tends to wander and burn the work.
Generally if I ask myself: is this blade dull? Then I know the answer. It is.
Thanks as always for doing these! I’m building a workbench in the Anarchist’s Workbench style for my apartment, which limits me to 4 or 5 feet in overall length. What overhang would you have on each side? Could you (and would you) change anything about the undercarriage dimensions? For example, would you make the legs or stretchers thinner/narrower for aesthetic or practical reasons (such as getting a couple more inches of storage space underneath)?
Shift the base all the way to one end so you have a good overhang there. It’s quite useful. You can scale down the legs an inch or so and be OK.
Thank you. Hope you are feeling better.
Are holdfasts supposed to keep the work in place in the face of sideways (parallel to the benchtop) forces? For example, relief carving, Fisher-esque bowl work, etc.? Mine (Gramarcy w/ AWB) slip, even after roughing them up. I’m resisting widening the holes from underneath to make the effective thickness less than the current 5″.
Holdfasts should hold in all directions for carving, engraving, whatever. Your plan should help that.
Thanks Chris – I was just about to ask the same question. It seems like the learning curve would be shorter for folks used to spokeshaves…
I’m going to build a chair for a silent auction fundraiser. Could you recommend a hardwood that people prefer in a chair? Thanks.
You can never go wrong with cherry, walnut or maple.
I’m hoping/planning to build a dresser, probably based on the one in the Joiner and Cabinet Maker. I’d like to learn more about drawers and their housings. What other LAP books can I buy that have instructions for building drawers? Thanks!
Vol 2 of “The Woodworker”…which will be back in stock soon (hopefully in May)…describes a passel of approaches to drawers.
Chris or Megan will know more but if I were exploring the fine art of making/fitting drawers I’d start with two Lost Art Press books:
Robert Wearing, which I have—dry, technical for beginners, but clear and distills centuries of professional woodworking fundamentals, a book where you can get the basics and return to often to find advanced skills you missed at first:
https://lostartpress.com/products/the-essential-woodworker
Chris Becksvoort Shaker Inspiration, on the wishlist, an outstanding craftsman sharing a lifetime’s worth of wisdom and practical knowledge building some of the most admired and beautiful/simple furniture ever made:
https://lostartpress.com/products/shaker-inspirations?_pos=2&_psq=+Becksvoort&_ss=e&_v=1.0
Good luck!
Our bungalow in LA was built in 1925. When I take the doors off for painting or repairs the hinge mortises look like they’re cut at an angle/bevel to the face of the hinge. Sort of like a shallow ramp? House is not fancy, so maybe this used to be standard carpenter practice? Bet there’s a good reason.
AI answer: “A hinge mortise is sloped (formed like a ramp) to accommodate the gap between the door and frame when using non-swaged hinges. This slope allows the hinge to sit flush with the door and frame, even when the gap is present.”. There is a link earlier today to the excerpt in Wearing’s book, but he doesn’t explain the “why”.
Happy Saturday and thanks for spending time with us. I was wondering if you’ll do another run of workbooks? I’ve quite enjoyed slowly filling mine in – but it will definitely be full by mid-2026 🙂
Maybe? It sold OK, but not great. Requests like this help us make future decisions.
I love mine.
I’m sure it has nothing to do with age, but I’m starting to have problems seeing a pencil/pen line of some species of wood and it’s frustrating at times not being able to see the line. I have tried a white pencil, with some success.
My bench is in a well lit space, would rather it be outside, but MN winters are not kind to outside working.
Looking for options and/or suggestions.
thanks
I have astigmatism that keeps me from seeing well close-up, at all times. Lately I’ve been knifing in my lines a little more deeply, and just feeling for them with the sawplate. But you could try this trick, from Fine Woodworking’s Mike Pekovich: https://www.finewoodworking.com/project-guides/joinery/how-to-cut-perfect-dovetails-with-tape
I’m starting to collect 2 X 12 lumber for a bench.
As I understand it, boards lose most of their moisture thru the ends.
I’m wondering if it makes any difference if I rip the boards in half before they dry,
or is there a reason to wait until they are done drying?
Don’t bother ripping them. But cutting them to rough length will help immensely. Most of the moisture exchange is through the end grain.
In The Stick Chair Book, you talk about using a hard felt wheel on a high speed grinder to sharpen a travisher blade. I have a 1750 RPM buffer, would I still be able to use a charged felt wheel on that and get good results, or is the speed going to be too low for that application?
It’s do just fine, just a few seconds slower.
I’ve been mulling over making a set of stick chairs for a dining room set. My question is whether or not the stick chair works without arms, i.e. as side chairs?
https://blog.lostartpress.com/?s=backstool
Yup. Those are called “backstools” in the stick tradition. I built a couple of them for “The Anarchist’s Design Book,” a free download.
https://lostartpress.com/collections/books/products/the-anarchists-design-book
Hi. I constantly read that quartersawn lumber is the most stable and straightest lumber. However on a recent project, building face frames from quarter sawn white oak, I found that NOT to be the case (at least that “straightest” part). I bought 8/4 lumber that was pretty straight to begin with. I jointed one face dead flat on my jointer and also one edge, so far so good. Pieces were approx. 36″ long . Waited 2 days, then checked it and it was still flat on the face. Ran it thru the planer. Waited 2 days….still flat. Then I resawed it on my bandsaw (with a resaw blade) and that’s when the kerf started to close on the blade and on other pieces it opened up. Needless to say they did not come out straight and had a significant bow (about 3/16 to 1/4″ in the middle compared to the ends). I could not joint them flat again as I was aiming for a finished thickness of 3/4 and they were near 7/8″ already, so with 1/4″ of a bow I was not going to get my 3/4″ thickness after trying to join again. They never relaxed after several days. I just simply had to come up with creative ways to pull them flat when I attached them to my carcass.
Any suggestions or advice?
Quartersawn wood is dimensionally stable. That means it doesn’t change much in width with the changes in season.
However, it is still likely to suffer internal tensions and reaction wood as flatsawn lumber. Or it can be case-hardened. White oak is very difficult to dry well and tension problems are common.
Resawing lumber is always risky. You can lose the entire board – no matter how careful you are.
It’s the tree. Not you or the way it was cut.
Hi. Another question. What advice would you give someone who wants to build wooden things and sell them online and as a side business? Thanks.
It’s like any woodworking business. You have to know the market (etsy is the biggest one). You have to know your competition. You have to love love love what you make (love it so much that you would still make it even if you weren’t paid to do it).
And then never shut up about the things you make on social media.
And then ask for my recipe for Wiener Water Soup (the soup of woodworkers!)
Hi!
Many small questions:
1: is there a reason to use a roller to apply glue as opposed to a (highly elaborate) piece of scrap cardboard or wood to spread – particularly when gluing face to face?
2: what is “finely set” wrt finish planes? Is this just meant to represent the thickness of the shaving? How does the chip breaker and frog relate to being “finely set”
3: crucible holdfasts: I presume there is nothing keeping me from smoothing out the tip of the end of the hook? Is there any “tuning” that you do to these?
Cheers from Seattle!
1, Use what you got
2.https://blog.lostartpress.com/2012/12/08/how-to-really-set-up-a-premium-handplane/
3. The most I might do is add a scrap of leather to the face. But if you want smooth out the tip, it won’t hurt anything.
Two questions. One, are you still using the small Rikon bandsaw. If so, how is it holding up and what, other than a new blade have you added to it? Two, I have to repair four Cohasset Colonial Windsor chairs made from kits in the ’80’s that are coming apart. I used the glue that was provided with the kit. It was l light brown glue. Definitely not hide glue. I think it was plain white glue with a colorant in it, but this is just a guess. I recently read Chris’s post about pva glue being able to bond to itself. What glue do you think would be best? I was planning on trying hide glue, but Chris’s recent post has me thinking about PVA. Thank, any thoughts will be greatly appreciated?
I was using the Rikon almost full time. THen gave to to a fellow woodworker who really needed a compact band saw. It’s still doing great. We put WoodSlicers on it and it is a beast.
I would probably reglue with PVA. First, scrub them with vinegar, which will loosen some of it. Rough up the dried glue surfaces without removing wood below. Reglue with a quality PVA.
Years ago Chris sang the praises of Wetzler heavy duty clamps. Seems it might have been one of those small family owned businesses that eventually dwindled out. Any chance of Crucible resurrecting or reanimating the design? Could be the vintage tooling is waiting in a barn somewhere. Your habit of bringing back lost but superior books and tools (Wearing, Lovejoy, Make a Chair From a Tree…) is great!
Oops… Woodjoy, not Reverend Lovejoy from the Simpsons, who’s fortunately still with us!
We looked into it and talked to a patternmaker about the project even. It’s just not financially feasible for a company like us. It would require an investment in patterns and tooling that we just cannot even touch. We’d also have to invest in having an in-house machine shop again. And I’m still smarting from that failed attempt.
Plus, there are millions of these old clamps out there (not just Wetzlers). And they can be had for reasonable prices.
Me again. Thank you for the answer on India ink. I’ll give it a go.
Second question: What are your thoughts on drilling jigs for the stick chair arm bow & seat holes, as opposed to lining up using the laser? I’m referring to Peter Galbart’s home brew version or the fancy pants Large Spindle Drilling Guide from Kyle Barton at BB Custom Tools. I had an opportunity to try one out on my latest stick chair and it was so easy I felt like I was cheating. No fussing or repositioning the laser needed and the holes lined up perfectly. Almost too easy and too perfect?
But, am I supposed to endure some hardship whilst stick chair building? Have I sinned? (Where does one get absolution of sins of this order?).
I know you are usually jig-adverse, but I’d appreciate your thoughts.
The jigs work. And they work really well. I’ll never lie about that.
I am just always trying to reduce the tools I need to build a chair. The laser is a teaching tool – not something I need for my work. This is simply the way my head works – I am happier doing things freehand (except sharpening my chisels and plane blades).
If they are interesting to you, go for it.
I should note that this issue is most prevalent when cutting dovetails.
Back in 2022 when you were giving out Stick Chair Merits badges, you asked us to send in a photo of the chair we made. I’ve had my badge pinned in my toolchest ever since, but am still wondering on what it is/was you were planning to use those photos for, since you did mention it was not just for proof?
My plan is to use them as wallpaper in the warehouse. It’s one of 100 projects I have waiting for a rainy, sticky day.
No question. Just Thank You! a thousand times for the Open Wire search tool so I can find all your recommendations of places to visit for knowledge and inspiration on furniture design. All your recent recommendations have been great. Now we have easy access to all of them!
Hey Chris and Megan! What are some projects/ideas you’ve steered away from that you hope to come back to?
There is a joint stool in my basement that I’ve been meaning to finish since 2008. And then there is just about every project in my house that is 90% done…. Oh – and a Stickley 808 server has been on my list for a long time.
I want us to get back on track to do a book on Western Shaker furniture. It’s a whole other world from the Eastern stuff. I desperately want to learn faceplate turning so I can make a set of plates and cups for our house.
I’d be interested in something on turning plates and cups!
Hey Chris, so I just finished up a four stick comb back, but I had some trouble fitting the comb smoothly, cracked the first one. Do you sight a secondary angle/sight line to each mortise? Or are they all angled straight back? Individually they fit the mortise but together took some force.
Also, what’s your overall opinion on shellac? It’s a walnut chair, and I was intending to do a shellac finish topped with black bison wax, i did a bunch of test pieces vs just wax variations, but can’t quite figure out the best, and curious what way would look best in 10 years. I know you use shellac in campaign furniture, but seems not the favorite for chairs.
Thanks!
The four-stick chair doesn’t have any tricky geometry (unless you introduced some with your drilling). I always tell people to waller out the mortises in the comb – the pegs hold it on. That usually fixes 95 percent of the problems.
I use shellac on chairs. It’s just shinier than I like. And when it gets damaged, it looks ugly.
I think a non-film finish (oil/wax) will age more gracefully than a clear film finish. And a paint finish will age equally as well.
Hello and thanks for keeping this going!
I have a question on saddling seats. I am very specially challenged and absolutely cannot picture how a stick chairs seat is supposed to look when saddled, even after looking at a ton of pictures! Is there a topographic map or profiles or something somewhere I could reference?
And secondly – this question might be more for the public. Can anyone recommend a turner to reproduce a federal style candlestand center post from a pattern?
Thanks!
My saddles are flat at the back (and curve up to the spindle deck). This bowl is about 1/4″ deep. The cups at the front of the chair are 3/4″ deep at the bottom. And then they ascend like a curved ram to meet the flat bowl about 7″ back from the front edge of the seat.
There are lots of production turners out there who do one-offs.
Hi, and thank for your time. I’m as I’m writing building my bench, it’s a mix between a roubo and the one Peter Sellers built, the top will be 4” by 60”, 3/4” Baltic birch plywood, on edge, it’s short because it will sit in the living room of our apartment. You both complain about the space in the middle on Megan’s new bench. Did Mixon got ir wrong?
Should I leave the space in the middle? I thought it would be good to insert a clamp.
Please your opinion will carry a lot of weight in my decision. Thanks.
I’ll send some pictures and design notes when I’m done with it.
A lot of people love the slot (some for the very clamping you mention). I haven’t found a need for it; doesn’t mean you shouldn’t do it!
Thanks Megan, I think I’ll keep the slot.
Hey Chris, I want to say, as a white Anglo-Saxon ex-Protestant heterosexual male on the latter side of 60, my appreciation for your plain unadorned welcome, acceptance and encouragement of human diversity. This is not the place to name names, but your kindness and openness is like a beacon in dark days. So thank you.
Also for plain sensible talk about tools and shops and artistry. You rock. (Not your chairs, I trust. You all…)
‘Nuff said.
Thanks David. I’ll help anyone who wants to enter the craft. The craft has fed my family now for 30 years, so it’s time for me to pay things back by helping others with instruction, tools or opportunities.
Apologies if this is a duplicate post – I tried submitting the question earlier and it did not post. The question is: would you consider producing a Crucible sector for woodworkers?
I approved your earlier post (first-time commenters have to be approved), and answered; That’s a Chris question…but my guess is no? You can get one here, though: https://redrosereproductions.com/tools/The-Sector-p144028084
Ah, I didn’t realize first posts needed approval, apologies for the duplication. And thanks for letting me know about the red rose reproductions sector.
Thank you,
Lisa
That’s neat fix. Thanks
Thank you very much – I’ll check it out!
Will do, thanks!
Kaleb: I lived in Belgium for four years for work and can second the Trappist breweries and fromage. I would add to Chris’ list St. Sixtus Abbey in Westvleteren. It’s right near Ypres in Flanders, and it’s a lovely town with a beautiful WWI museum in its old Cloth Market.
ChatGPT has nice things to say about Open Wire as well.
Leftover house paint for an ATC seems frugal, practical, and fitting. Anything to be wary of, in your estimation? Any benefit to a base layer of, say, milk paint before the exterior latex?
Nope. My first ATC was house paint over milk paint. But that’s what I had at the time. Latex doesn’t require a primer on bare wood.
Recently used homebrew softwax on an old Douglas-fir floor deeply in need of refinishing. Was a bit slippery for a day or two, but has since become a quite nice, if rustic, finish. I was unable to find much info on this other than a lot of folks using Feed-N-Wax to shine up laminate floors. Does LAP have any experience with homebrew floor finishes?
I’m afraid I do not. I’m an idiot about home stuff.
Nope. I used Bona.
Allback says their Linseed oil wax works on floors.
Hello!
A stick chair question. I strongly prefer to work with local species, and living in a softwood forest has its challenges sometimes. There are plenty of old growth trees windfallen trees here in SE Alaska.
What do you think about softwood branch stock? It is much strong, denser, and harder than wood from the main trunk. Many of these tight grained branches barely float, even after drying.
Old growth spruce or hemlock branches can be as much as 6-12″ in diameter. I’m thinking I can rip a branch down the middle, dry for a year or two outside, then slowly move inside to dry fully. I’m thinking branch wood for legs, sticks and arms. I can always do the sledgehammer test.
For the seat, I occasionally find very dense stump compression wood. I’ve successfully dried the wood, even turned some bowls.
Do any of you have thoughts on using this potentially crazy wood?
Thank you in advance.
I live in the Phila PA area and dew points can reach 68-72 degrees during june to sept. Hide glue fails under these conditions. Anything I can do to hide glue to make it more useable in high humidity conditions?
Thanks, vintazh it is! A lot of that stuff is so well built no point in letting it go to waste. Timing and availability the only problem but then there’s the excitement of the hunt. And being cheap.
What is bona?
A brand of waterbased floor finish (and floor care products). No/few VOCs
Should be a reply to Chris’ answer about Wetzler clamps above… WordPress or my glitch, maybe both!
Using linseed oil paint on pine. Lots of knots. I covered everything with two coats of shellac before using the LOP. Is the shellac can to come loose over time or is it held in place by the paint ?
Thanks
The shellac should stay put. It can last hundreds of years if it isn’t abused.
Thank you!
Thanks for your time and for providing this forum
Do you know of anyone who produced a bastard form of toolchest from your Anarchist and Dutch toolchest designs? I favor the slant lid of the Dutch, but find the Anarchist dovetail design for the joinery more appealing than the primitive look of the Dutch, (nailed and applied pieces) : Rather, horizontal grain for the carcase with dovetails all round, and skirts at top and bottom , the top one being a dust seal. The fall front would be done away with, and two equal sized drawers would replace it. The angled sides obviously make the dust seal a bit more time consuming, as does the drawer construction, and 8 inch wide front piece joinery . Has anyone done something like this that you’re aware of?
Also, in your experience, have you ever had to dovetail butternut stock in any of your projects? Its soft like pine, but chopping it with chisels tends to compress and break and tear the fibers, no matter how compulsive I have been about sharpening the tool.
Thanks again- M Weiss
I’ve not seen anything quite like that chest. The Swedish form has some of those characteristics. It sounds like you have a clear idea in mind. Go for it.
On butternut, I’ve not dovetailed it. When I used it I’d say it was like working walnut.
You might try the American Association of Woodturners, they might have a chapter in your area. https://www.woodturner.org/Woodturner/Woodturner/AAW-Main-Homepage.aspx
When building bookshelves are there any woods or finishes that should or should not be used? I ask mainly so I can be as kind to my books as possible.
I generally don’t finish the shelves unless I have to. I’ve had too many books stick to the paint on shelves. I don’t know what paint they used, but it didn’t do right by my books.