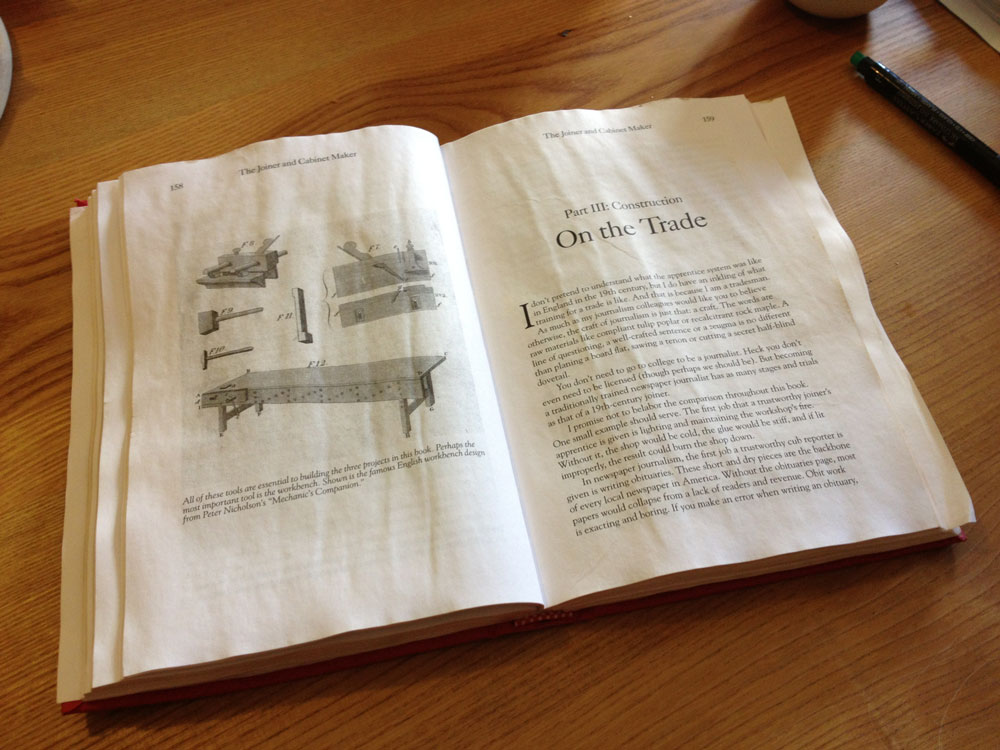
While teaching in Germany one summer, my hosts showed me a copy of our book “The Joiner & Cabinet Maker.” The cover boards were warped, the pages were wavy and the book was scuffed all over.
I cringed and apologized. Did this happen during shipping? I was ready for a Teutonic tongue-lashing.
Instead, they just smiled. The book had survived in a workshop after the Danube River had broken its banks. The book had been soaked. It floated in dirty water for days. And it was beat up by bobbing workbenches and lumber. And it was still completely intact (if a little worn).
It’s not difficult to make a durable book. It just takes money. Some modern publishers are unwilling to spend the cash to ensure a book will survive dogs, floods and babies.
For a typical perfect-bound trade paperback or print-on-demand book, you might get to read it three times before the pages start falling out like leaves dropping from a tree in autumn.
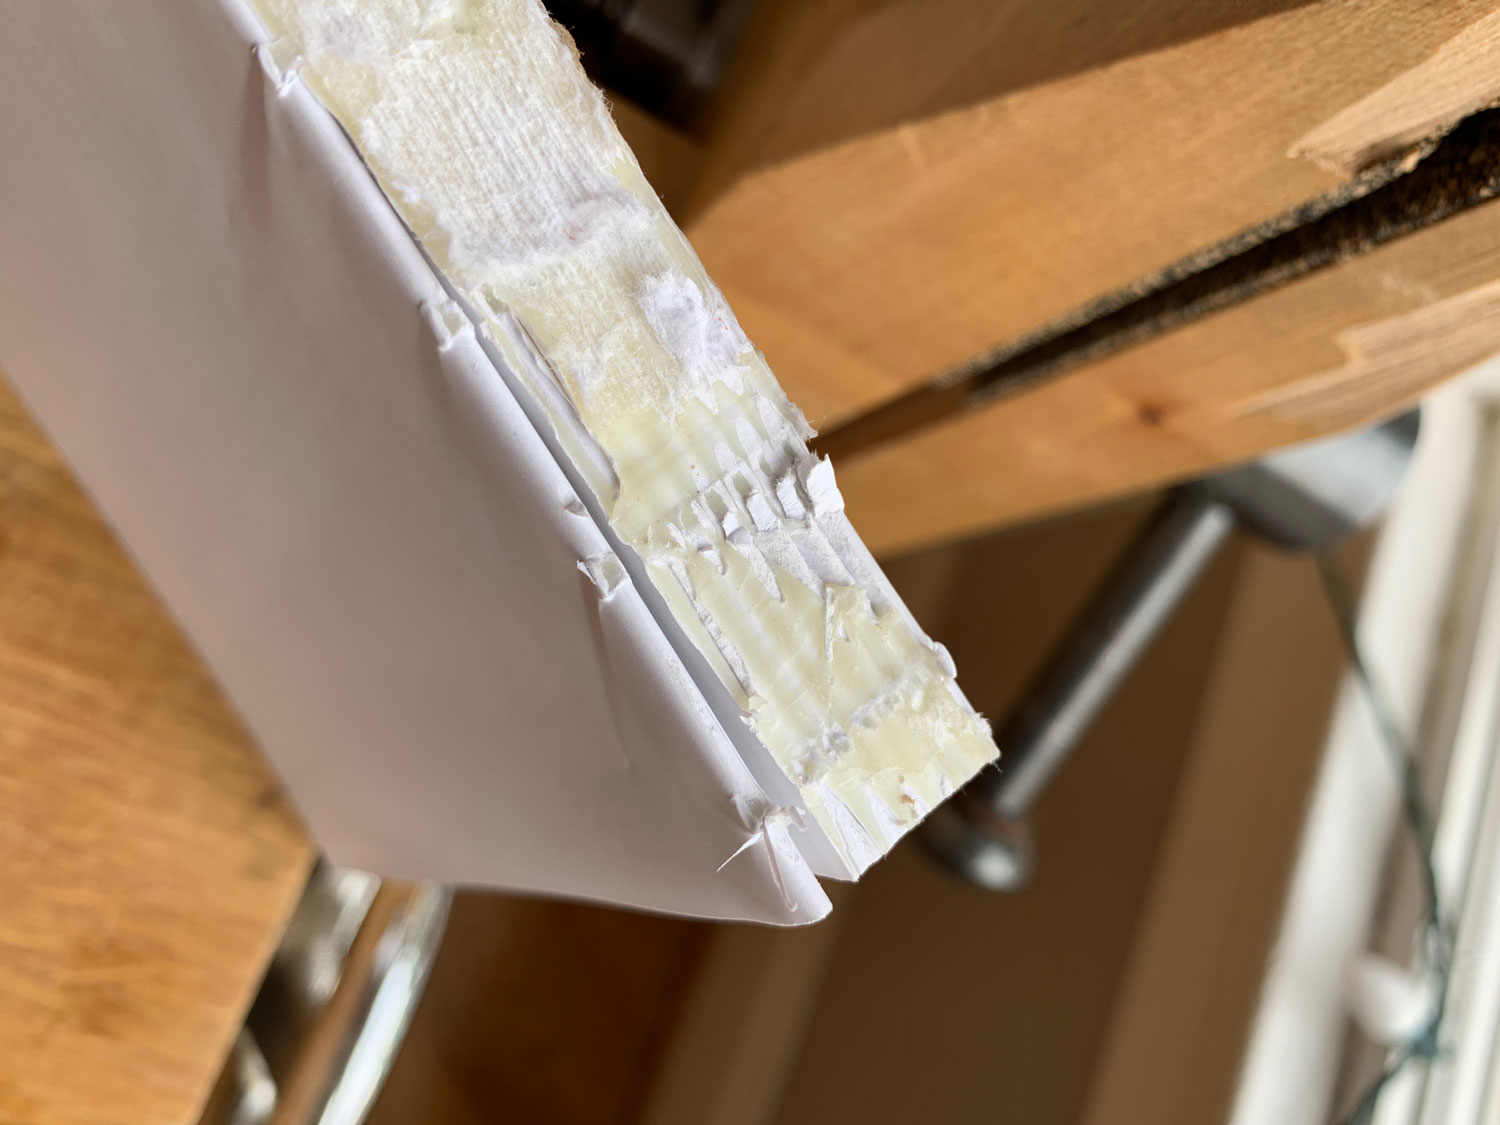
For me, perfect-bound books are like assembling a table with no joinery or fasteners – just glue. Basically, perfect binding is where you take a stack of single sheets of paper and apply glue to one edge of the stack to stick the individual sheets together. When the glue gets brittle or too wet, however, there is nothing else there to keep the book together.
Just like with woodworking, there are mechanical ways to keep a book together for many decades.
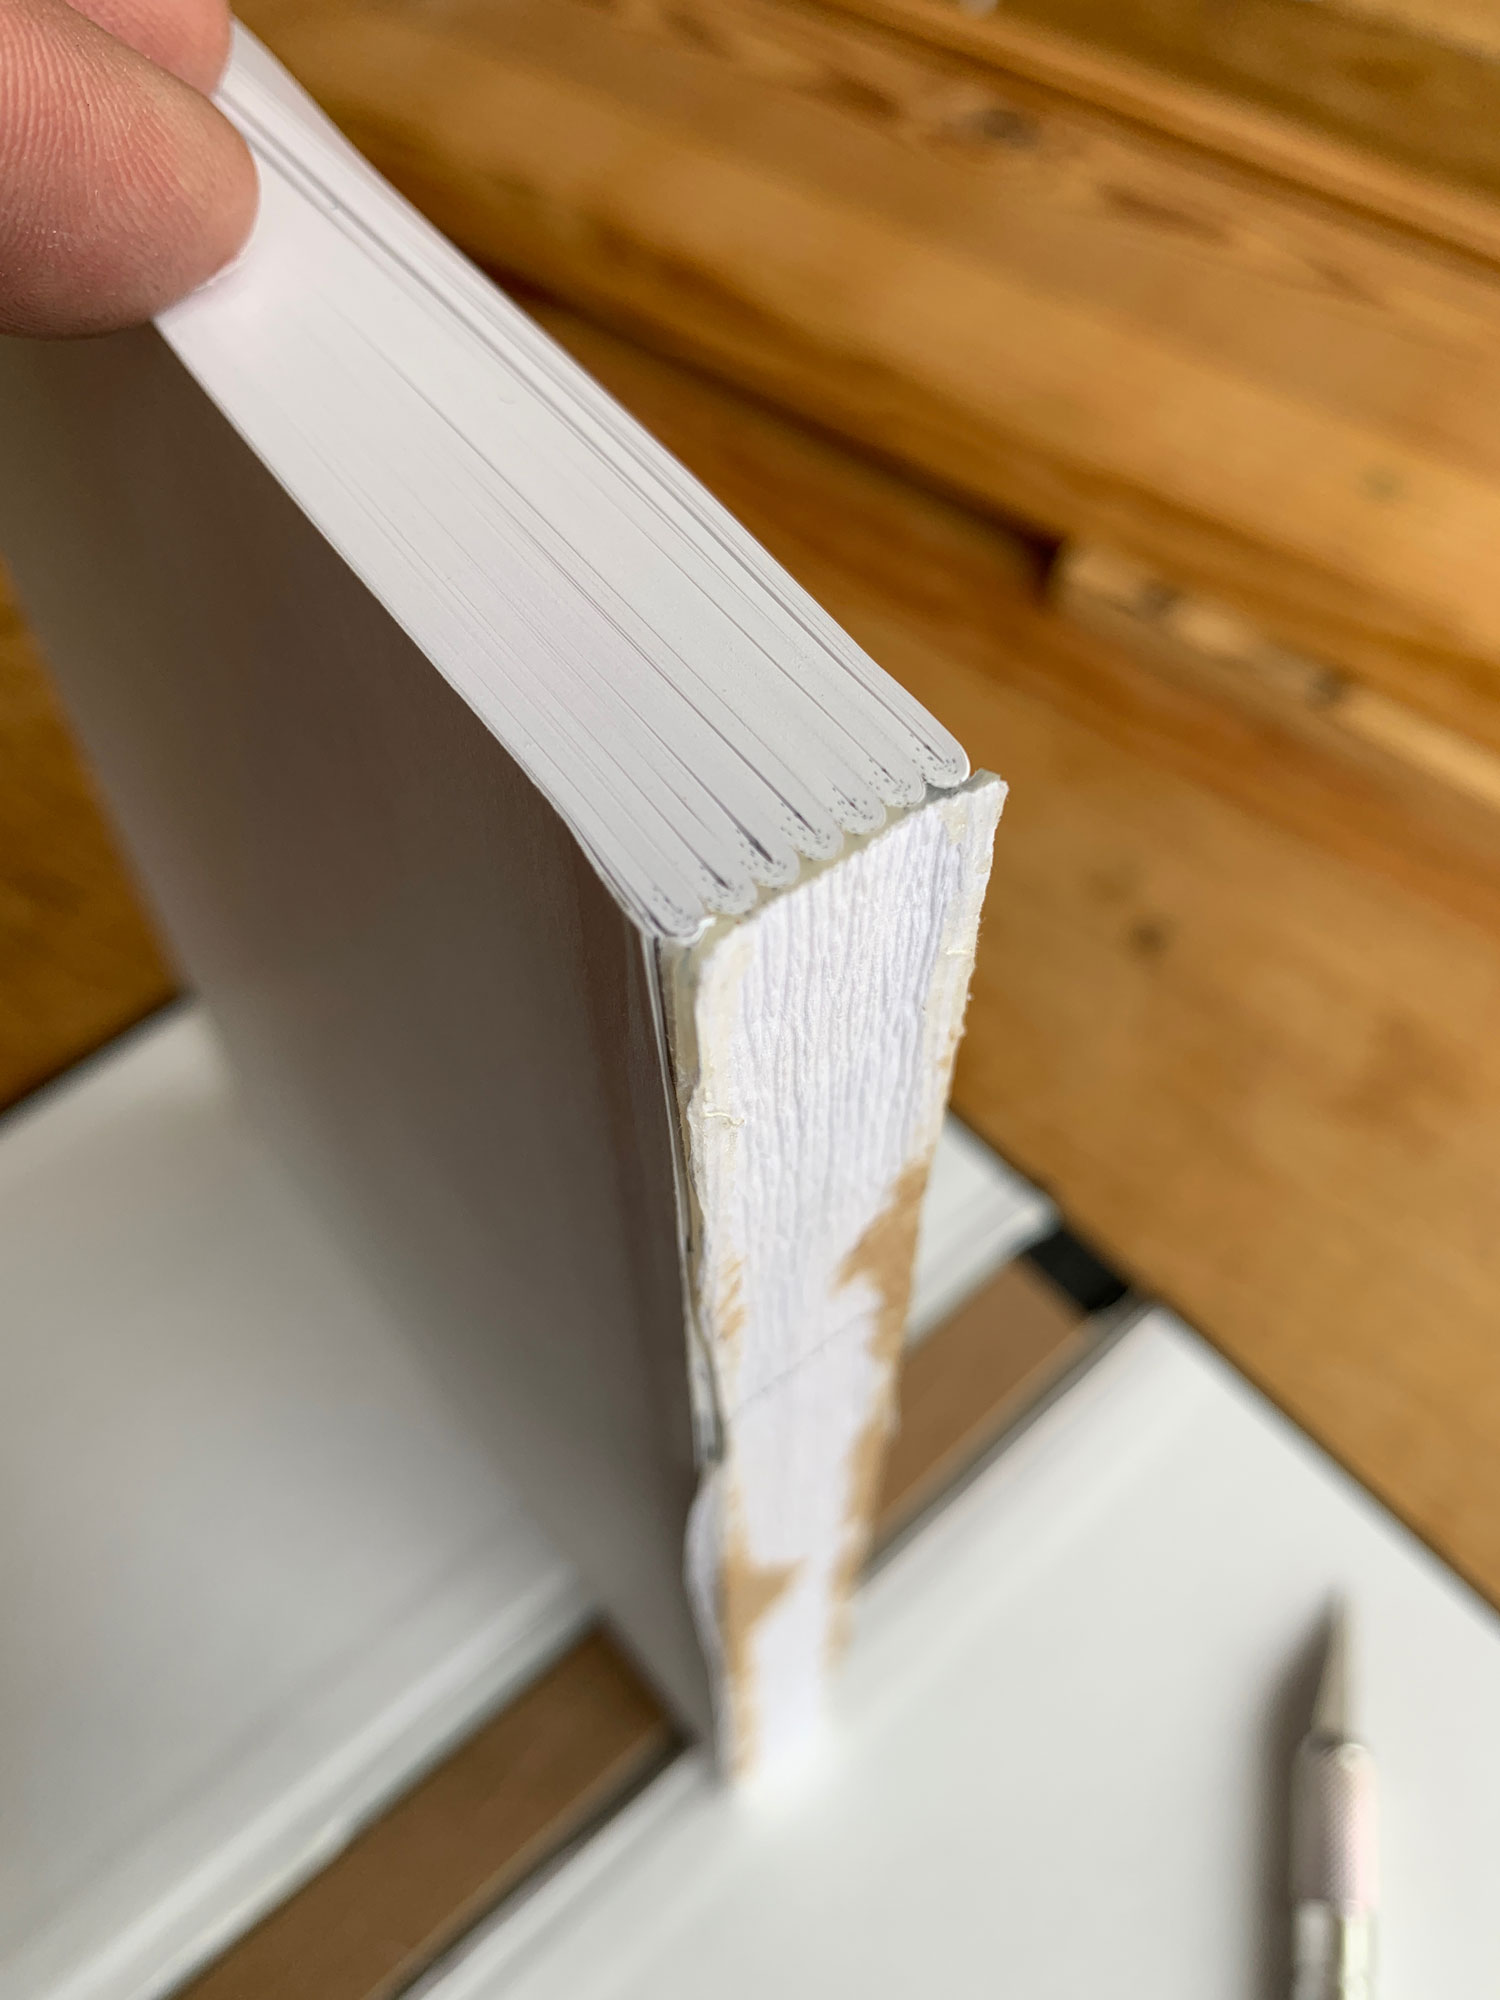
The first method is to use signatures instead of individual sheets of paper. You create a book signature when you print multiple pages of the book on a big sheet of paper. Then you fold that big sheet multiple times and trim the edges. The folds prevent individual pages from falling out because each page is attached to a buddy in the signature.
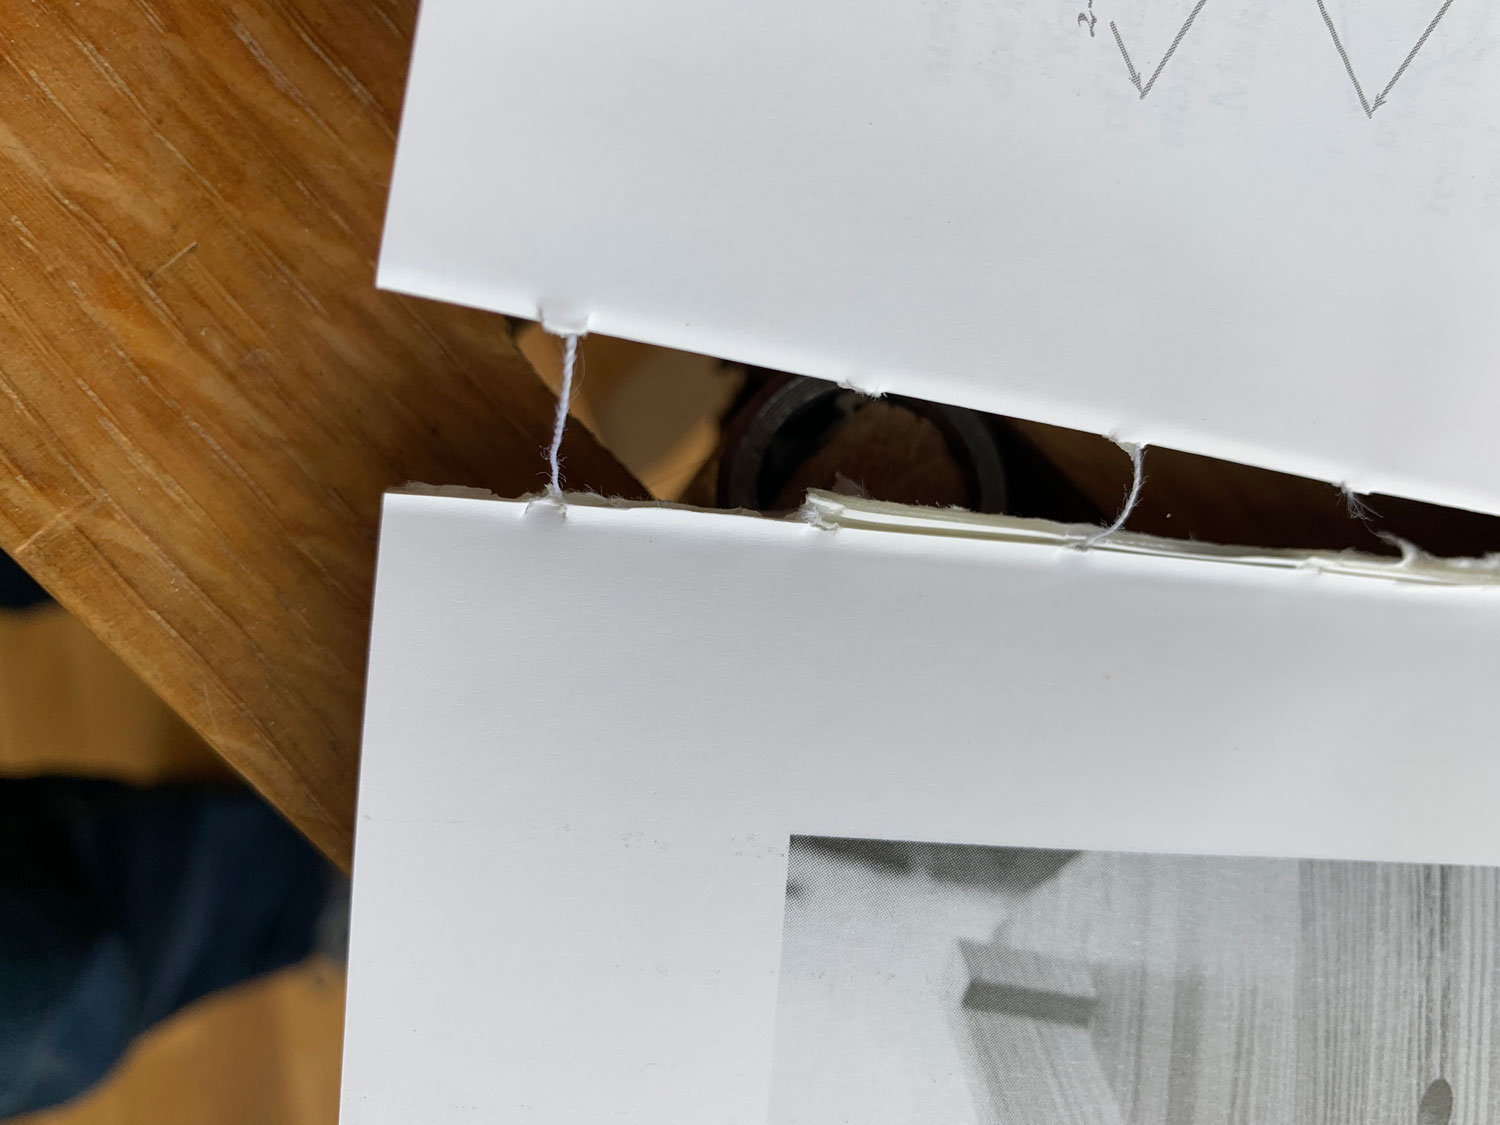
The next mechanical trick to make a binding durable is to sew the signatures together with thread. The machine that does this sewing is insane to watch. It pokes thread through multiple holes in the signature, then sews the signatures of the book together into a book block. Think of the thread as the tenons that hold a chair together when the glue fails.
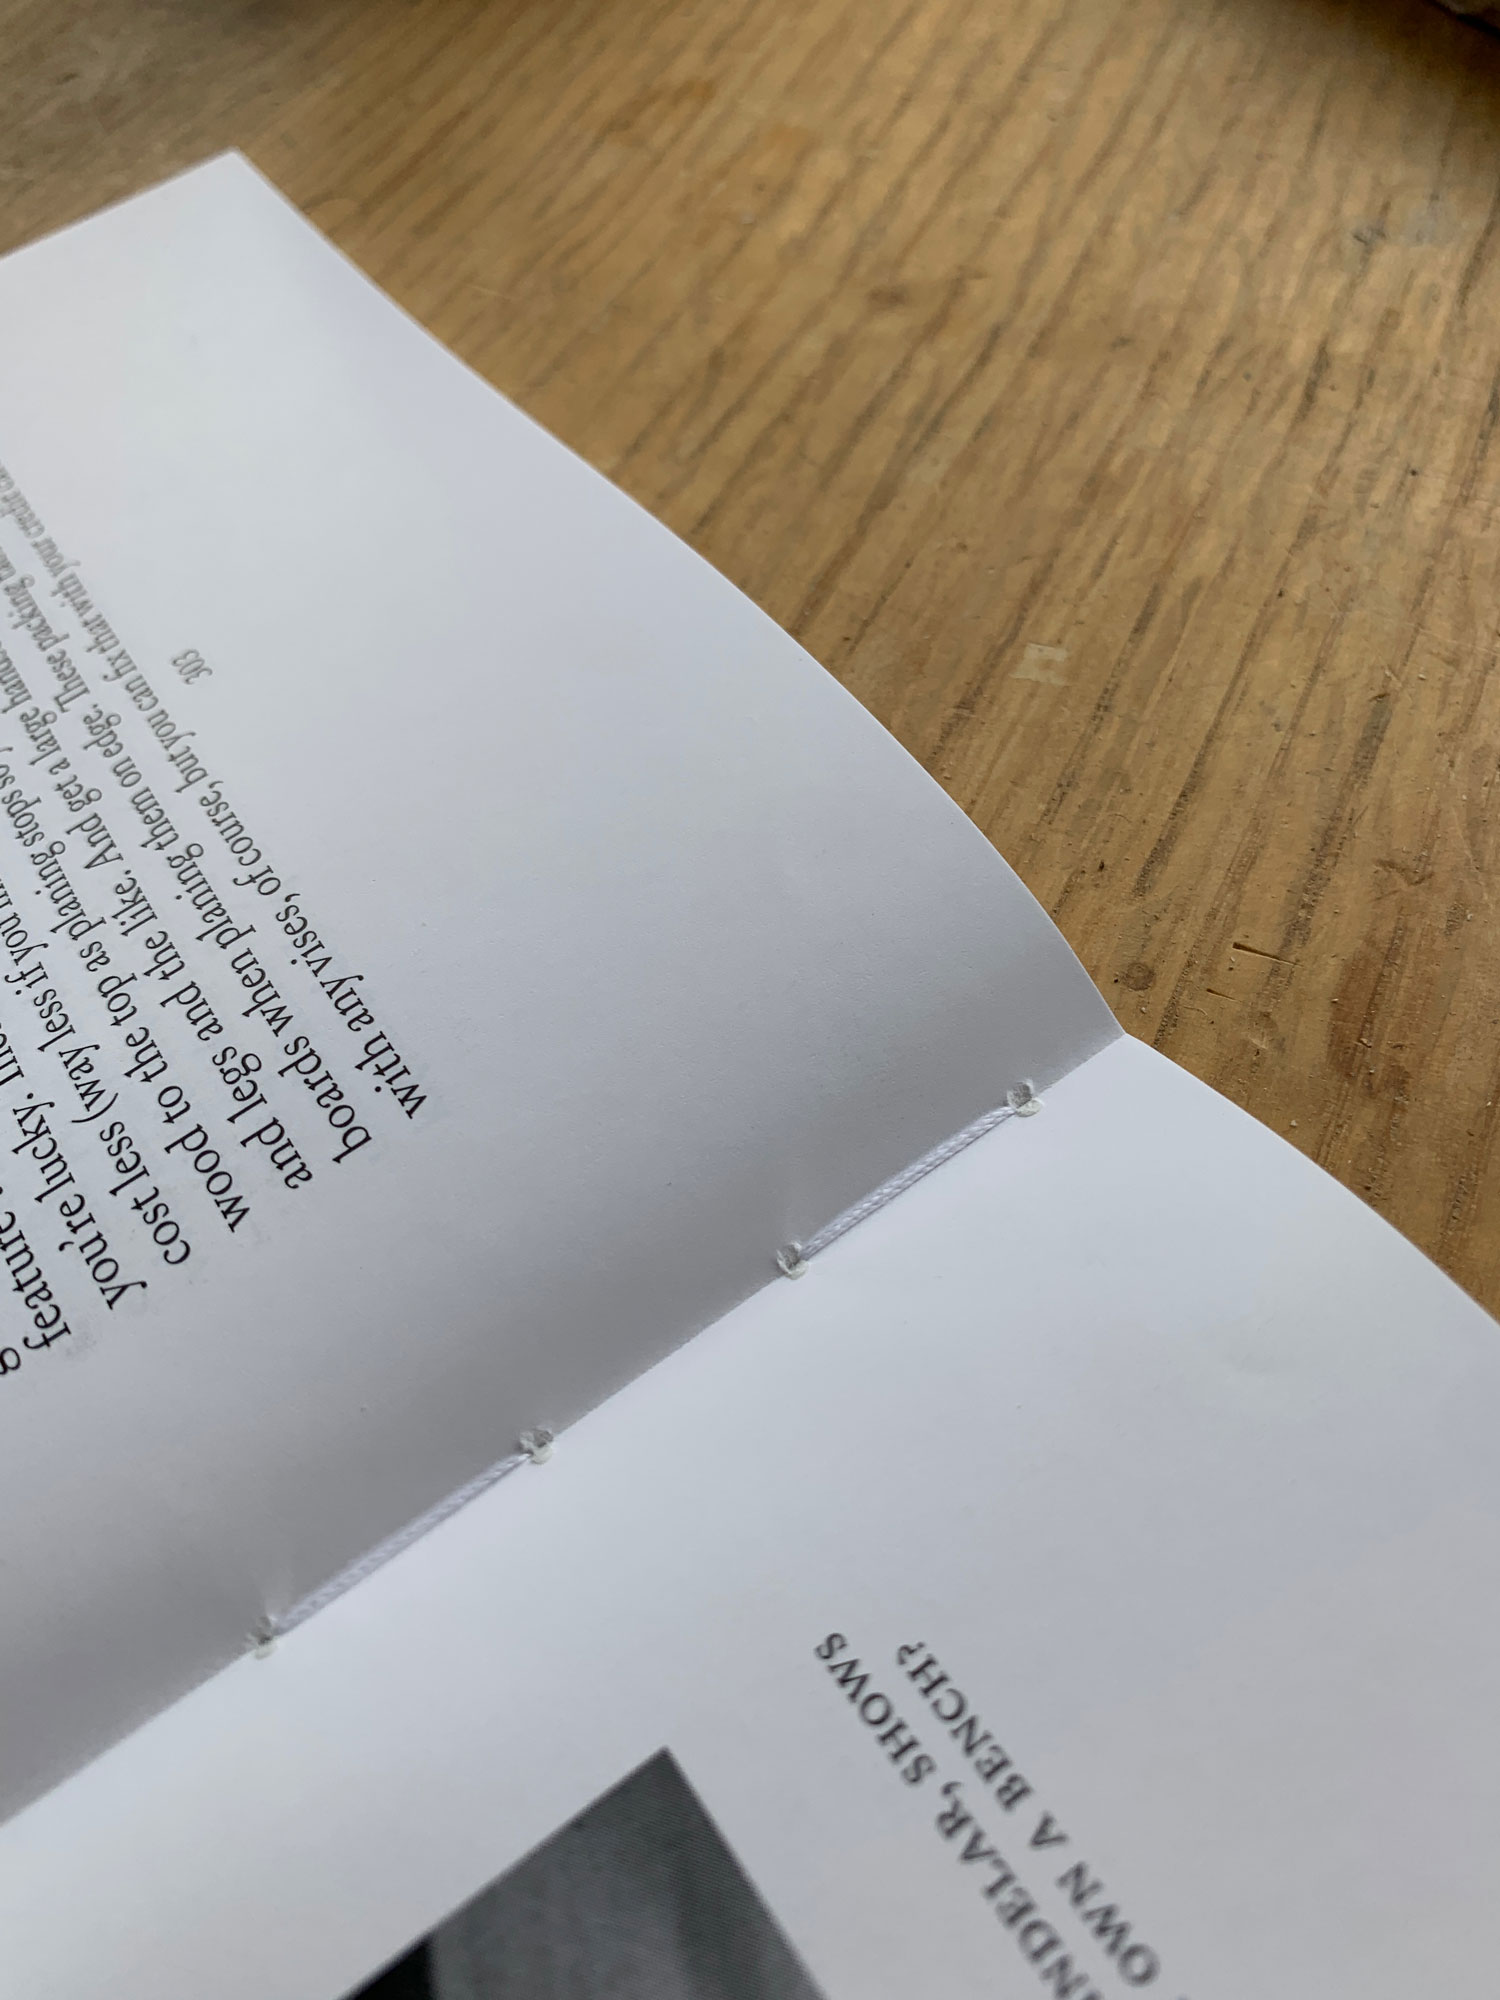
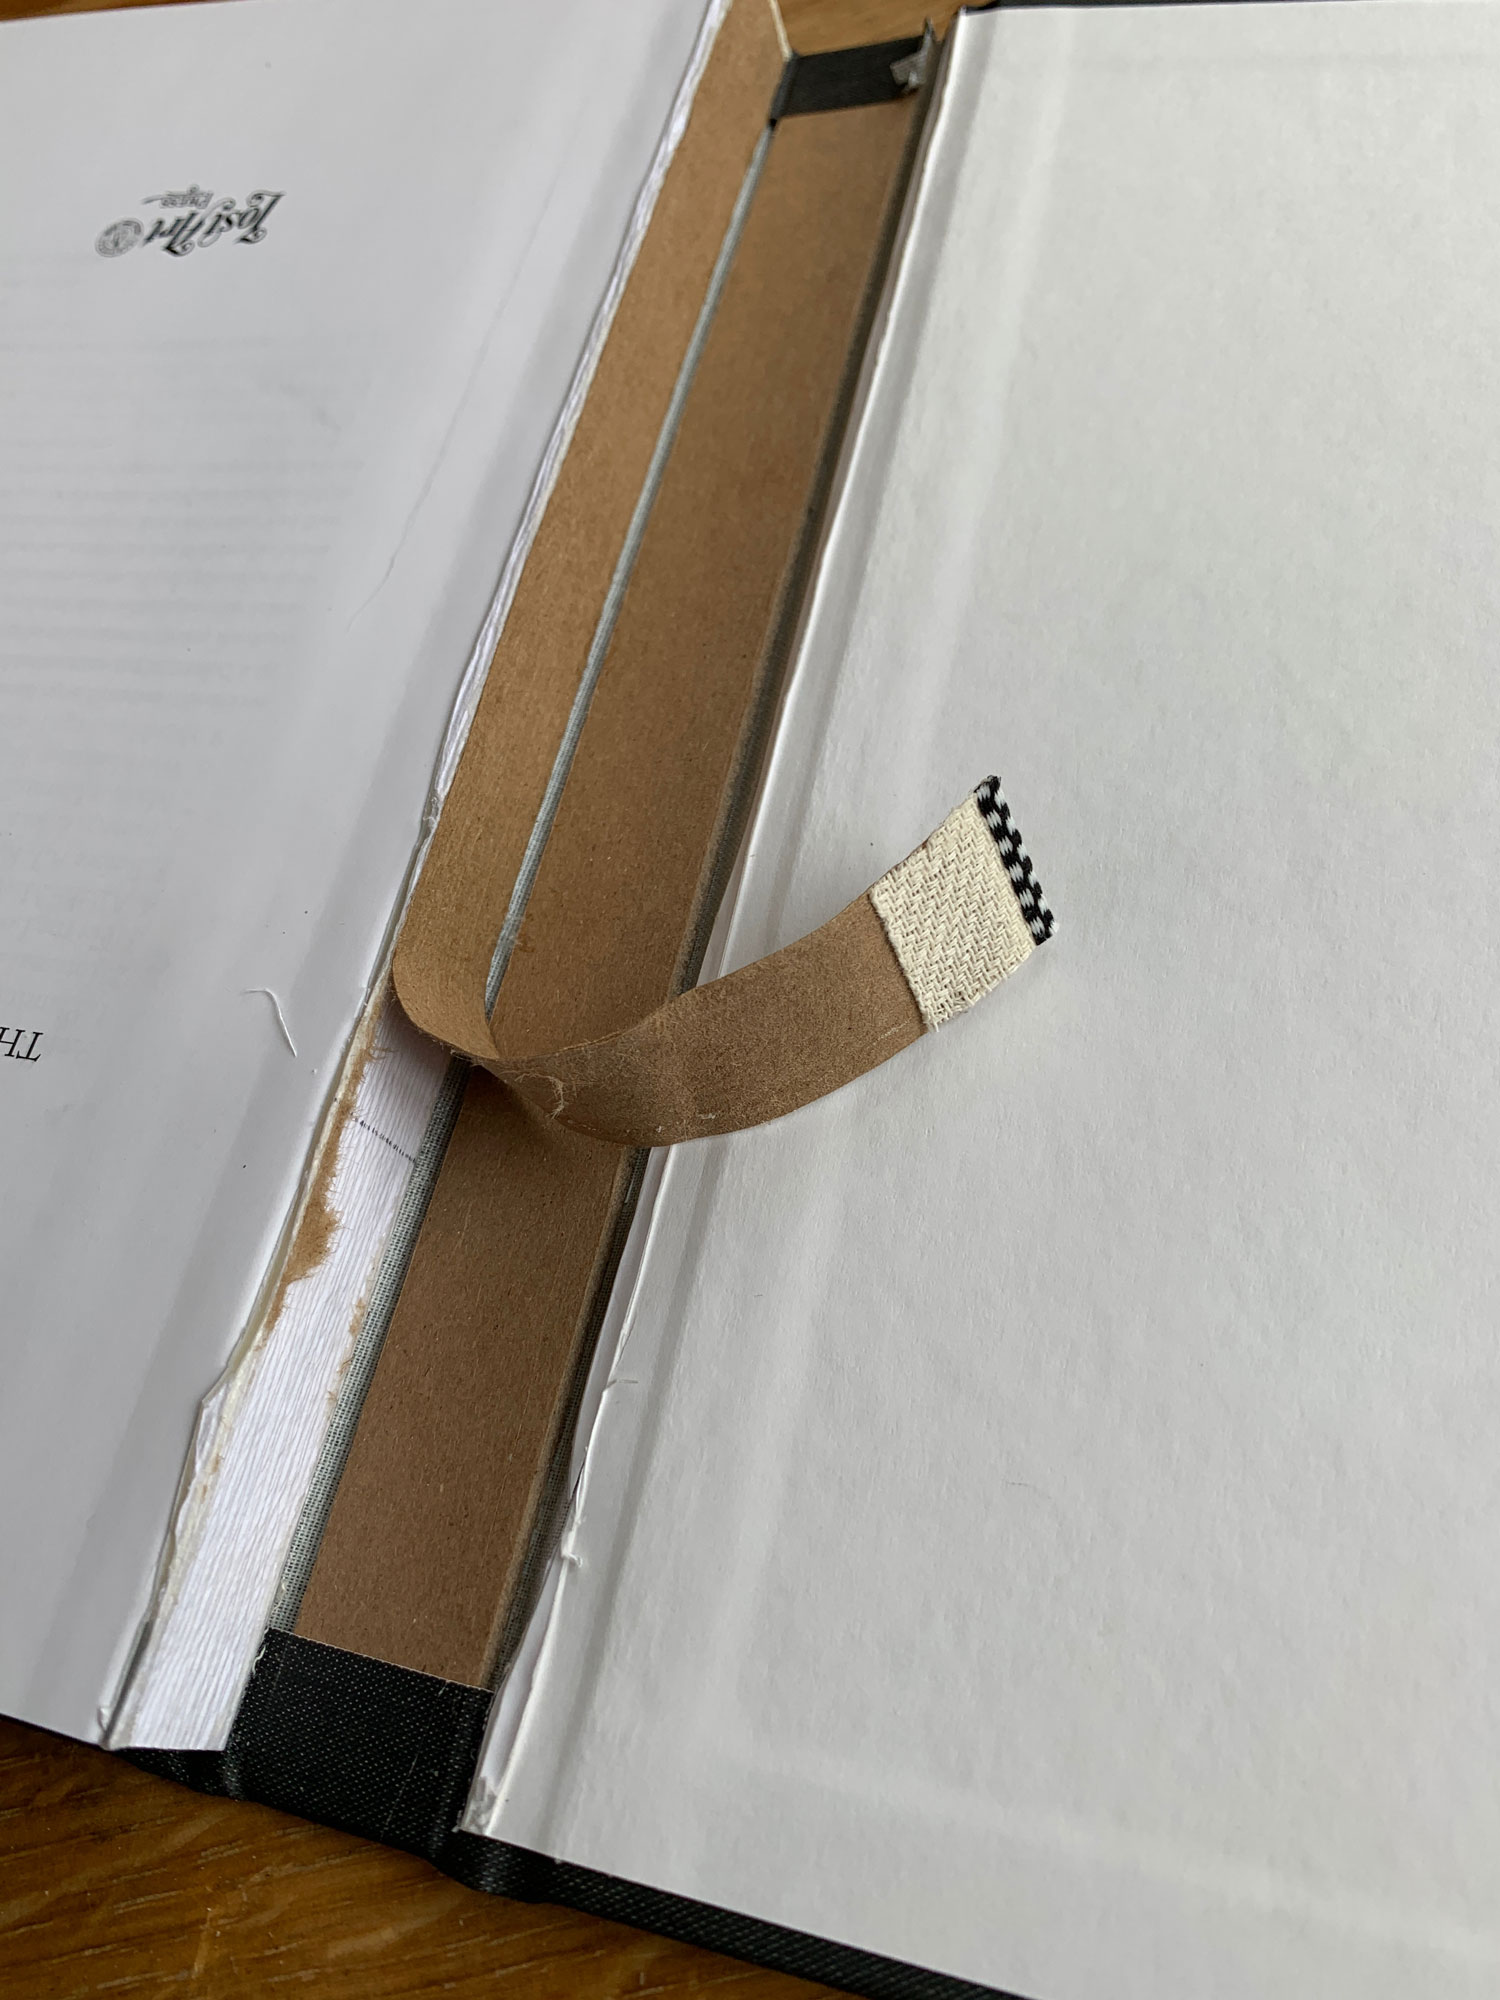
What else can you do? Well, we use lots of flexible glue, which seeps between the signatures. And then we apply a piece of tape (usually fiber-based) that reinforces the glue and helps attach the book block (basically all the assembled signatures) to the cover boards. There are also end sheets in the equation, which create the hinge between the cover and the book block. These end sheets can be flimsy or they can be heavy and backed by the tape on the spine of the book block.
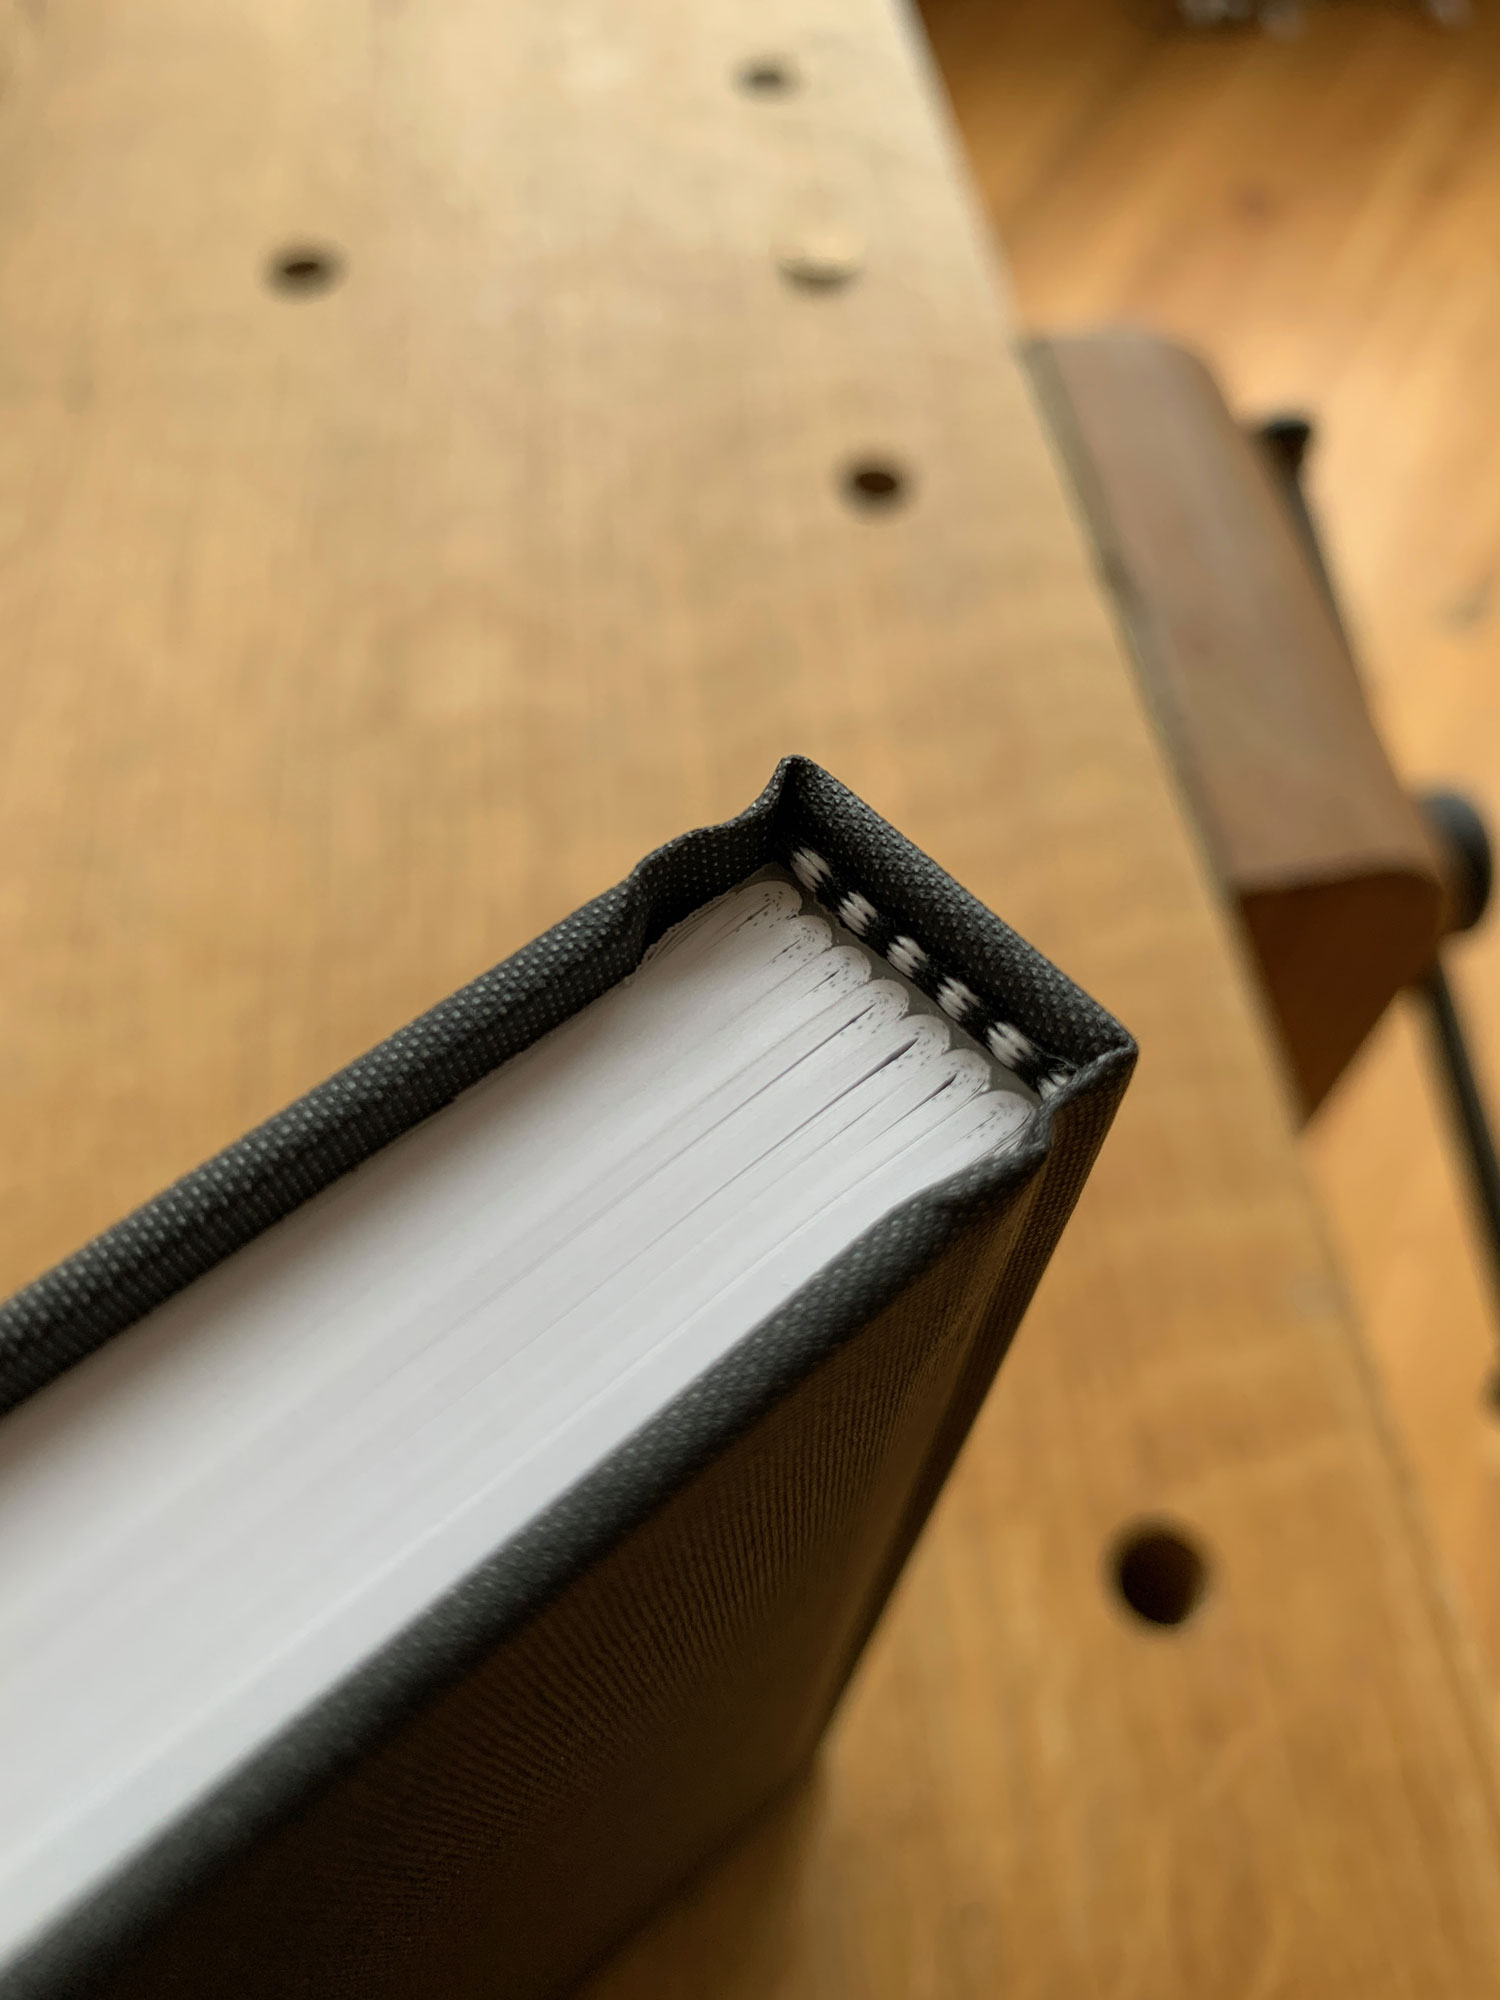
Oh, and there is one mark of quality you should ignore. Many people look at the threads at the top and bottom of the spine of a book and assume that is an indication that the signatures are sewn. It’s not. These threads, which we call “headbands,” are the merkin or toupee of the book-binding world. They are merely applied. We pay about 3 cents per book to add them.
Why do we add them? They look nice and some people think they provide some protection for the spine. But they don’t indicate anything about the quality of the binding.
As always, it’s difficult to judge a book by its cover. Instead, don’t trust your eyes. Get a knife and dissect its binding.
— Christopher Schwarz
P.S. The disassembled book in these photos was a book that had been damaged in shipping then returned to us. We don’t just cut up books for fun.

That was some testament to the quality of your books. Did you offer to take their book and replace with an undamaged one? You seem to be the sort of person that would do that even if they politely declined.
Yes. But they had already replaced the book using insurance money.
Chris
Now that is quality!
Personally I don’t much mind the sometimes limited lifespan of a glued-only softcover book – I know what it is, and what I’m getting, and although I certainly much prefer a properly bound book, like those that LAP produces, I don’t feel cheated when a pocket book eventually falls apart and has to be replaced, because I had already factored that into the equation. Also, the low cost of production tends to be reflected in the price. So far, so fair.
What does get my goat, though, is cheaply produced hard cover books that make as it were a false claim to be more sturdy than they are! When something that has been made to look sturdy, but isn’t, starts to fall apart after only a few readings (and if I like a book, I will read it over and over again; for example I have just finished my fourth read-through of TAW, and am about a third of the way through my third reading of TATC …), that is when I’ll start gently foaming at the mouth. Which thus never will happen when I’m reading something from LAP 🙂
And talking about LAP books and their bindings, there’s a question that’s been on my mind (not in a bad way, I hasten to add) for some time now: I have noticed that some of your books have rounded backs, while others are more or less flat – is this an aesthetic choice, or rather production-cost related? Or is there some other reason?
Cheers,
Mattias
Hi Mattias,
Rounded back vs. flat back is mostly an aesthetic choice. Sometimes a flat back is required, such as with “The Anarchist’s Workbench,” because of the diestamp on the spine. We didn’t use any ink with that diestamp, so we had to add the flat back piece (a 2 cent upcharge per book!) so that the diestamp would actually take an impression. (Apologies to most readers who don’t give a fig about these details.)
Personally, I prefer the look of a rounded back because it reminds me of my favorite old books. But honestly most people have never noticed these two kinds of backings exist.
Chris
Hi Chris,
Interesting! Not least that a flat back (which, I too, prefer less than a rounded one, precisely because of “that’s what a book should look like”) is actually more expensive than a rounded back one! Well, we live and learn.
Now, speaking of the diestamps on the “The Anarchist’s Workbench”, I happened to look at the ordering page for that book just the other day (I wanted to share the link with someone to whom I was recommending the book). And that new diestamp on the cover, based on the Tom Latané planing stop. Wow. Wow. And WOW! It really blew me away, and almost (but not really) made me regret having already bought my hard copy – it just looks that gorgeous!
However, it also made something very audibly go “click” in my mind, and made me want to ask you for, if you don’t mind the word, permission. And now you have brought the subject up. Hence the following:
I have been thinking for some time now about getting both a name stamp and a symbol (like your pair of dividers, but summat else of course) stamp of some kind to put on my tools (when appropriate), and on the stuff I make with them. The name is of course no problem (I know what I’m called), but I’ve been kinda stumped for coming up with a suitable symbol. I won’t bother you with a list of rejected ideas (although I think I can safely say it starts with a Bailey plane in silhouette), but when I saw what you have just done for the 2nd printing cover of “The Anarchist’s Workbench” … and my (almost) identical planing stop arrived from Tom Latané a few weeks ago … and this week I started breaking down the stock for the top of the bench I have now officially started to build … and, perhaps most importantly, I already know for zartain shure from working with impovised planing stops that a proper one is going to become absolutely central to any woodwork I do in the future … well, I’m sure you can were where this is going.
So. Would you mind if I were to get myself a symbol-of-my-woodworking stamp based on the same idea that you have just used for “The Anarchist’s Workbench”? I hope it goes entirely without saying that I am not asking permission to use your actual design; I am of course talking about coming up with a design of my own, based on the same concept. But still. You had the idea before me it first, so I thought it proper to ask.
Cheers,
Mattias
Hi Mattias,
When I put the workbench book under a Creative Commons license, I was sincere. All elements of it are free for people to use and build upon. You are more than welcome to use the planing stop image for your own purposes. Here is the Illustrator file, which can be altered as you please:
https://www.dropbox.com/s/c9zhgf13wzvm9f8/diestamp%20traced.ai?dl=0
Here is a jpeg of the same image:
https://www.dropbox.com/s/mhfck0hx9kqe51c/diestamp%20traced.jpg?dl=0
Side note: This image was supposed to be the diestamp on the first printing, but I couldn’t get it looking good enough. So I defaulted to the dividers. When we had to go back to press for the second printing, I decided to give it one more go. I got out the pencil and paper and knocked it out on the first go. A little pressure sometimes helps the creative process.
All best,
Chris
Hi Chris,
Well, so you did, too. Please believe that I did not doubt for a moment your sincerity about putting the book under a Creative Commons license – I just didn’t think to connect it with the diestamp, too.
Now that you have set me right on that matter, though, I am of course not only utterly delighted with what you’ve just told me about being welcome to use the image, but well past the moon and heading for Mars in terms of gratitude for your sharing of the IIlustrator file – I pay through the nose each month to have the Adobe suite, so .ai is a highly useful format to me.
I’ll stop gushing already, and just say what it’d all boil down to anyway: thank you and all the best right back at ya!
Mattias
That. Oh so much. We had to buy a certain physics textbook, which was (-deleted-), both regarding the content and the physical quality. Hardcover but fell apart during the semester. What a waste of resources (and students’ money).
I have several books, beautiful books, with wonderful content and photos, and are some of the best furniture books ever. Every furniture geek should have these books. But they are literally falling apart. They were not abused, and the pages started coming out after just a couple of uses. And they weren’t cheap. One was 125 bucks when new.
There is just no excuse for making something that badly. Ikea makes furniture closer to John Townsend than those objects resemble LAP books.
If there is a silver lining, one book came apart so completely and cleanly that I ran it through the sheet feed scanner, and it lives on in my tablet.
Keep making great books, in every sense of the word.
If one doesn’t like to read on a tablet…
If the book came cleanly apart one can rebound it.
Stack the pages cleanly.
Press the stack between cauls;
With a saw make a number of kerf in the back of the pages.
Insert and glue twine in the kerf.
(if the pages are not perfectly aligned, press the stack between cauls and use a plane the book edge to make it flat/smooth)
Make a front and a back cover in cardboard.
Assemble them with a piece of cloth, leaving the space for the book back.
Untwist the ends of the pieces of string and glue them to the cardboard.
Glue a paper to mask the glued untwisted strings.
Glue the original front and back cover (and the back if possible) on the cloth at the outside of the assembly .
(surely a professional could do better but this would save your book for some time)
Fascinating. Thanks.
When I bind, rebind or restore books, I not only sew the signatures by hand but sew each signature to the tough cloth tape, and the tape extends beyond the block and into the boards which makes them stronger than only gluing the flyleaves to the boards. Modern glues, cloths and leathers are far superior to the materials of the past which were organic and fell prey to self-deterioration and the elements: insects, humidity and dry rot. When antique books are in bad condition, I restore them in their original manner and style but with improved materials. They will be good for a few centuries if anyone cares about them in the future. A modern book I really care about I will rebind appropriately, and I never put my name in a book because someone may own it after I am gone and why would they care who I am. An author’s signature is another matter – that will always be of interest to an owner.
Interesting, I have the opposite opinion on names in books. Going through the stacks and stacks of old books I’ve inherited, most go to the recycling bin except those that have the handwriting of my grandparents or great-grandparents. I like knowing the history, it gives the book context and meaning.
There are exceptions re: signatures in books. Nostalgia is one when the names are family or friends; the value remains as long as they stay in the family and succeeding generations share in it. The other exception is names of famous former owners; the monetary/collector value is greatly increased in such instances. I have a few such in my collection that a few centuries old.
How would you remind a book that is just a collection of pages, not signatures.
Bookbinding is on my list of things to dabble in some day. North Bennet Street is nearby, and they have great classes.
It can be done but it is time consuming to say the least and is not ideal. A perfect bound book that is nothing more than a stack of pages glued on one edge requires that that you trim off the glued edge, then, if it is not so cheap that it has an adequate gutter left, you can stitch sections together as false signatures. This will somewhat thicken the book block and make the sections somewhat more visible than in a true signature book. Of course it decreases the inner margin and makes a less flexible book than a true signature sewn book. If there is not an adequate inner margin it cannot be done successfully. You would have to set great store by a book to go to such trouble.
A simpler procedure is to get a hole puncher made for wire bound books, apply a strengthening strip to the edge before punching it and installing the wire comb. This also is laborious but some people who use a volume a great deal and want it to lie flat, which a perfect bound book will not (“perfect” is a misnomer) go this route even with a a new perfect bound book or one still in reasonable condition.
Thanks for that great description of how books are made.
So the headbands are like those fake “through tenons” you see glued onto the outside of cheap arts and craft furniture?
Exactly.
Never would have thought I would run across “merkin” in a woodworking blog!!!
Robert Schumann wrote a piece of music: Märchenbilder (fairy tale pictures) which is sometimes affectionately called “Merkinbuilder”
I did a hard cover book with the free book on work benches you put out. I took what I knew about book binding and jumped in with both feet. long story short I am not a book binder but I doesn’t look to bad and it will keep all the pages together. it make me appreciate all the work that goes in to making a book. Thank you for making book that will last a couple of life times.
I bought many a Dover book when I first got started. They had great titles and super cheap! The down side, the books only lasted a few years until the pages started falling apart…and do they f A lL
aP a rT
Chris, I’ve been following your articles for a long time. I am a printer by trade, actually for 40 years. I’ve enjoyed your posts on making a book, and although I might argue with you on a point here or there. I would have to say that you are spot on with how to make a book. And you are absolutely correct when you say spending money now will insure a book that can last generations. Lost Art Press books if taken care of will last generations.
I don’t comment often, but the quality products of your craft reflect your spiritual being. Thank you Chris and Megan for sharing your interior strengths.
Maybe one final step? My Dad instilled in me the proper way to treat a new book is to gather the first 15-20 pages and then gently open the book fully, then collect 15-20 more pages and open the book fully again, etc., until you have opened the book all the way to the end. I’m not sure I’ve described this clearly but it is supposed to protect the binding.
Yup. I know I did a blog entry and video about this years ago and can’t find it.
Found it! https://blog.lostartpress.com/2012/03/24/preparing-a-book-to-read-it/
I remember being led through that
‘opening’ drill from grade school in the ’40s.
https://blog.lostartpress.com/2012/03/24/preparing-a-book-to-read-it/
Thank you.
There have been a few small books I’ve been wanting to bind so I’ve been working (for a while) on building a sewing frame as illustrated by Noel Rooke on page 104 of Book Binding and the Care of Books by Douglas Cockerell.
The laying and cutting press on page 128 is also very interesting as it is basiclly a twin screw vise with a track for the “plough”.
The difference between a flat spine is not a mere aesthetic difference; it is a brutal functional one. As the book opens, the sections should “throw up” into a concave shape, allowing the pages to lie flat even if they are stiffer than they should be. As the closes, the book pull back into a convex or at least flat form, creating a firm sealed block. When the concave forms on opening, the shoulders (the places where the sides meet the back) move closer to each other. If this movement is resisted, great strains build up and will prematurely break the book apart, usually between the endpapers; or between the first two pages of the text, or at the outside hinge, depending on the particular choices of material. A rigid spine board, especially when combined with narrow joints (as in the sample you show) and a flat back, is exactly the thing to prevent the shoulders from moving toward each other.
The damage is slower if the book is thin; if the joints are large (half the thickness of the book, rule of thumb); if the spine is reinforced internally with spine sturdy cloth spine lining that runs onto the sides (as you wisely have had done) and if the paper is flexible enough to “drape” well (which is rare nowadays and getting rarer.) These factors reduce, but don’t remove, the problem. If you use a rigid spine board, a flat back, and narrow joints, you are building rapid sel-destruction into the book.
Your trade binder will no doubt deny this. They don’t have to deal with the damage, and the flat back is cheaper and faster to make. I am a retired book restorer with a conservation background and connections, and I have encountered this problem over and over during a career of nearly forty years. My favorite example was the omnibus edition of “Thomas the Tank Engine, which at one time represented the biggest book repair prolem of the major metropolitan public librqary nearest to me. This was the most popular book in the library, with dozens of copies in circulation: it was a very expensive book, all brilliant color printing, an inch thick and about twelve inches high; and it lasted on average three circulations before the cover broke free of the text block, requiring either replacement or major (expensive) repair. It had the rigid spine piece and narrow joints, made far worse by the lack of any form of spine reinforcement—just bare glue inside the cover. The publisher had no interest in addressing the problem: sales were driven by the popularity of the book, and the librarians were in a forked stick. The solution was simple: when repairing the book, the rigid spine board was replaced with a piece of flexible paper; and a reinforcing layer was added to the internal spine and joints, just as your books have.
I later ran into the same problem when consulted by a repairer in a much smaller library, and the fix worked there too.
No doubt you will think that this comment is too negative for publication, in accord with your “be kind” statement. Fine. But take it to heart in your own dealings with bindings and binders. I can’t write more details, you will be relieved to hear, because I am scheduled to watch a movie with a ten-year-old. So in this case pleasure beats responsibility.
Sincerely,
Tom Conroy
And I stumbled across this simple instruction on another website the other day:
https://www.abebooks.com/blog/2012/05/16/how-to-open-a-new-book
I once bought a large paperback book and left it in my car. After a day in the heat, the glue holding the pages in place had softened and all the pages were loose. I think that company is no longer in business.