This is an excerpt from “To Make as Perfectly as Possible: Roubo on Marquetry” by André-Jacob Roubo; translation by Donald C. Williams, Michele Pietryka-Pagán & Philippe Lafargue.
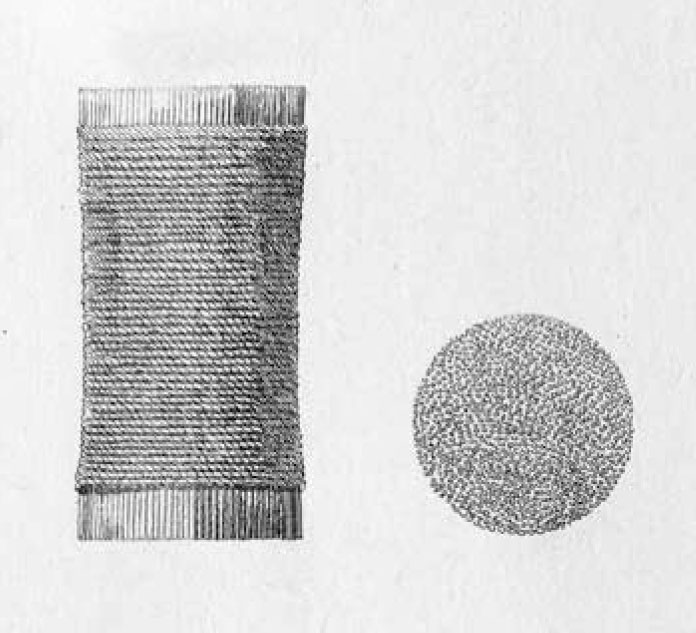
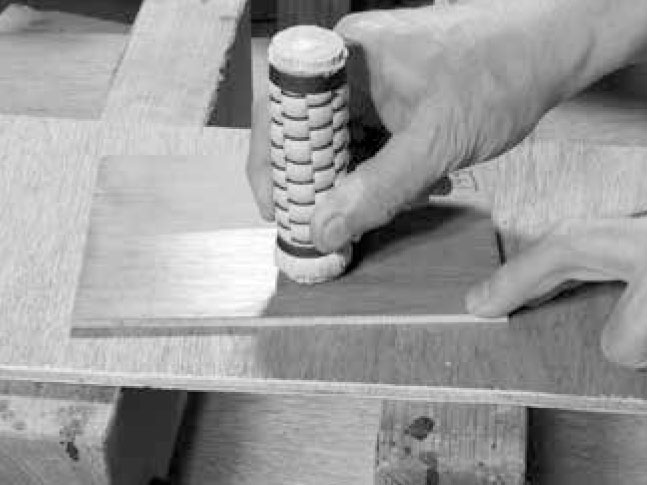
One influential tool that was unknown to me at the start of this project is a polissoir (polisher), which I call a corn straw burnisher. Roubo offers fewer than 100 words describing the tool and its use, yet that tool has fundamentally changed parts of the way I work. As the last tool to touch the surface prior to the application of finish, or in some instances the tool that actually applies the finish, vigorously scouring the surface with it imparts radiance to the substrate that cannot be adequately described. It must be experienced.
Fabricating your own burnisher is fairly easy, and the raw materials are no farther away than any straw broom.

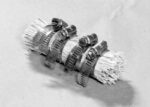
You will need a hank of straws between 1″ to 2″ in diameter. Take your bundle of straws and bind them together with several hose clamps of the appropriate size side-by-side, leaving about 1/2″ of straw sticking out at one end. Leave a little gap between the hose clamps about halfway down the length of the bundle. At this opening, wick in a copious amount of glue all around the circumference and let it sit overnight. Any glue is fine.
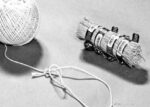

Then take a string and tie a loop at one end of the cord. I simply double up the end and tie it into a knot leaving 3″ or 4″ inches of tail. Make a noose from the loop and the string leading to the ball. Place this about 1/8″ from the end of the straw bundle, cinch the noose and start wrapping it as tight as you can without breaking the string. Remove the hose clamps as you work your way down the bundle. When you get to the other end of the bundle (about 1/8″ shy of the end), hold the string in place with a spring clamp. Soak the string wrapping with dilute hide glue and let it set until dry. You can skip this gluing step if your burnisher will be cooked in molten beeswax as the final step. Then reverse the direction of your wrapping (same rotation but now you are working back toward your starting point) to return to the starting point. When you get there, tie off the wrapping string with the tail I mentioned earlier.
Soak the whole string surface with white glue or cross-linked hide glue and let it sit. Trim the straw bundle ends as needed. If your goal is to make a dry burnisher, you are done. If you want a wax-impregnated burnisher, melt some wax in an appropriate vessel and allow the wrapped bundle to soak in it until it is fully saturated. Remove the burnisher from the molten wax with appropriate caution and wipe the excess wax off. As soon as it cools to hardness it is ready to be put to work.
— Meghan B.
Splendide !
May I Ask a question? There is one step I am not sure to have fully understand (my French speaking background is blocking me now). I want to beeswax it. Do I:
1) right everything with the rope
2) then use hide glue on the whole string area
3) leave the 1/8 end free of anything
4) then soak that part in the beeswax for let’s say, 1 hour?
Thank you again for sharing your knowledge. Long live LAP!
You are correct. Good luck!
What a great post! Can’t wait to try it.
You are amazing. As usual. Cheers !
Something new to me! A great way to spend my morning coffee time.
Thank you
I know of two shortcuts. The Macy’s version, go to donsbarn.com and buy one for less than lunch for two at a chain sit down eatery. Kmart version, start with the short straw broom and zip tie the heck out of it, then trim the bottom to about a half inch from the bottom tie. The Kmart version doesn’t last long; the zip ties slide around and the straw geometry is ‘off’ I believe. I only use the zip tied broom to burnish on my small lathe, for which it works great.
As a side note, the last hibachi style restaurant I ate at used one to clean the grill after cooking. I assume their version was made with bamboo instead of straw, but I could be wrong.
The side-by-side of the mutilated broom and the hoseclamps almost made me spit out my coffee.
Would this help reduce splotchiness in an oil finish on planed cherry? A little while back you put up an excerpt from one of Christian Becksvoort’s books about improving oil-on-cherry by sanding to 600 grit. Very helpful! Just wanted to see if this could help me reduce dust in my primitive shop.
Would soap finish also work in place of the wax.
Interesting. I wonder why this is so effective?
Megan, Thank you for this article I’m going to make one and try it out.
This is all the rage in spoon carving circles these days. That and burnishing with a smooth stone or smooth antler. I love this! I can easily put all my fly tying skills to use.
That cut up broom looks familiar.
(Gasp!) Is that one of Roy Underhill’s demonstration brooms on how saw teeth work? So that’s where they are going to!
With the recent passing of David Esterly, I was reading about his work and Gibbons. I read that they did their final surface prep of the carvings with something called “Dutch rush.” Seems similar to the polissoir but perhaps comes from a different plant than the straw or juncus as described by roubo.
Does anybody have any knowledge on using Dutch rush as a means to “sand” relief carvings? Thanks.
Hello,
I’m making a straw polissoir, and I’m going to use shellac instead of thinned hide glue to seal the string. Can you think of a reason I should not use shellac? I’m thinking that hide glue was used because it was cheaper back then – didn’t have to come from India.
Dennis
I’m sure it will be fine!