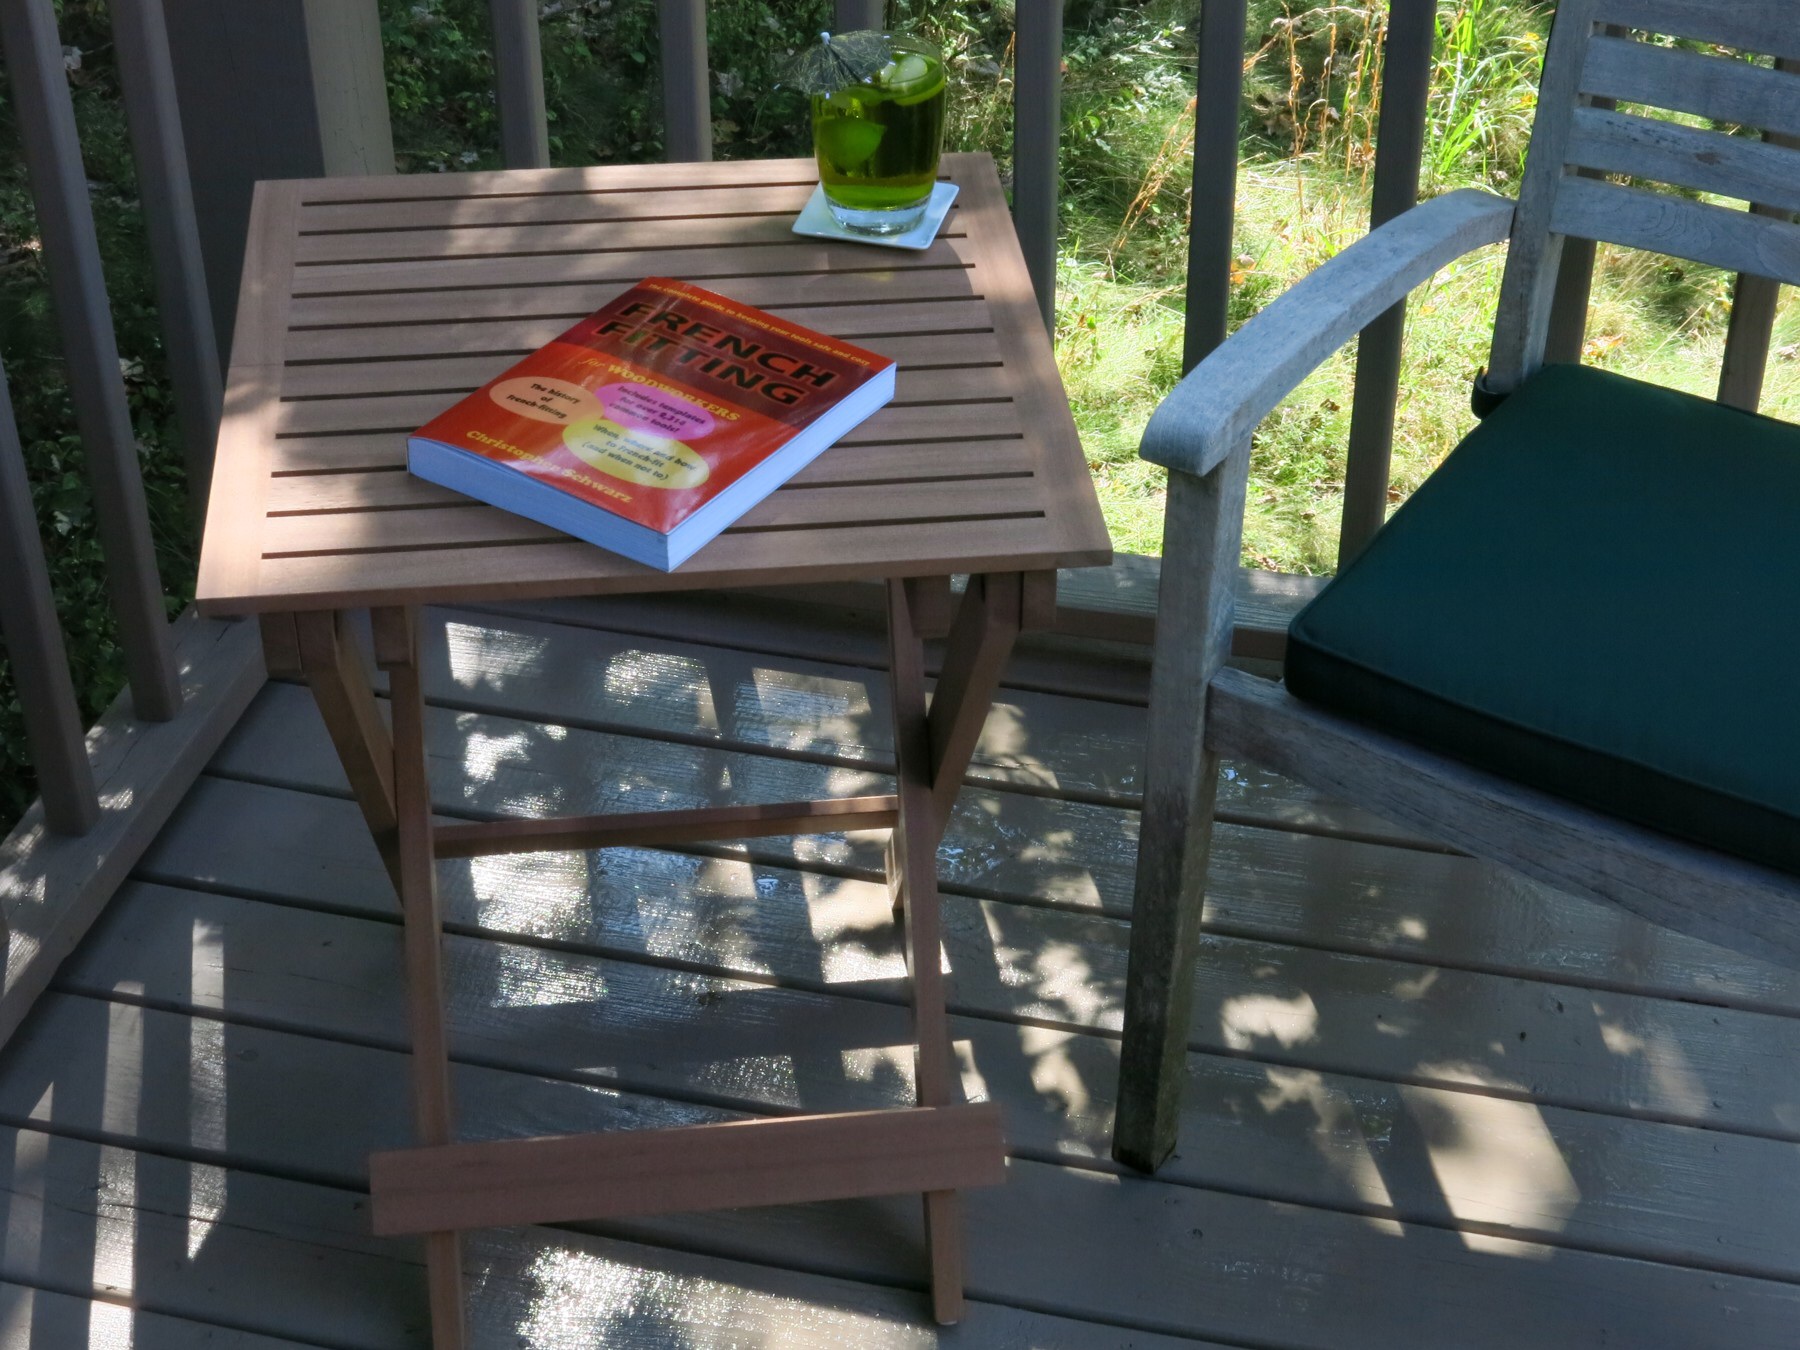
I am embarking on a project to (slowly) repopulate my deck with a better grade of furniture. First up is a pair of small folding tables. The design is adapted from one published a few years ago in Popular Woodworking. The table shown here is 20″ square by 38″…er, no…24.5″ high.
Designing furniture that can survive being left outdoors in the sun and rain without eventually degrading into a pile of sticks (or worse) is a whole ’nother enchilada compared to ordinary furniture making. There is significant overlap with campaign furniture, with the added bonus that wood that gets rained on moves. A lot. In fact, outdoor furniture has much in common with boatbuilding, and so one looks to suppliers like Jamestown Distributors for fasteners and finishes, SailRite for upholstery fabrics, etc.
The woods used must be durable (resistant to decay), of course. That limits one’s choices to the usual suspects: teak, mahogany and its relatives, white oak, etc. Some “cedars” are also suitable, though their relatively low strength means that the various components usually need to be beefier than in this table. Other North American woods that would be suitable are black locust and honey mesquite, both of which can be hard to find but are probably worth looking for. I haven’t worked with mesquite, but it’s on my to-do list, as it is supposed to have exceptional dimensional stability with changing humidity.
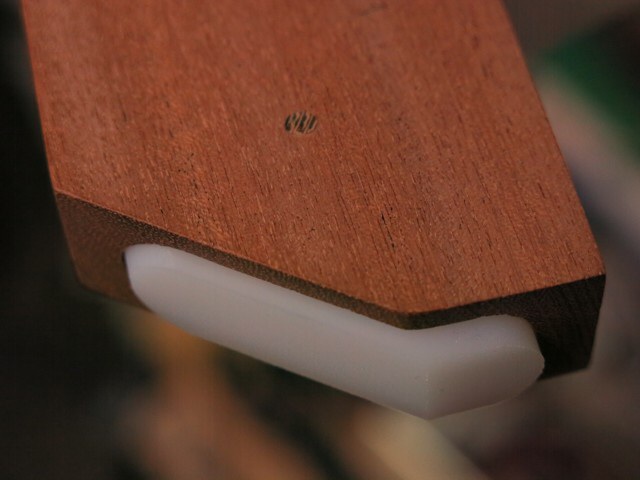
These tables are in sapele, an African relative of mahogany that’s rated as “moderately durable.” To give them a leg up (pun intended) in terms of surviving the elements, I’ve fitted them out with “shoes” made of UHMW polyethylene. The shoes are held in by a 1/8″-diameter oak pin, which can easily be drilled out to allow for replacement, in case they wear out or the whole experiment turns out to have been a bad idea.
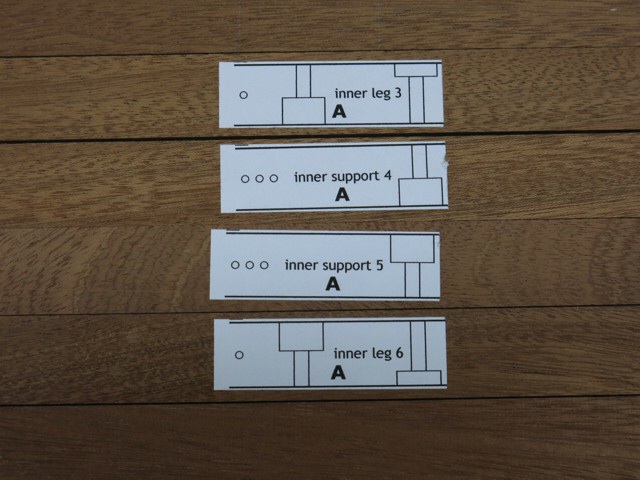
There are four legs and four top supports, and no two are exactly the same. They come in each of the four combinations of inner/outer and left/right mirror-image pairs. It got to be so confusing that I made up some custom labels before I drilled all of the holes and counterbores.
For want of a good locknut…
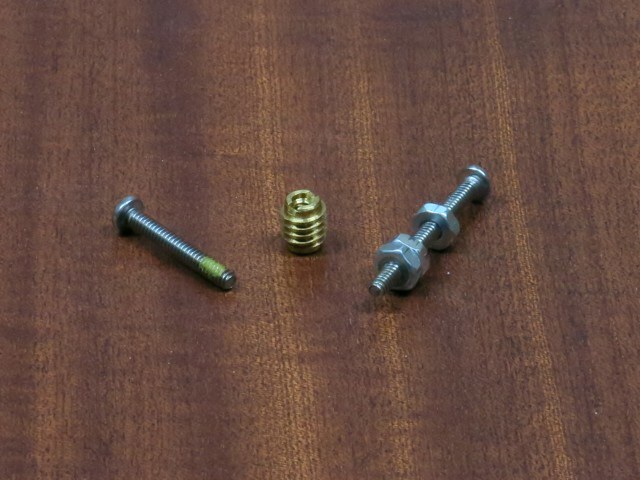
Chris isn’t the only one with hardware woes. Because the joints of this table need to allow folding for storage, the fasteners have to stay put without being fully snugged up to the wood (which in any case is only going to be a temporary condition as the wood shrinks and swells). So some kind of locking fastener is called for. The standard solution is a nylon-insert locknut (leftmost in the photo below). These work well, but I didn’t want to use them, for two reasons. The main reason is that they’re thick, quite a bit thicker than an ordinary hex nut, which would mean having to reduce the thickness of wood left at the bottom of the counterbores more than I was comfortable with. The secondary reason is that nylon is not UV stable, meaning that they would degrade over time (although, to be honest, so will the wood).
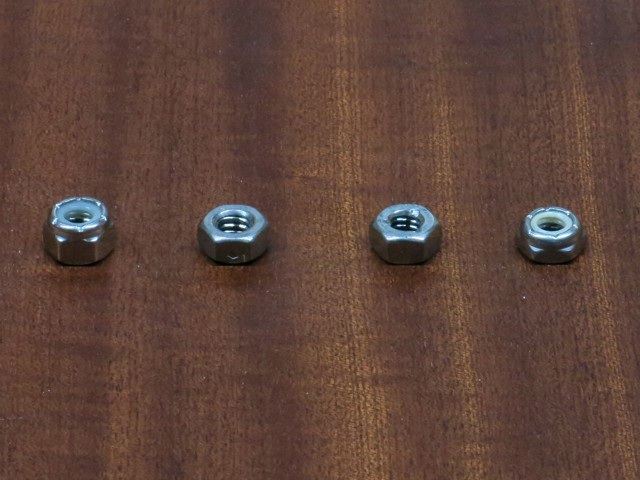
Back when I was in the cyclotron business, we used some aircraft-grade locknuts that were all stainless steel, and worked by having a thinned-down collar that looked like it had been slightly squished in a vise. I wasn’t able to find that kind of locknut, but I did find some at McMaster-Carr that were superficially similar. I ordered a pack of the center-lock style (second from the left). You can see a small indent on the flat; there’s a matching one on the other side, and together they deform the thread just enough to create a locking action. Or at least that’s how they’re supposed to work. I found the nuts to be wildly inconsistent from one to the next, and most barely locked at all.
So I ordered a pack of the top-lock style (third from the left). These have three small deformations on the top of the nut, which you can just barely make out in the photo. These turned out to be a lot more consistent than the center-lock variety, although there are a still a few bad apples in the pack. These are the ones I’m using in these tables, but to hedge my bets, I also ordered a pack of low-profile nylon-insert locknuts (rightmost), in case the top-lock nuts turned out as bad as the center-lock ones.
Finishing touches
I haven’t yet applied any finish to the table. One option would be to leave it unfinished and let it go gray (like Megan the teak chair in the photo). I have a piece of sapele that’s been sitting outdoors for about eight years, and while there’s a fair bit of surface checking, it still looks pretty good, and remains structurally sound. I will most likely go with Osmo “One Coat Only.” I’m currently field-testing another piece of sapele with that on it, and it’s holding up well after a couple of months, but I’m going to see how it survives the winter before making a final decision. I decided early on against a traditional exterior varnish finish (e.g., Sikkens Cetol); I just can’t stand the look of varnish on unfilled open-grain woods, and I wasn’t about to try to use a pore filler on an outdoor piece.
In order to facilitate the inevitability of refinishing, the only parts of the table that are glued are the components of the two halves of the top. Everything else is bolted or screwed together. The top panels and the two leg braces are attached with #6-32 screws and brass inserts. The screws (also from McMaster-Carr) have a patch of locking goop that you can see in the photo. The makeshift insert installation tool on the right, along with a drill press to keep everything square, works better than any commercial tool that I’ve tried.
Lessons learned
If I were to build these tables again, I’d increase the thickness of the top from 1/2″ to 9/16″ and reduce the thickness of the legs and supports from 3/4″ to 11/16″. I also realized after it was way too late that bronze saw nuts like these might be just the thing for the leg/support joints.
I think the most important lesson I learned, though, is that writing a blog post using an iPad (from a hotel room) is never a good idea…
–Steve Schafer
“French Fitting for Woodworkers”, by Christopher Schwarz??? The cover looks like a gag, and it *sounds* like a gag… is it?
A gag? No, it’s a book. This is a gag: http://www.amazon.com/dp/B00KUH1FXE.
Of course, it’s no ordinary book. You won’t find it in your local bookstore (if you still have one), or any conventional online source. No, to get a copy of this book, you have to go to the Deep Web. You have to pass through layers of Tor hidden servers, and visit sites like Silk Road. You know what I mean.
Ah yes. One of the titles I was forced to write by my corporate overlords. It was only a matter of time before a copy surfaced.
Maybe you could try an epoxy, like something from the West system to fill the pores of an open pore wood, then varnish over it. Looks good on mahogany. Guitar makers and boat builders use this technique too.
Funny you should mention that… I’m actually doing just that on a non-furniture project, with Epifanes varnish. But it’s not the look I’m after with these tables. And it’s not exactly low maintenance, of course.
Steve, don’t go crazy with building furniture for the great outdoors. We are going to be producing a Roubo volume on Garden Furniture, that you will want to have, and to make French-style outdoor furniture from.
Steve, You could try making a diy locking nut by hitting the side of the nut with a metal punch either before or after you install it.
Chemical threadlockers, ala loc-tite?
Loctite et al. obviously work, but my desire for an all-metal solution is motivated by longevity and weather resistance considerations. I know that 25 years from now, a stainless steel locknut left outdoors is still going to be a stainless steel locknut; I’m not so sure that would be true for Loctite.
Poor man’s locknut , ergo 1/4″ thread use 5/16 ” ball bearing. Tap into thread gently until required fit, one side only. Dapping balls, or small ball_lien hammer all will work!
Might have already been suggested, one thing I like to use when I only want to use a standard nut, is drill and tap the side of the nut, insert a small piece of nylon or brass and then run a set screw in…pretty easy to tap that small of hole and with the brass or nylon in front of the set screw you won’t mar the threads on the bolt, so it can still be removed and used again. Use the low profile set screws (just under the thickness of your nut and then it won’t hag out past the edge) I think you may even be able to buy them already tapped depending on the size if you don’t want to drill yourself.
Didn’t realize it was such small hardware so that may be a bit of a pain, could always cross drill all the way through then use a small roll/spring pin flush with the sides of the nut. These can also be knocked back out. Only other complete locknut I can think of are the pin lock nuts that have a small pin at the top that can grab into the thread, believe Anco makes them. Have not tried those yet, so not sure how well they work.
Reblogged this on Manny's words & works and commented:
This is a great woodworkers blog, I like reading it, and reblog, Thanks.
Simple idea. Pin punch the protruding end of the bolt and edge of nut. Deforms a mechanical notch that makes it quite difficult to remove. Or, go aircraft style with castellated nut and safety wire!